
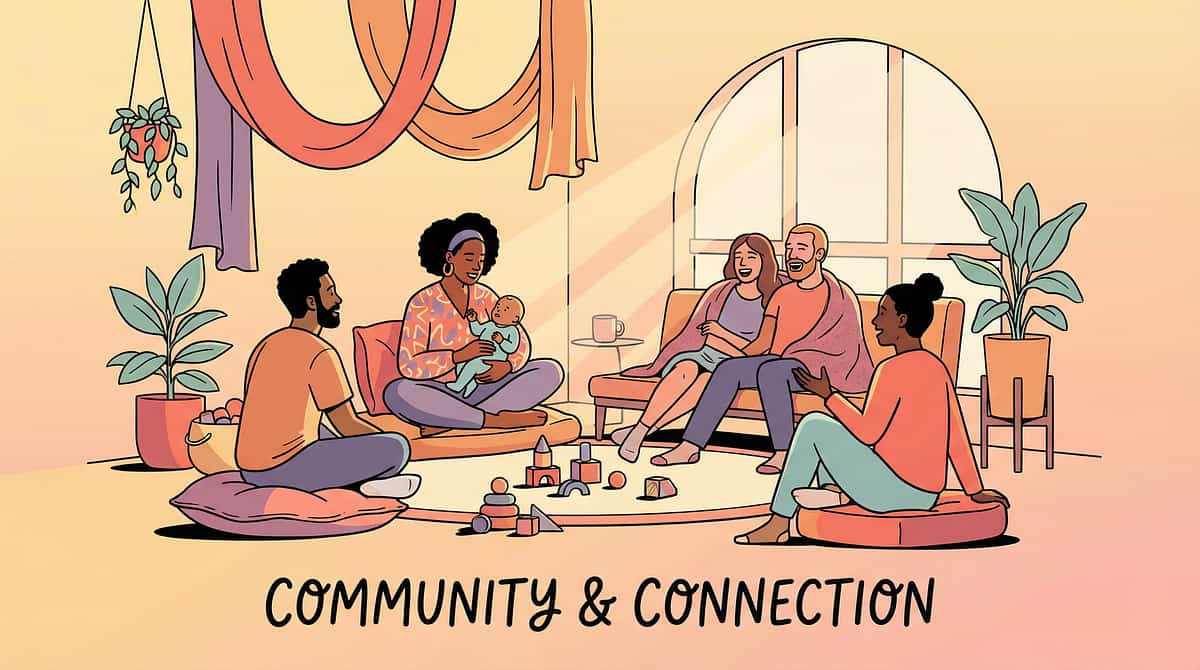
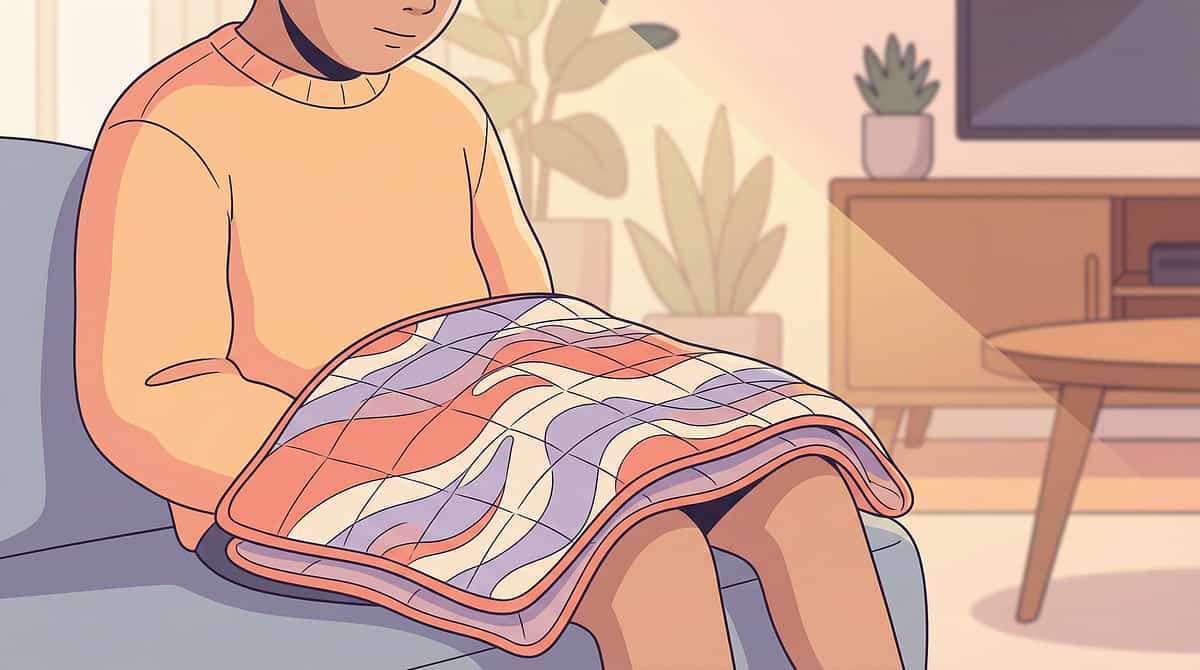
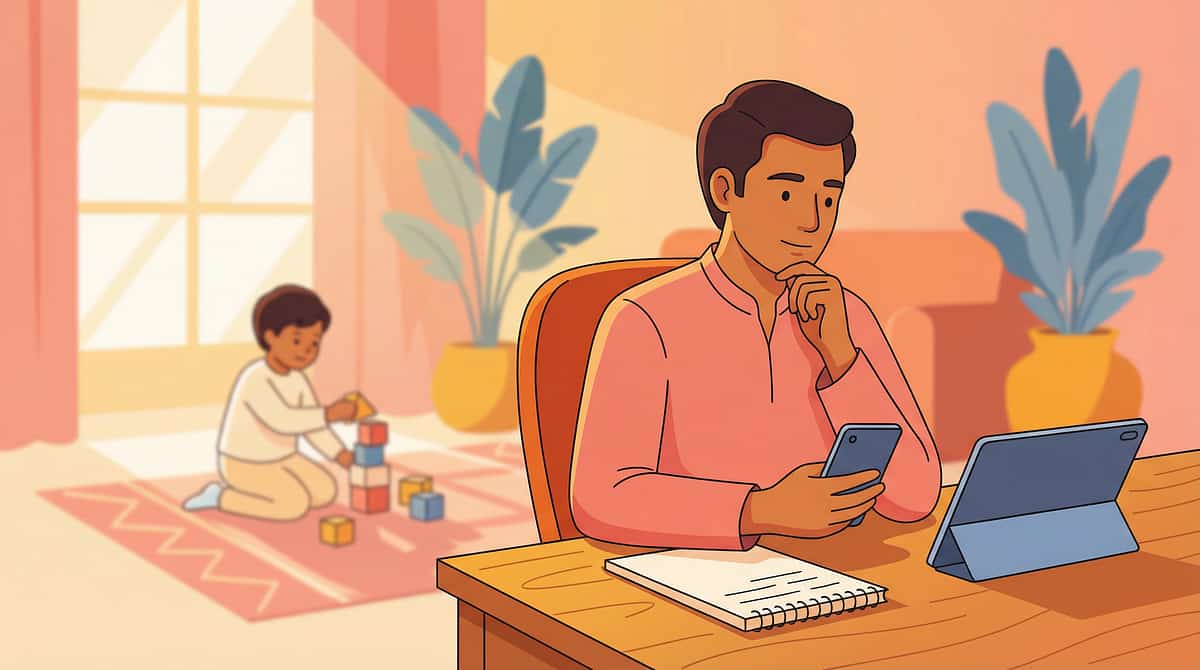
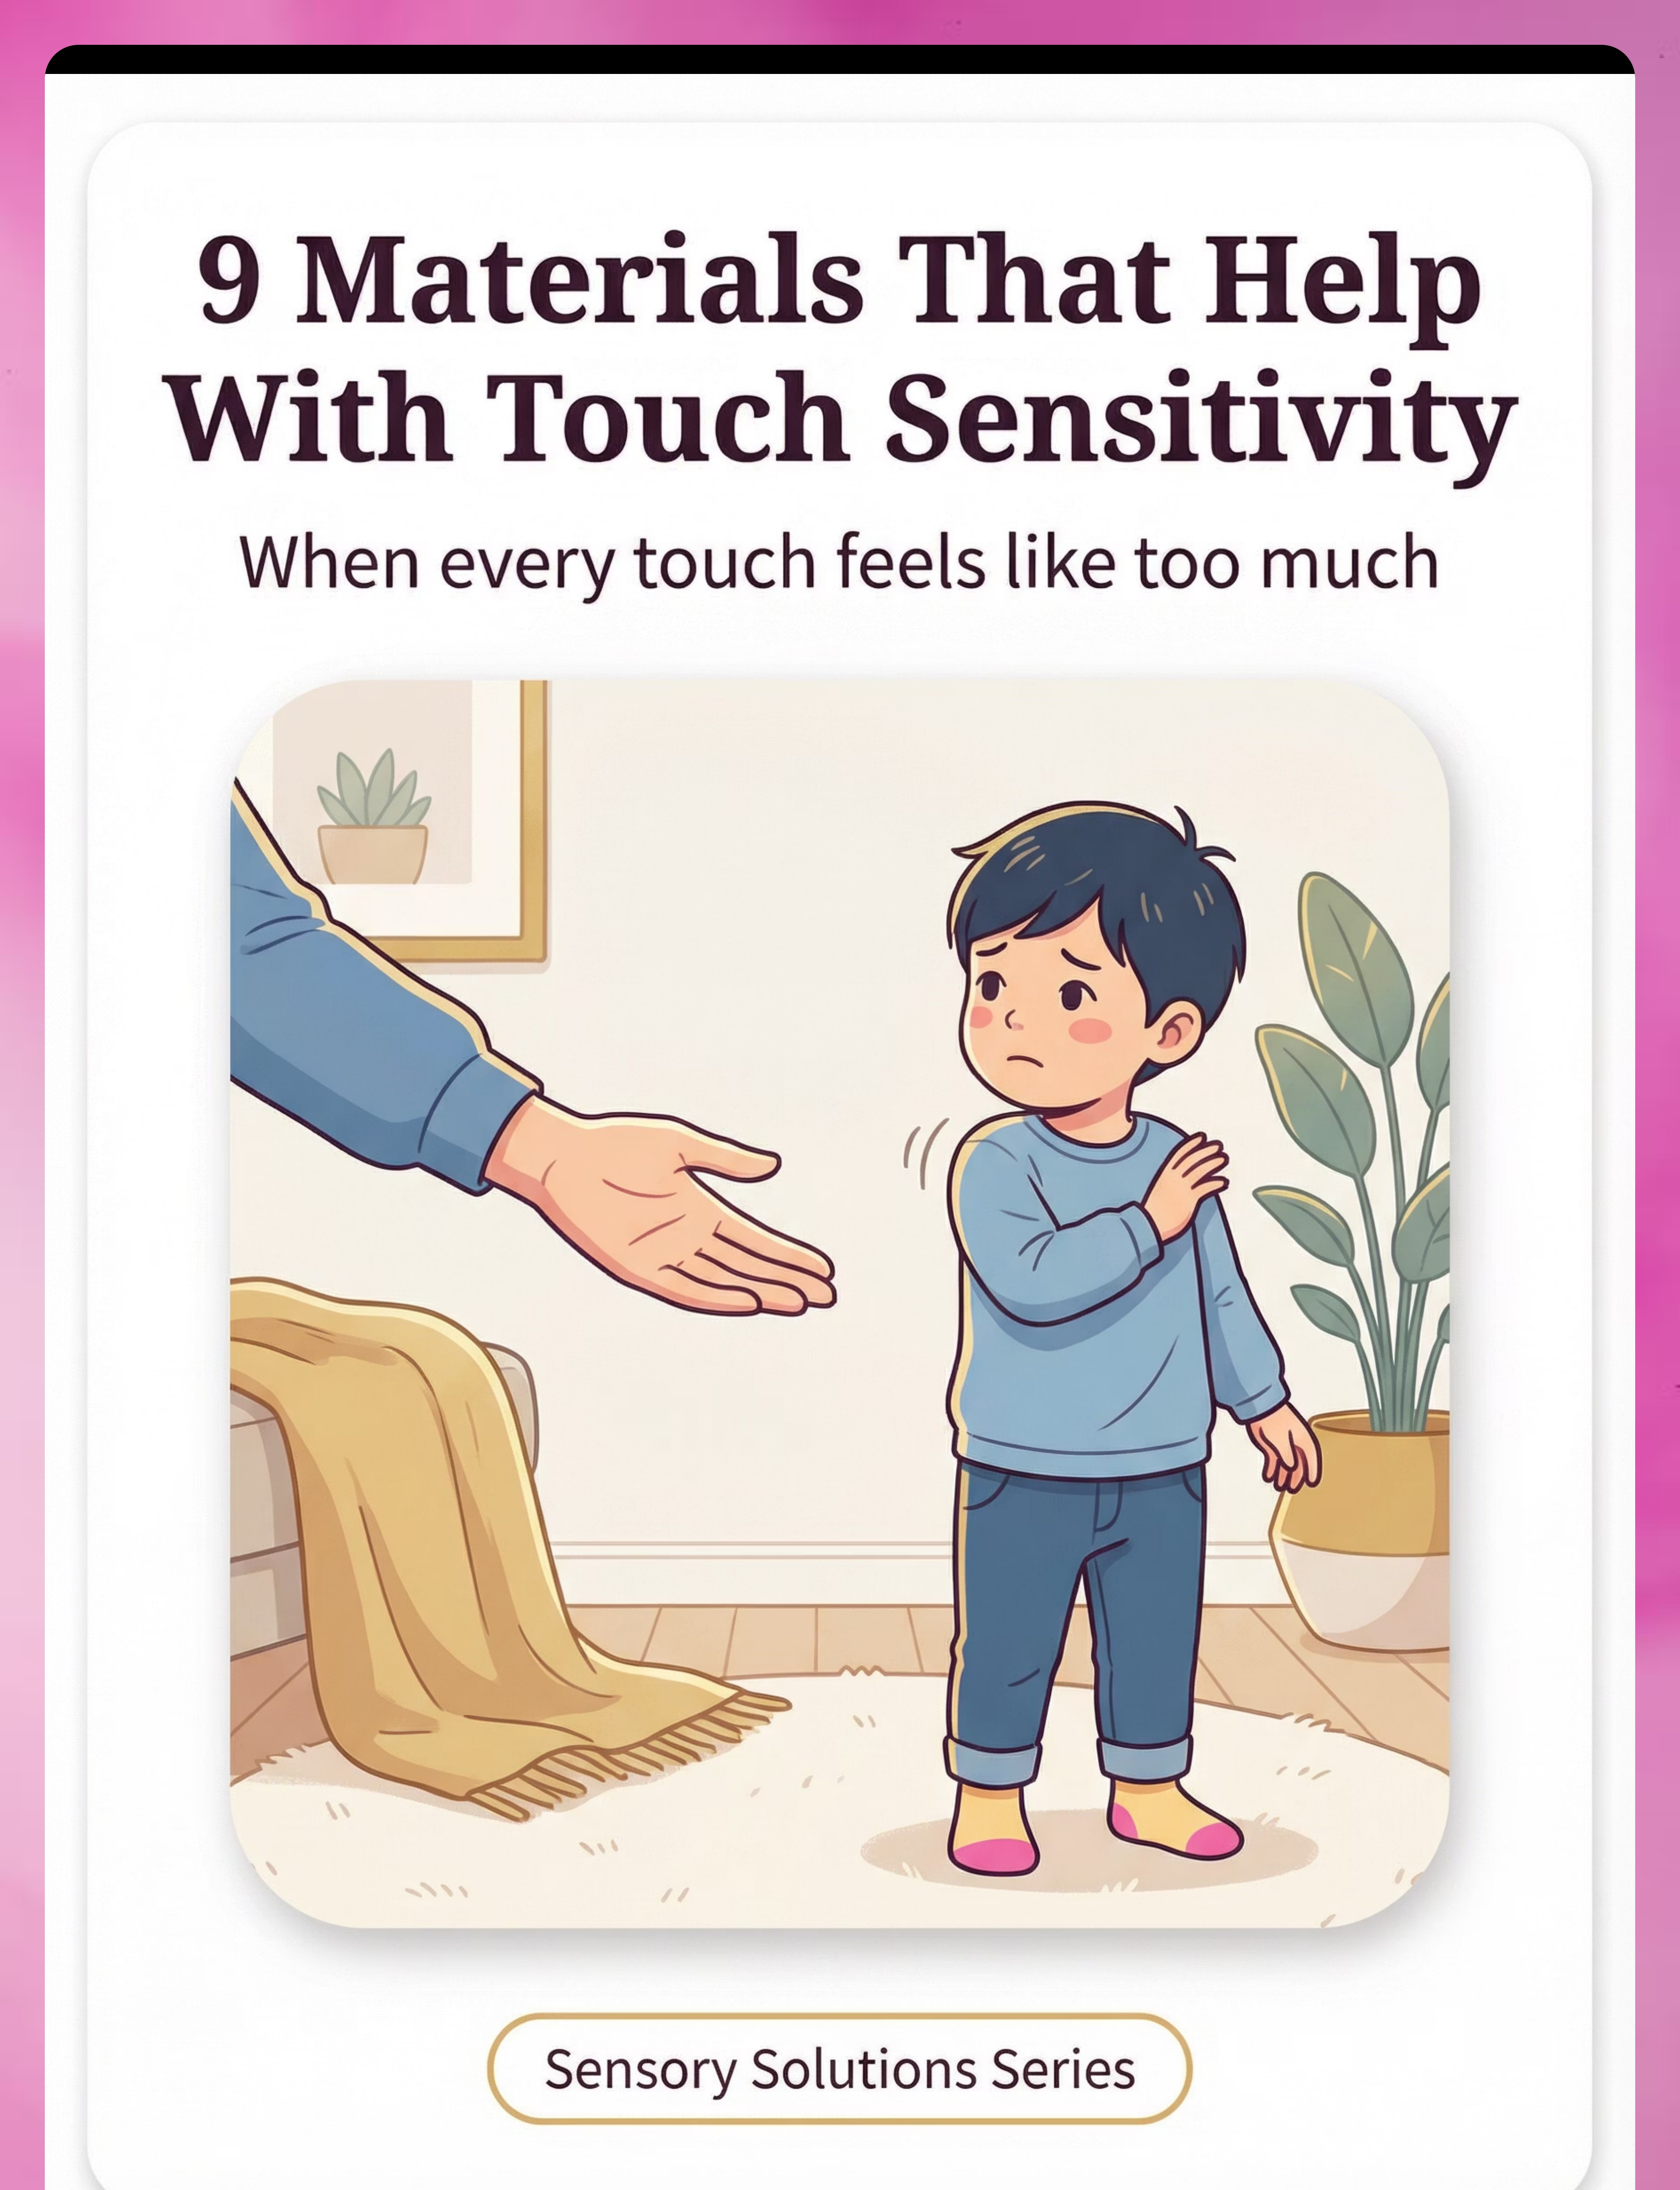
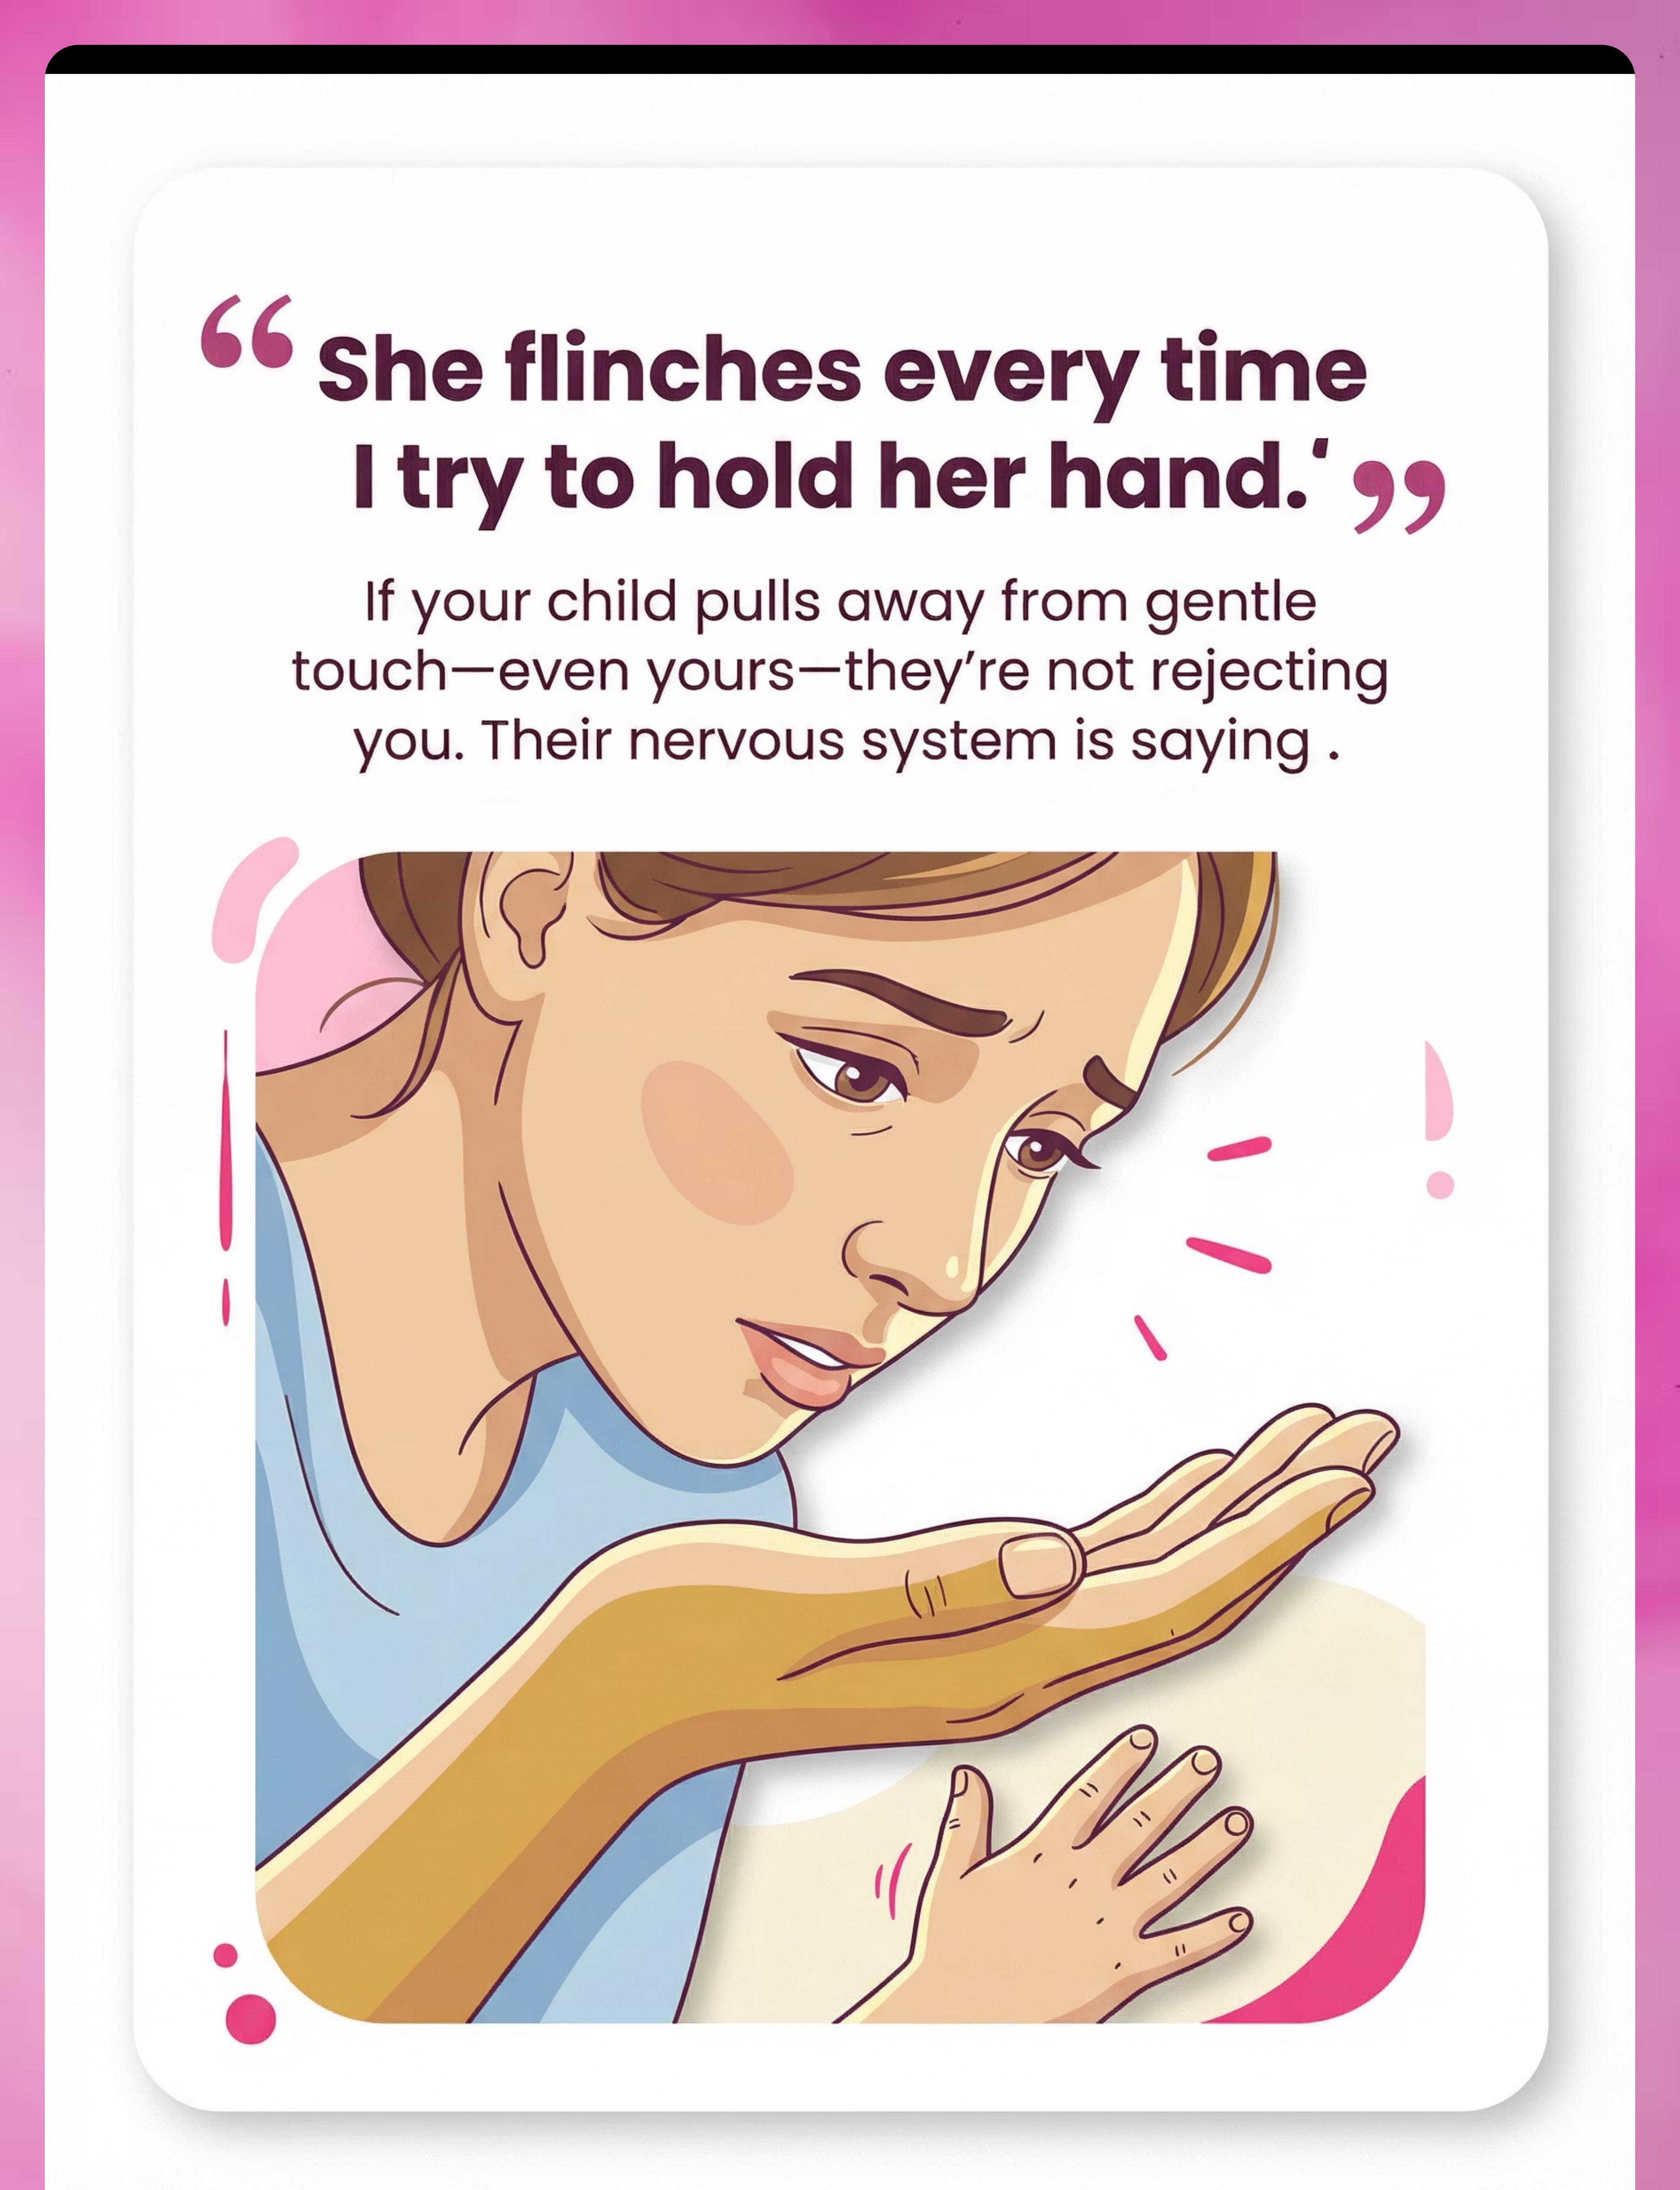
She Flinches Every Time You Try to Hold Her Hand
It's bath time. You reach for the washcloth and your son screams — not a tantrum scream, a pain scream. The tag inside his school shirt has left red marks on his neck from scratching all day. At the playground, he stands alone because other children brushing past him feels like sandpaper on raw skin.
You are not failing. Your child's nervous system is speaking a language most people never learn. This page teaches you that language — and gives you 9 clinically validated materials to help your child feel safe in their own skin.
9 Materials That Help With Touch Sensitivity — Sensory Solutions Series
Pinnacle Blooms Clinical Consortium
OT • SLP • ABA • SpEd • NeuroDev
Referenced by the WHO Nurturing Care Framework (2018) — early identification and parental awareness directly impacts developmental outcomes.
You Are Not Alone — The Numbers
Touch sensitivity in children with autism is not rare, not unusual, and not your family's fault. The research is clear: millions of families worldwide are navigating this exact challenge — and there is a well-documented path forward.
80%
Experience Sensory Difficulties
Of children diagnosed with autism experience sensory processing difficulties, per a PRISMA Systematic Review (2024; PMC11506176).
65%
Show Tactile Defensiveness
60–70% of children with ASD specifically exhibit tactile defensiveness or touch sensitivity (Frontiers in Integrative Neuroscience, 2020).
18.5M
Families in India Alone
Estimated families in India navigating sensory processing challenges, extrapolated from CDC 1-in-36 prevalence applied to India's pediatric population.
You are among millions of families worldwide navigating this exact challenge. What your child experiences is documented across 16 peer-reviewed studies spanning 2013–2023 — and there is a clear path forward.

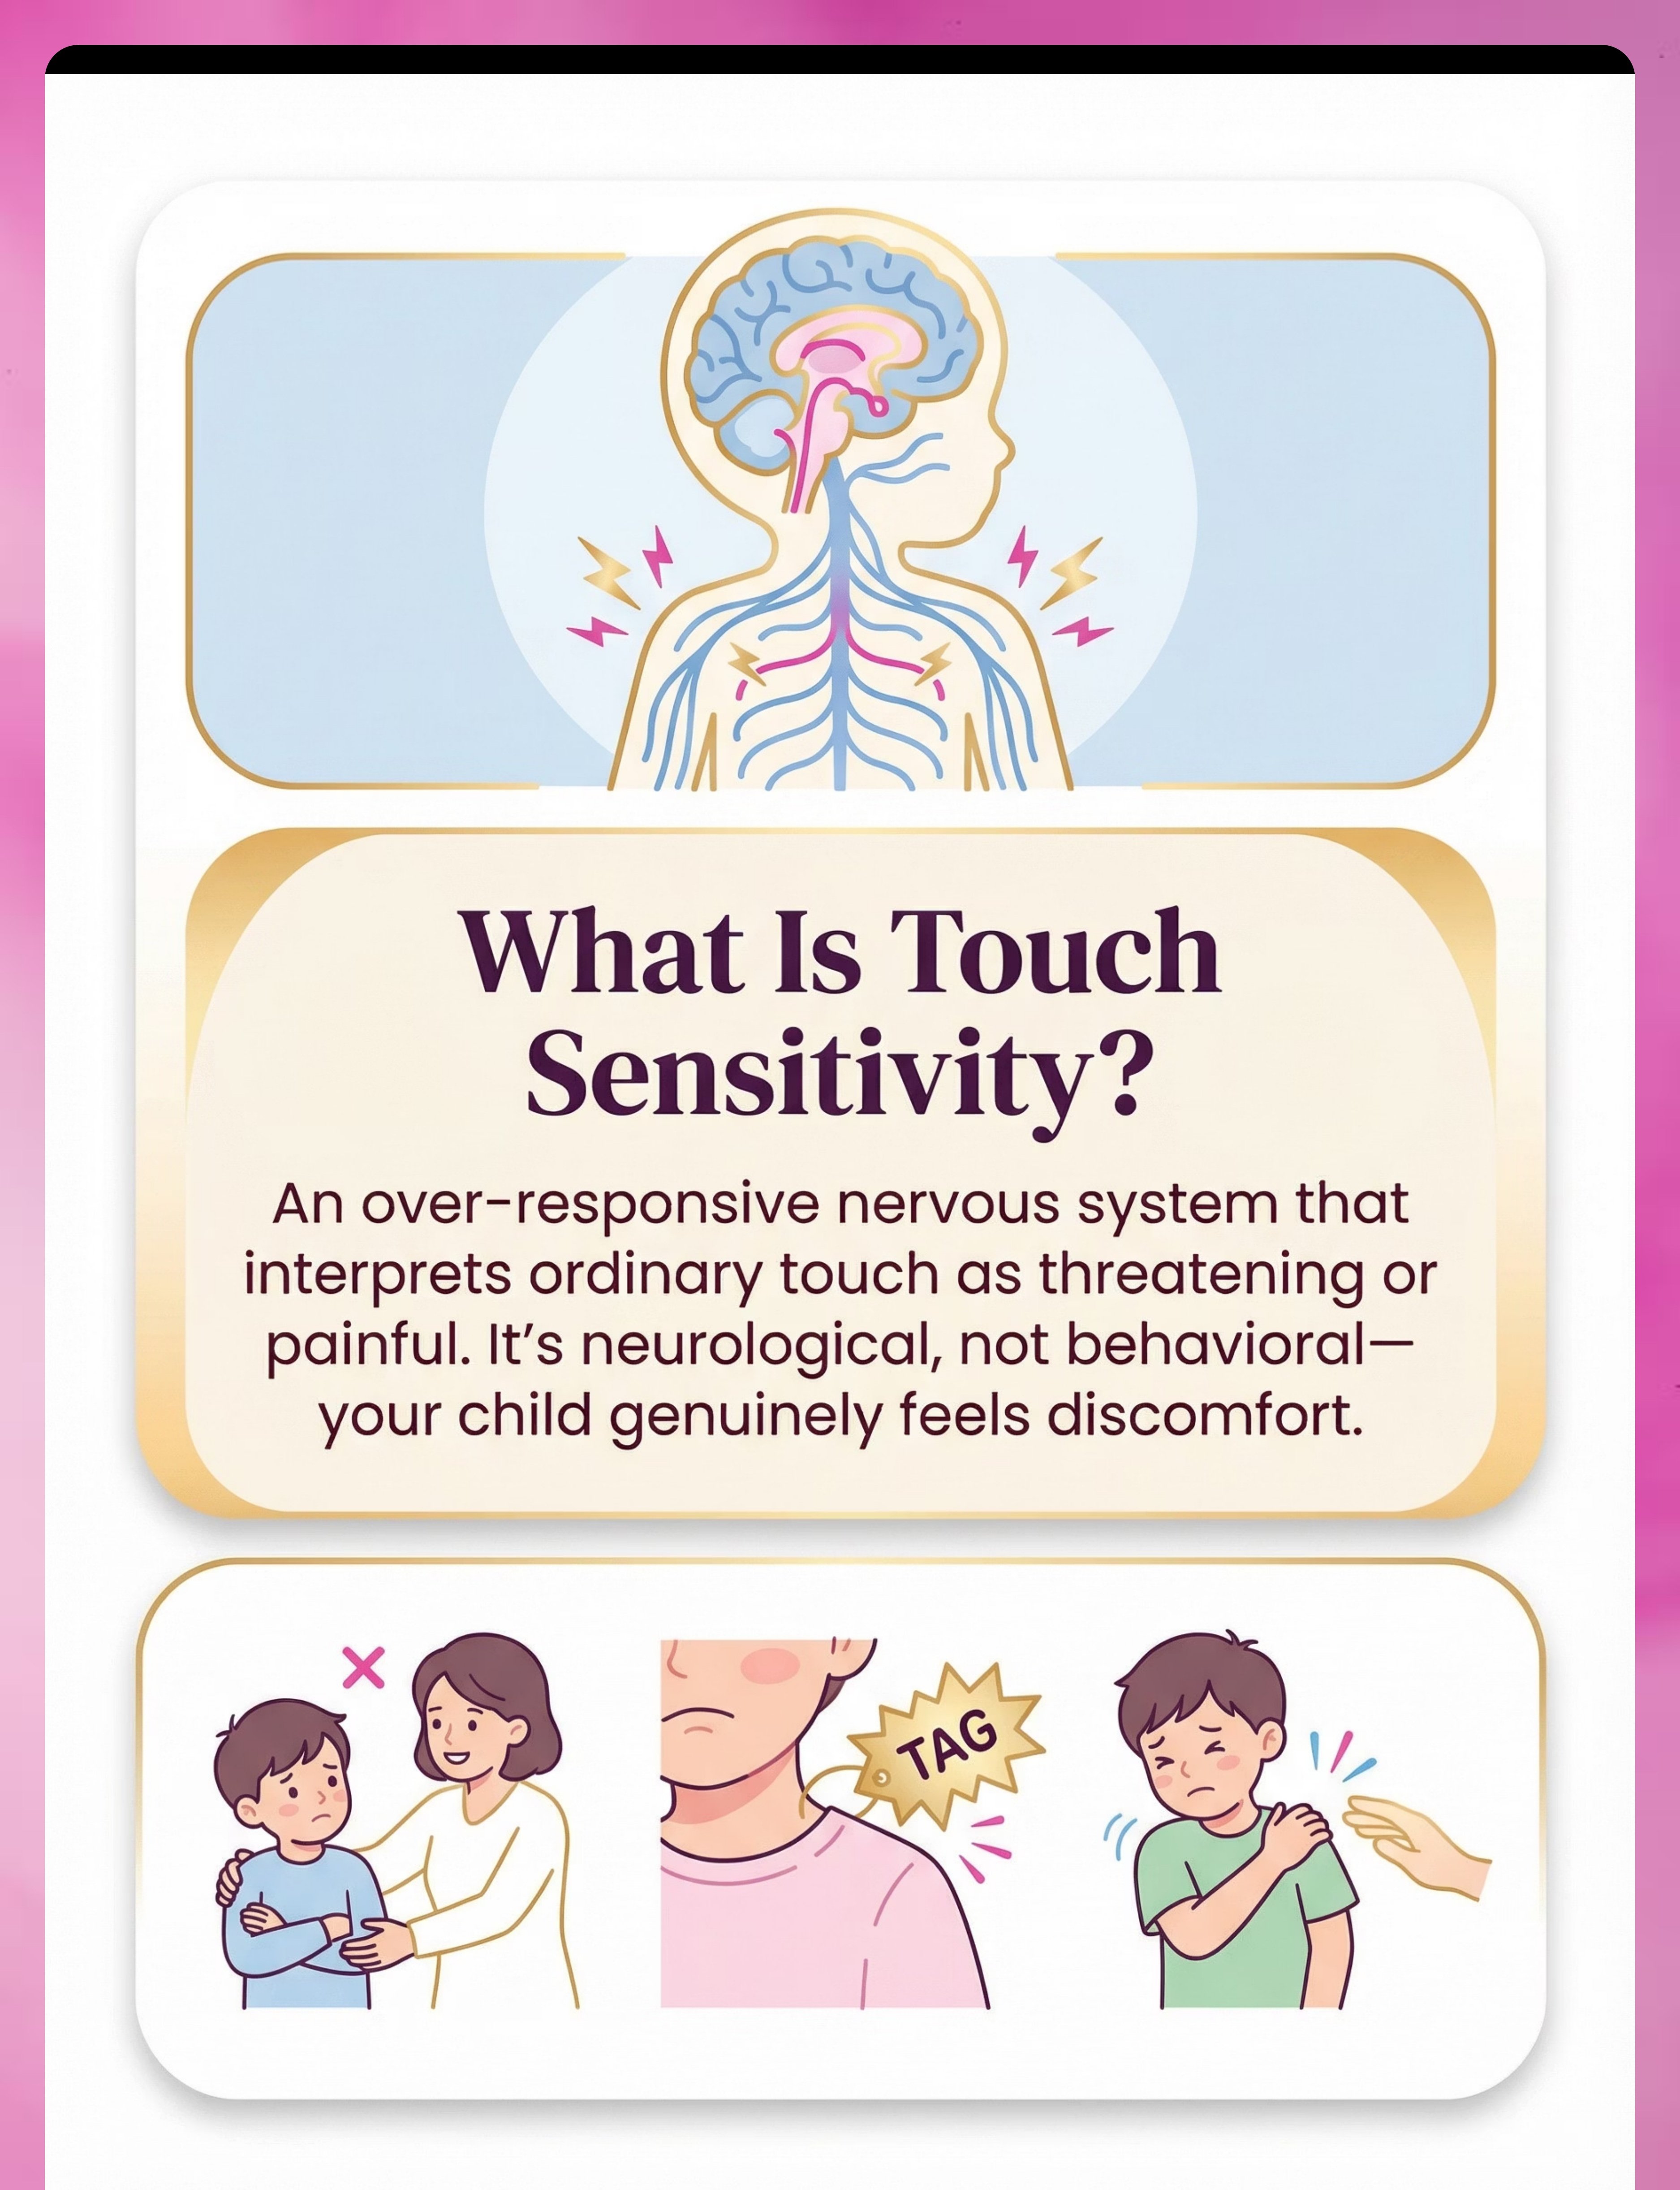
What's Happening in Your Child's Brain
The Neuroscience
Your child's brain has a volume dial for touch — and it's turned up too high. When you gently stroke your child's arm, their somatosensory cortex — the brain's touch processing center — amplifies that signal as if it were a slap.
Clothing tags feel like thorns. A hug feels like being crushed. A light brush from a classmate feels like being hit.
- Skin mechanoreceptors detect light touch
- Spinal cord relays the signal upward
- Thalamic gating amplifies the input
- Somatosensory cortex registers danger — not sensation
What Is Touch Sensitivity?
This is called tactile defensiveness or tactile hypersensitivity. It is a neurological wiring difference — not a behavior choice, not a tantrum strategy, not defiance. Your child genuinely experiences pain from what feels ordinary to you.
The 9 materials on this page work by retraining that volume dial. Deep pressure calms the overactive system. Gradual texture exposure builds tolerance. Predictable touch replaces unpredictable threat.
"This is a wiring difference, not a behavior choice." — Pinnacle Blooms Clinical Consortium
Research anchor: Frontiers in Integrative Neuroscience (2020): Comprehensive framework for sensory integration/sensory processing treatment in ASD. DOI: 10.3389/fnint.2020.556660

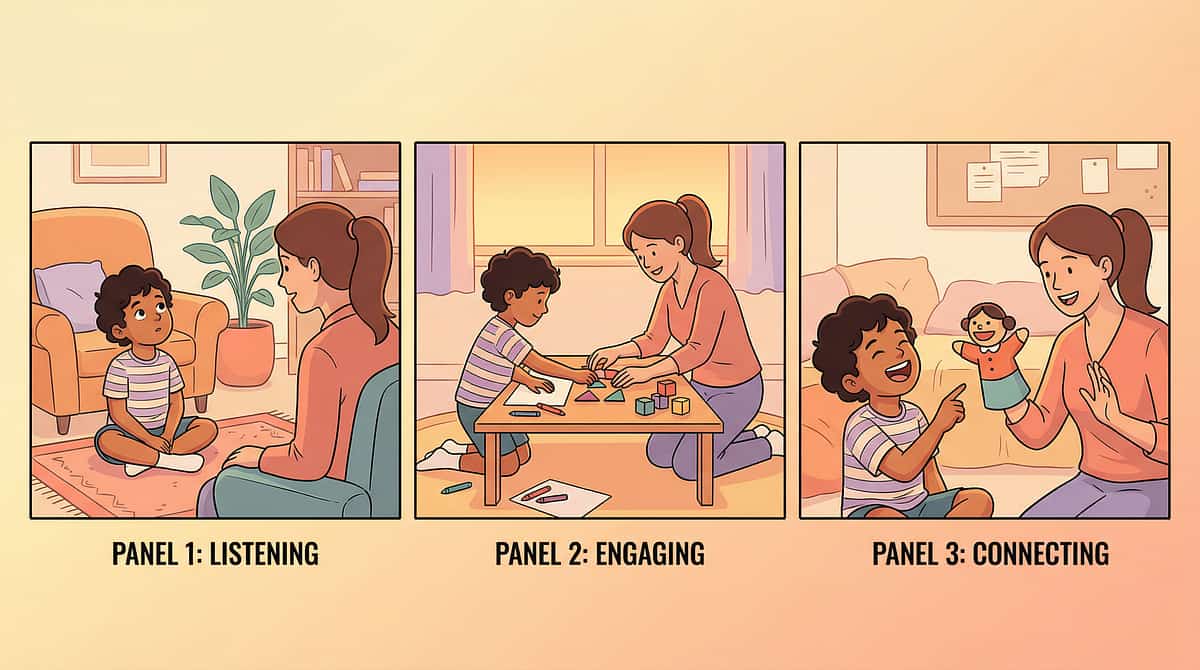
Where Touch Sensitivity Sits in Development
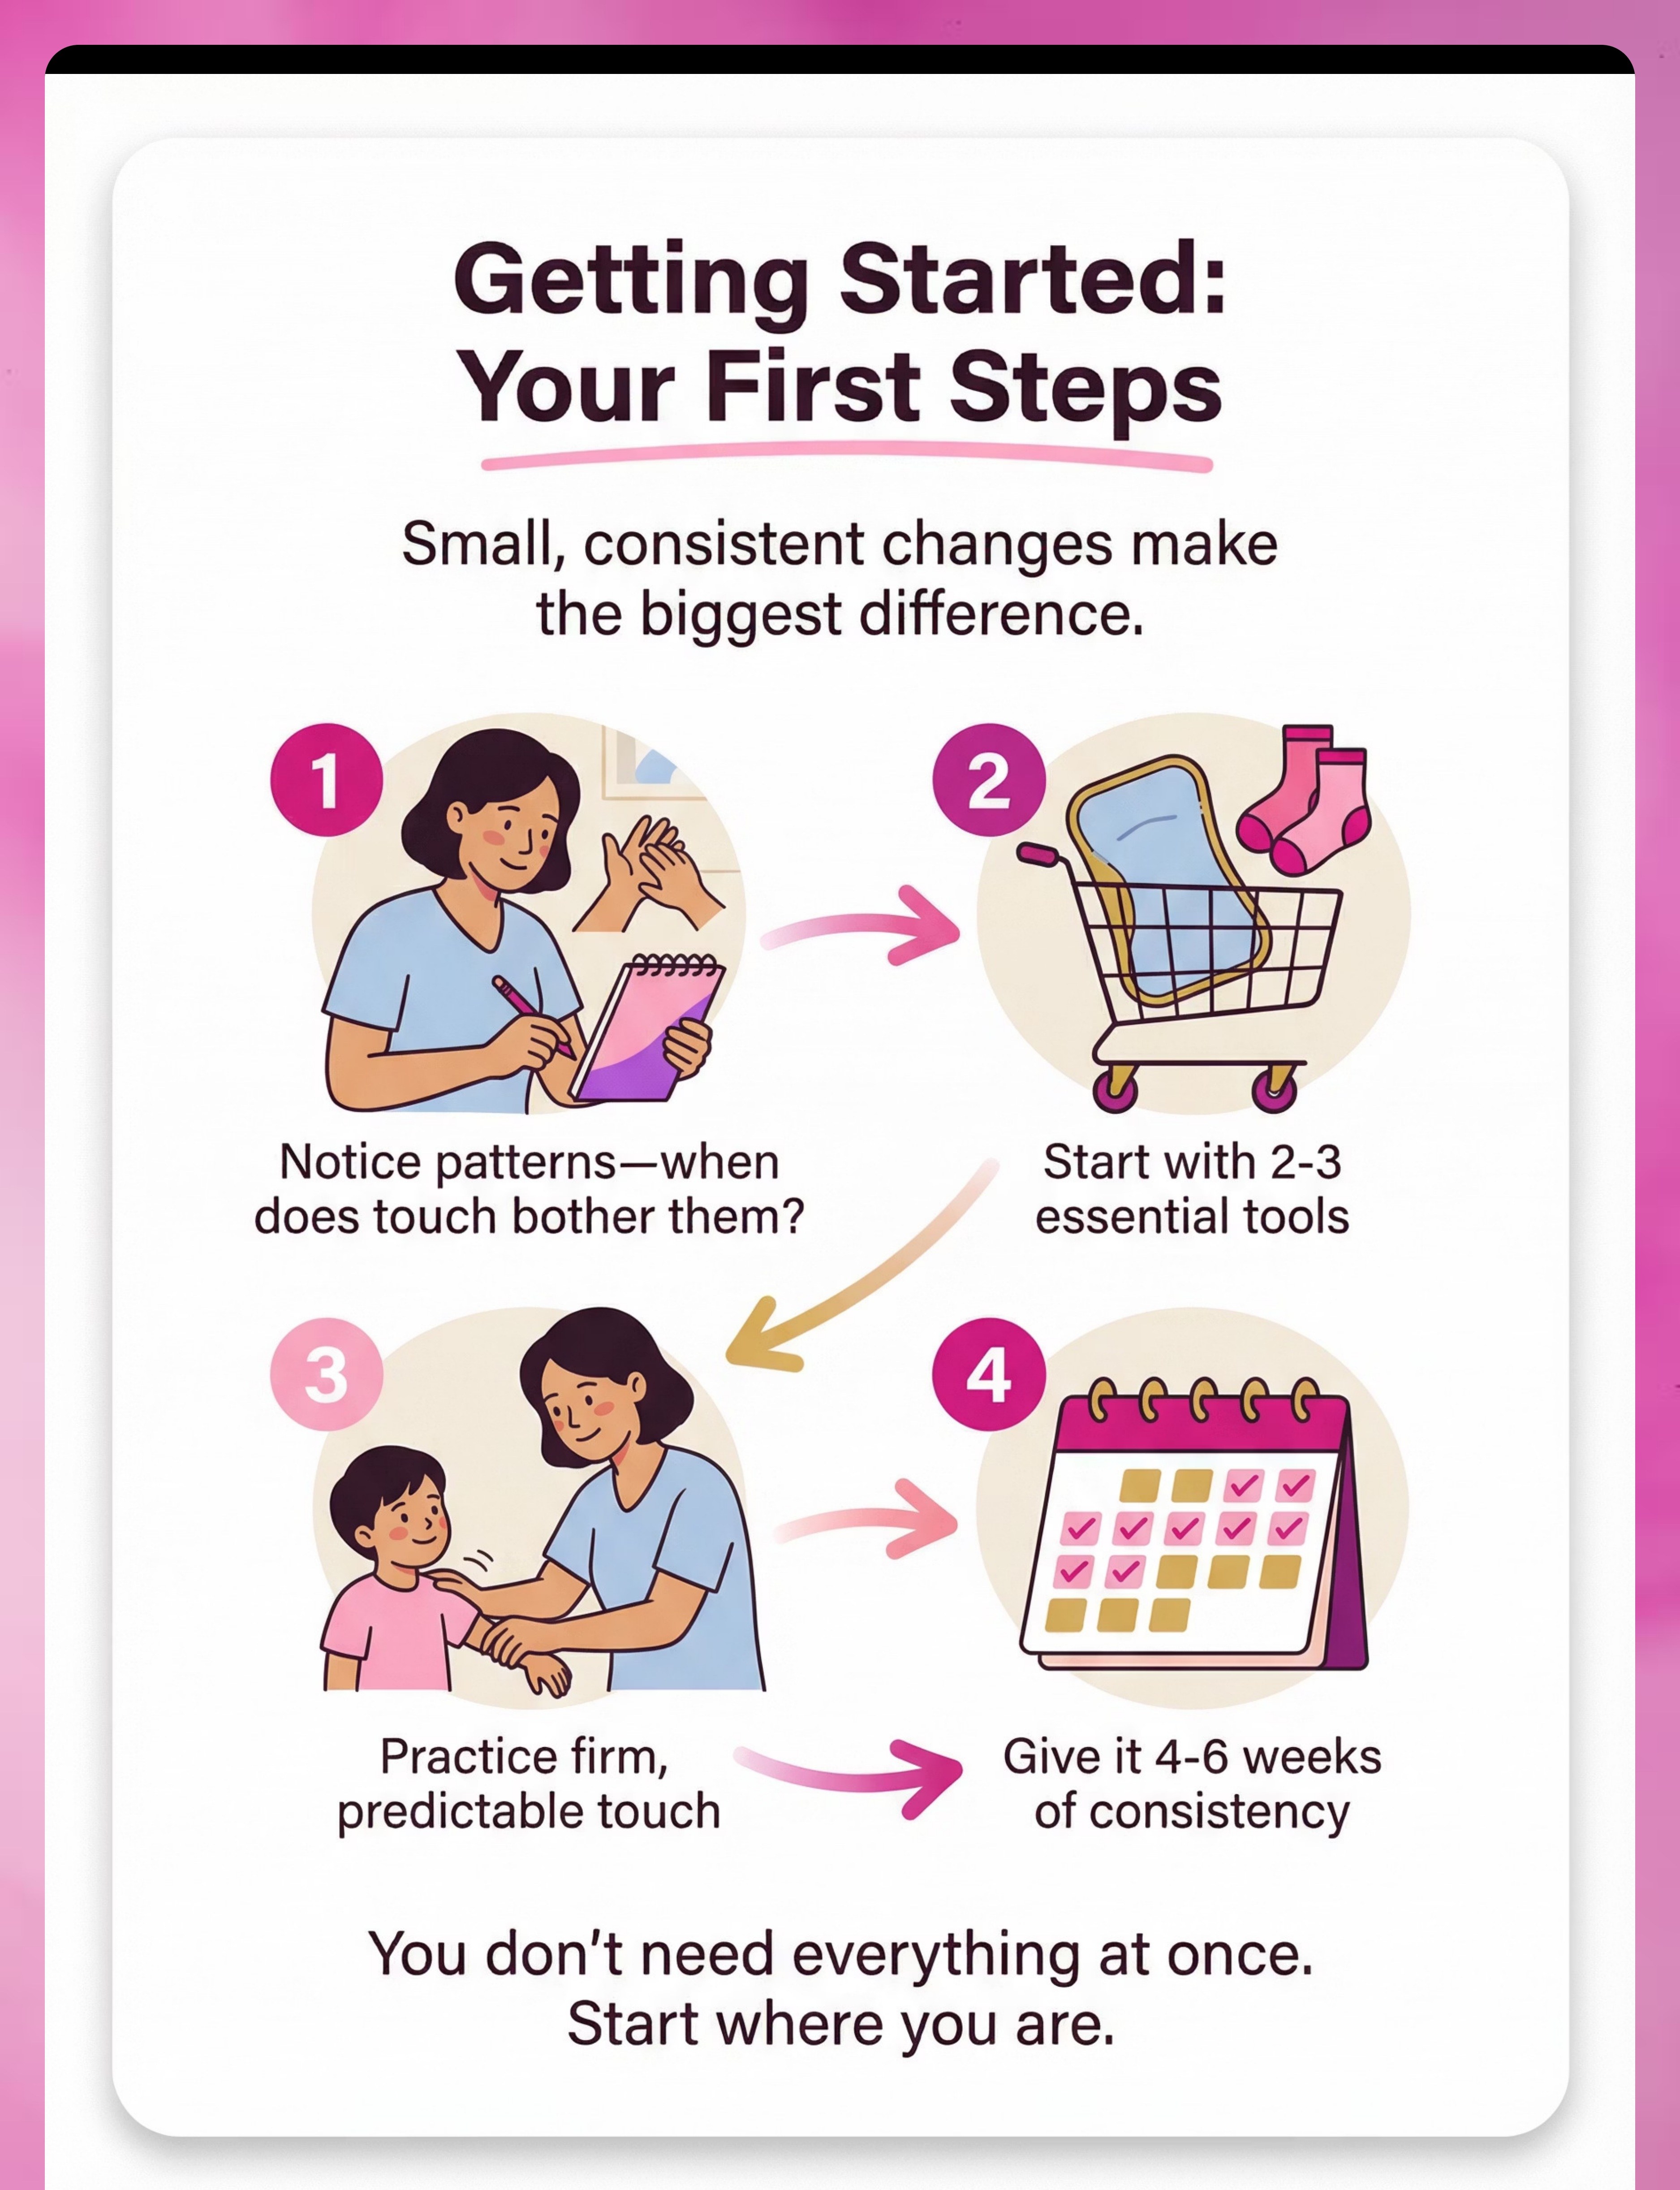
Touch sensitivity often becomes noticeable between 18 months and 3 years — when your child starts resisting clothing, avoiding certain textures in food, pulling away from being held, or reacting strongly to grooming routines like hair washing or nail cutting. This is not "a phase."
Birth – 3 Months
Basic touch reflexes establish
6 – 12 Months
Reaching, grasping, object manipulation
18 – 36 Months ⭐
Touch sensitivity typically becomes visible here. Resisting clothing, avoiding food textures, pulling away from grooming.
3 – 5 Years
Sensory preferences solidify; impact on play and social life
5 – 8 Years
Functional impact on school, social life, and self-care routines
Touch sensitivity commonly co-occurs with: auditory sensitivity, proprioceptive seeking (crashing, jumping), oral sensory differences (food texture refusal), and motor planning difficulties. It sits within the developmental trajectory mapped by WHO and UNICEF monitoring frameworks.
Your child is here. The 9 materials ahead are the bridge to where you're heading — regulated, comfortable, participating.

The Evidence Behind This Technique
Evidence Grade
Level I–II
Systematic Reviews + Randomized Controlled Trials
Clinically Validated
Home-applicable. Parent-proven.
Pinnacle Clinical Data
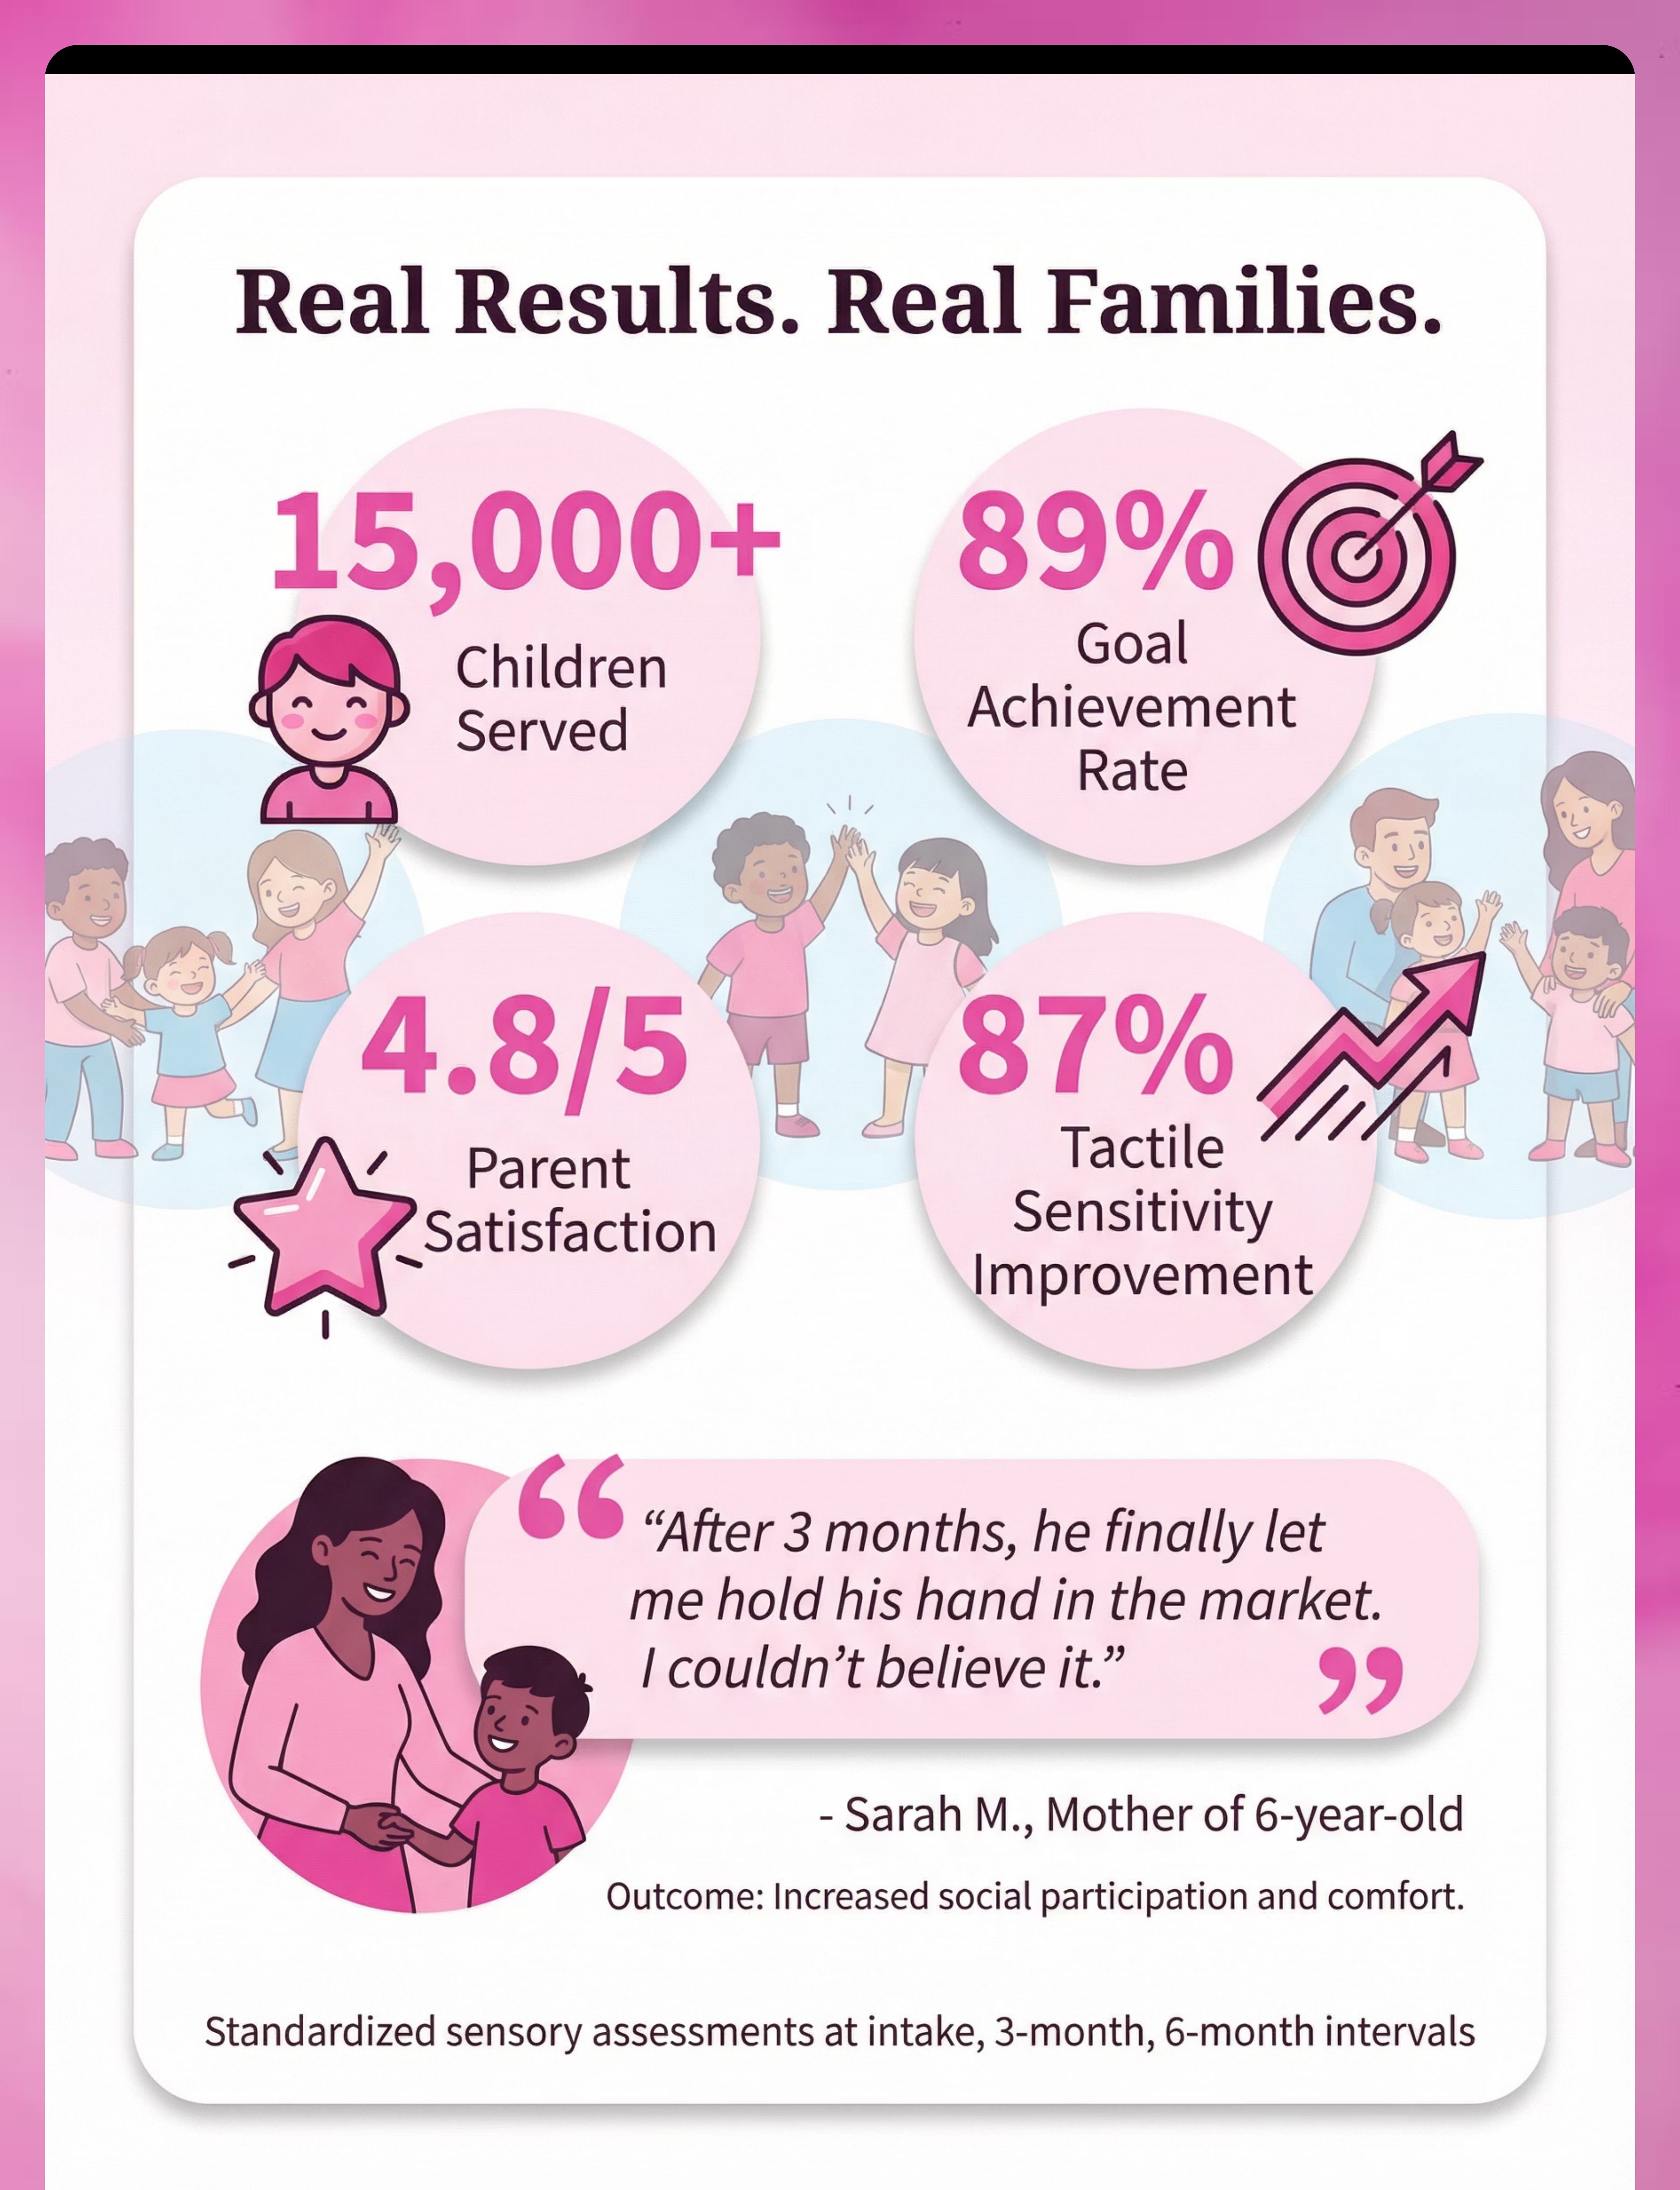
- 15,000+ children served
- 87% showed measurable improvement at 3 and 6 months
- 89% goal achievement rate
- 4.8/5 parent satisfaction score
What the Research Shows
16 peer-reviewed articles (2013–2023) confirm sensory integration intervention — including the use of tactile desensitization materials — meets the criteria for evidence-based practice in autism spectrum disorder.
Sensory integration therapy effectively promotes social skills, adaptive behavior, sensory processing, and gross/fine motor skills across 24 studies (World J Clin Cases, 2024). An Indian RCT (Padmanabha et al., Indian J Pediatrics, 2019) demonstrated significant outcomes from home-based sensory interventions with parent administration.
PMC11506176
PRISMA Systematic Review 2024
PMC10955541
Meta-Analysis, World J Clin Cases 2024
DOI: 10.1007/s12098-018-2747-4
Indian RCT, Indian J Pediatrics 2019
The Technique — What It Is
Domain A: Sensory Processing
Tactile Regulation
Formal Name: Tactile Desensitization Through Graded Material Exposure
Parent-Friendly Name: Using sensory materials to help your child become comfortable with touch.
This technique involves systematically introducing 9 categories of sensory materials — from deep-pressure tools (weighted lap pads, compression wear) to gradual texture explorers (sensory bins, fidget tools) — that retrain your child's nervous system to process touch as safe rather than threatening. Each material targets a different mechanism: calming the over-aroused system, building tactile tolerance, or modifying the environment to reduce triggers.
📅 Age Range
2–12 years
⏱️ Session Duration
10–20 minutes
🔄 Frequency
Daily, 1–3 sessions
📊 Protocol Duration
8–12 weeks

Who Uses This Technique
Tactile desensitization crosses therapy boundaries because your child's nervous system doesn't organize by therapy type. Four disciplines collaborate to deliver maximum impact:
Occupational Therapist (Primary Lead)
The OT is the architect of your child's sensory diet. They assess which materials your child needs, in what order, and at what intensity. The Wilbarger Brushing Protocol MUST be trained by an OT before home use.
Speech-Language Pathologist
Touch sensitivity affects feeding (food texture refusal), oral motor development (toothbrushing resistance), and social communication (avoiding proximity). The SLP integrates tactile materials into oral desensitization programs.
ABA Therapist
The behavior analyst structures the reinforcement schedule around tactile material exposure. They design the shaping protocol, set measurable targets, and teach parents systematic data collection methods.
Special Educator
The SpEd integrates sensory materials into classroom routines — compression wear during seated work, weighted lap pads during circle time, fidget tools during transitions — ensuring generalization from home to school.
"This technique crosses therapy boundaries because the brain doesn't organize by therapy type." — Pinnacle Blooms Clinical Consortium
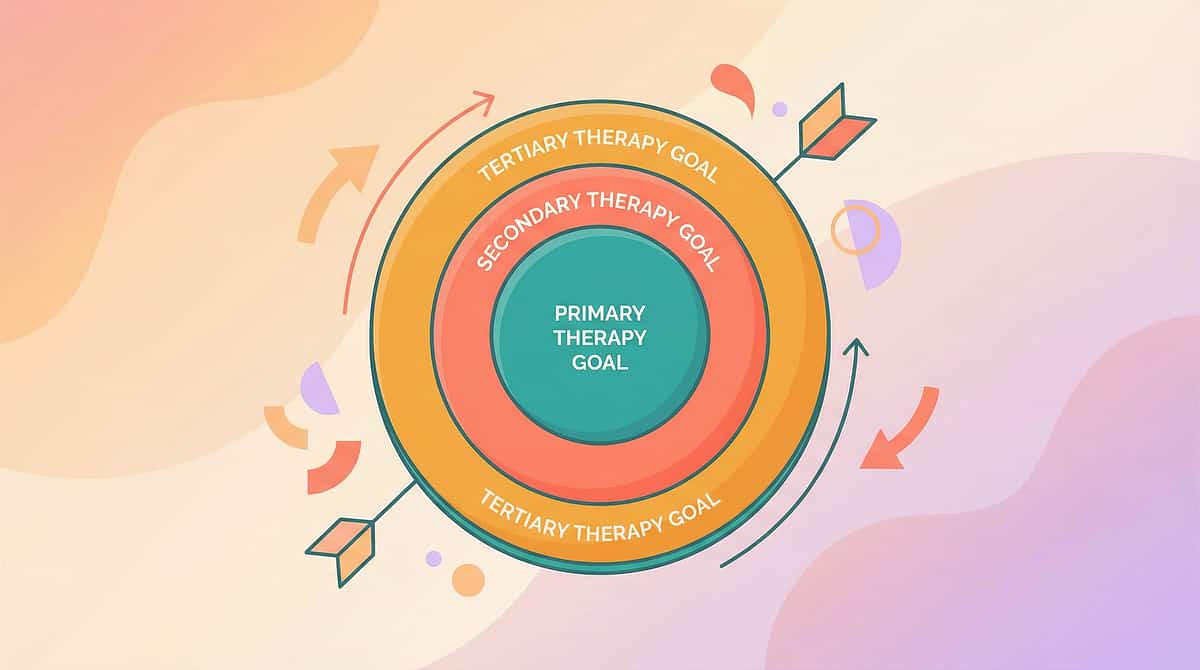
What This Technique Targets
🎯 Primary Target
Tactile defensiveness reduction — decreased withdrawal, flinching, or distress in response to light touch, clothing textures, grooming routines, and incidental contact with people or objects.
Observable indicator: Child tolerates previously avoided textures for progressively longer durations without distress signals.
🎯 Secondary Targets
Self-regulation improvement — child uses materials independently to calm when over-aroused. Social participation — child tolerates proximity and incidental touch from peers and adults. Daily living skill participation — tolerates dressing, bathing, grooming, feeding with reduced resistance.
Observable indicator: Parent reports decreased meltdowns during daily care routines.
🎯 Tertiary Targets
Neural pathway reorganization — somatosensory cortex recalibrates touch-threat threshold. Fine motor development — increased willingness to manipulate varied textures supports hand skill development. Emotional regulation — reduced baseline anxiety from sensory threat vigilance.
Observable indicator: Standardized sensory profile scores shift toward typical range at 3-month and 6-month assessments.
Research anchor: Meta-analysis (World J Clin Cases, 2024): Sensory integration therapy promoted social skills (primary), adaptive behavior (secondary), sensory processing, and motor skills (tertiary). PMC10955541
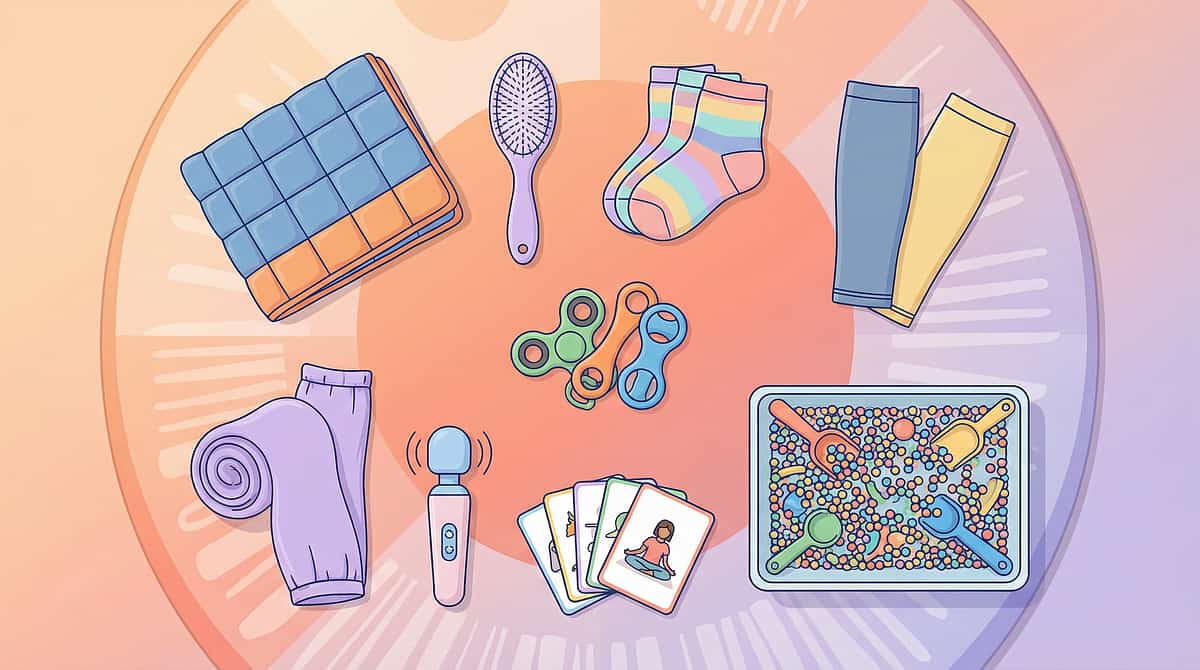
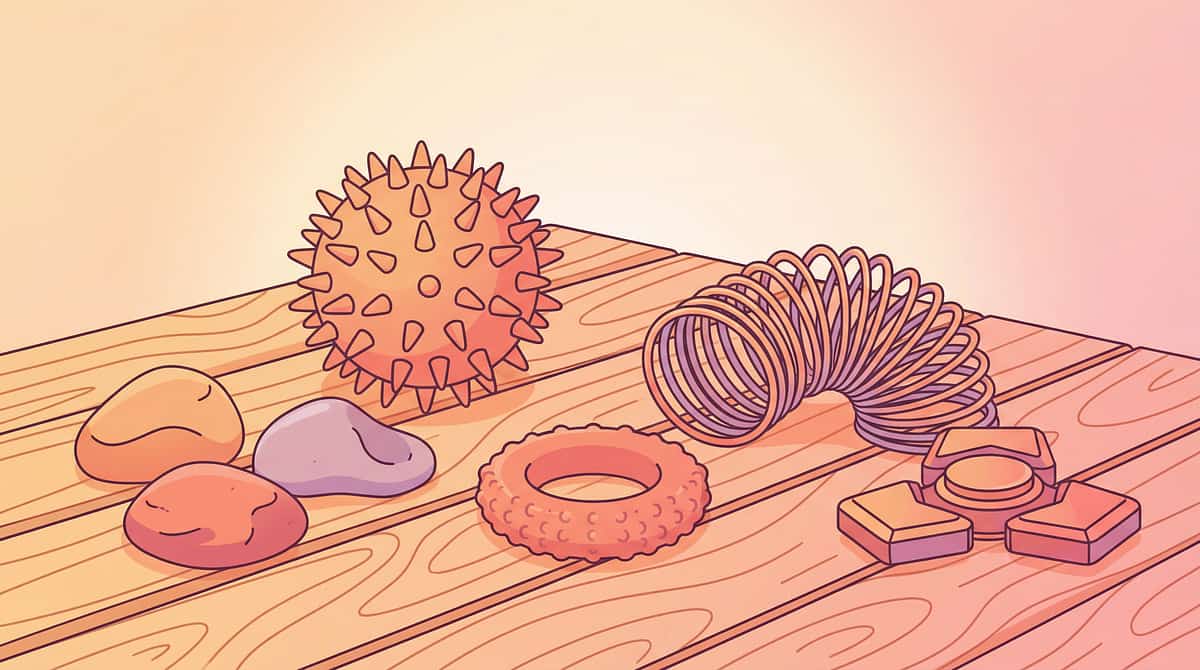
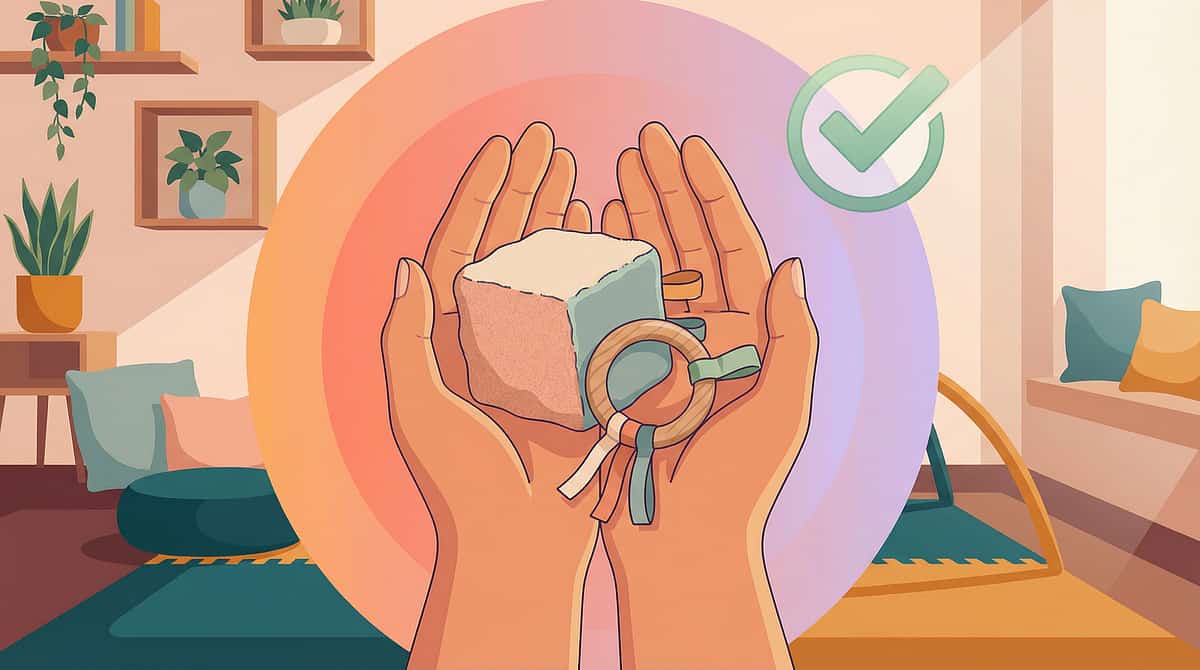
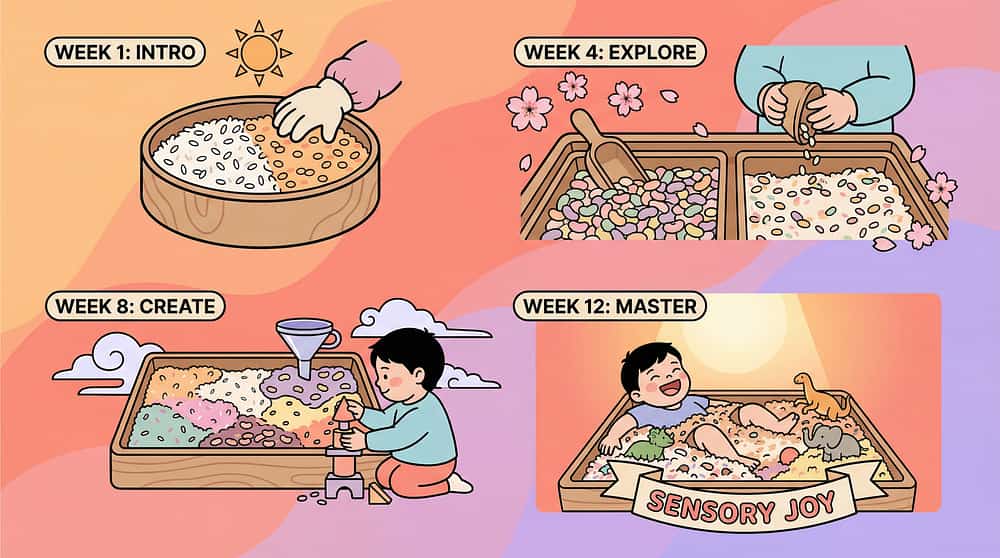
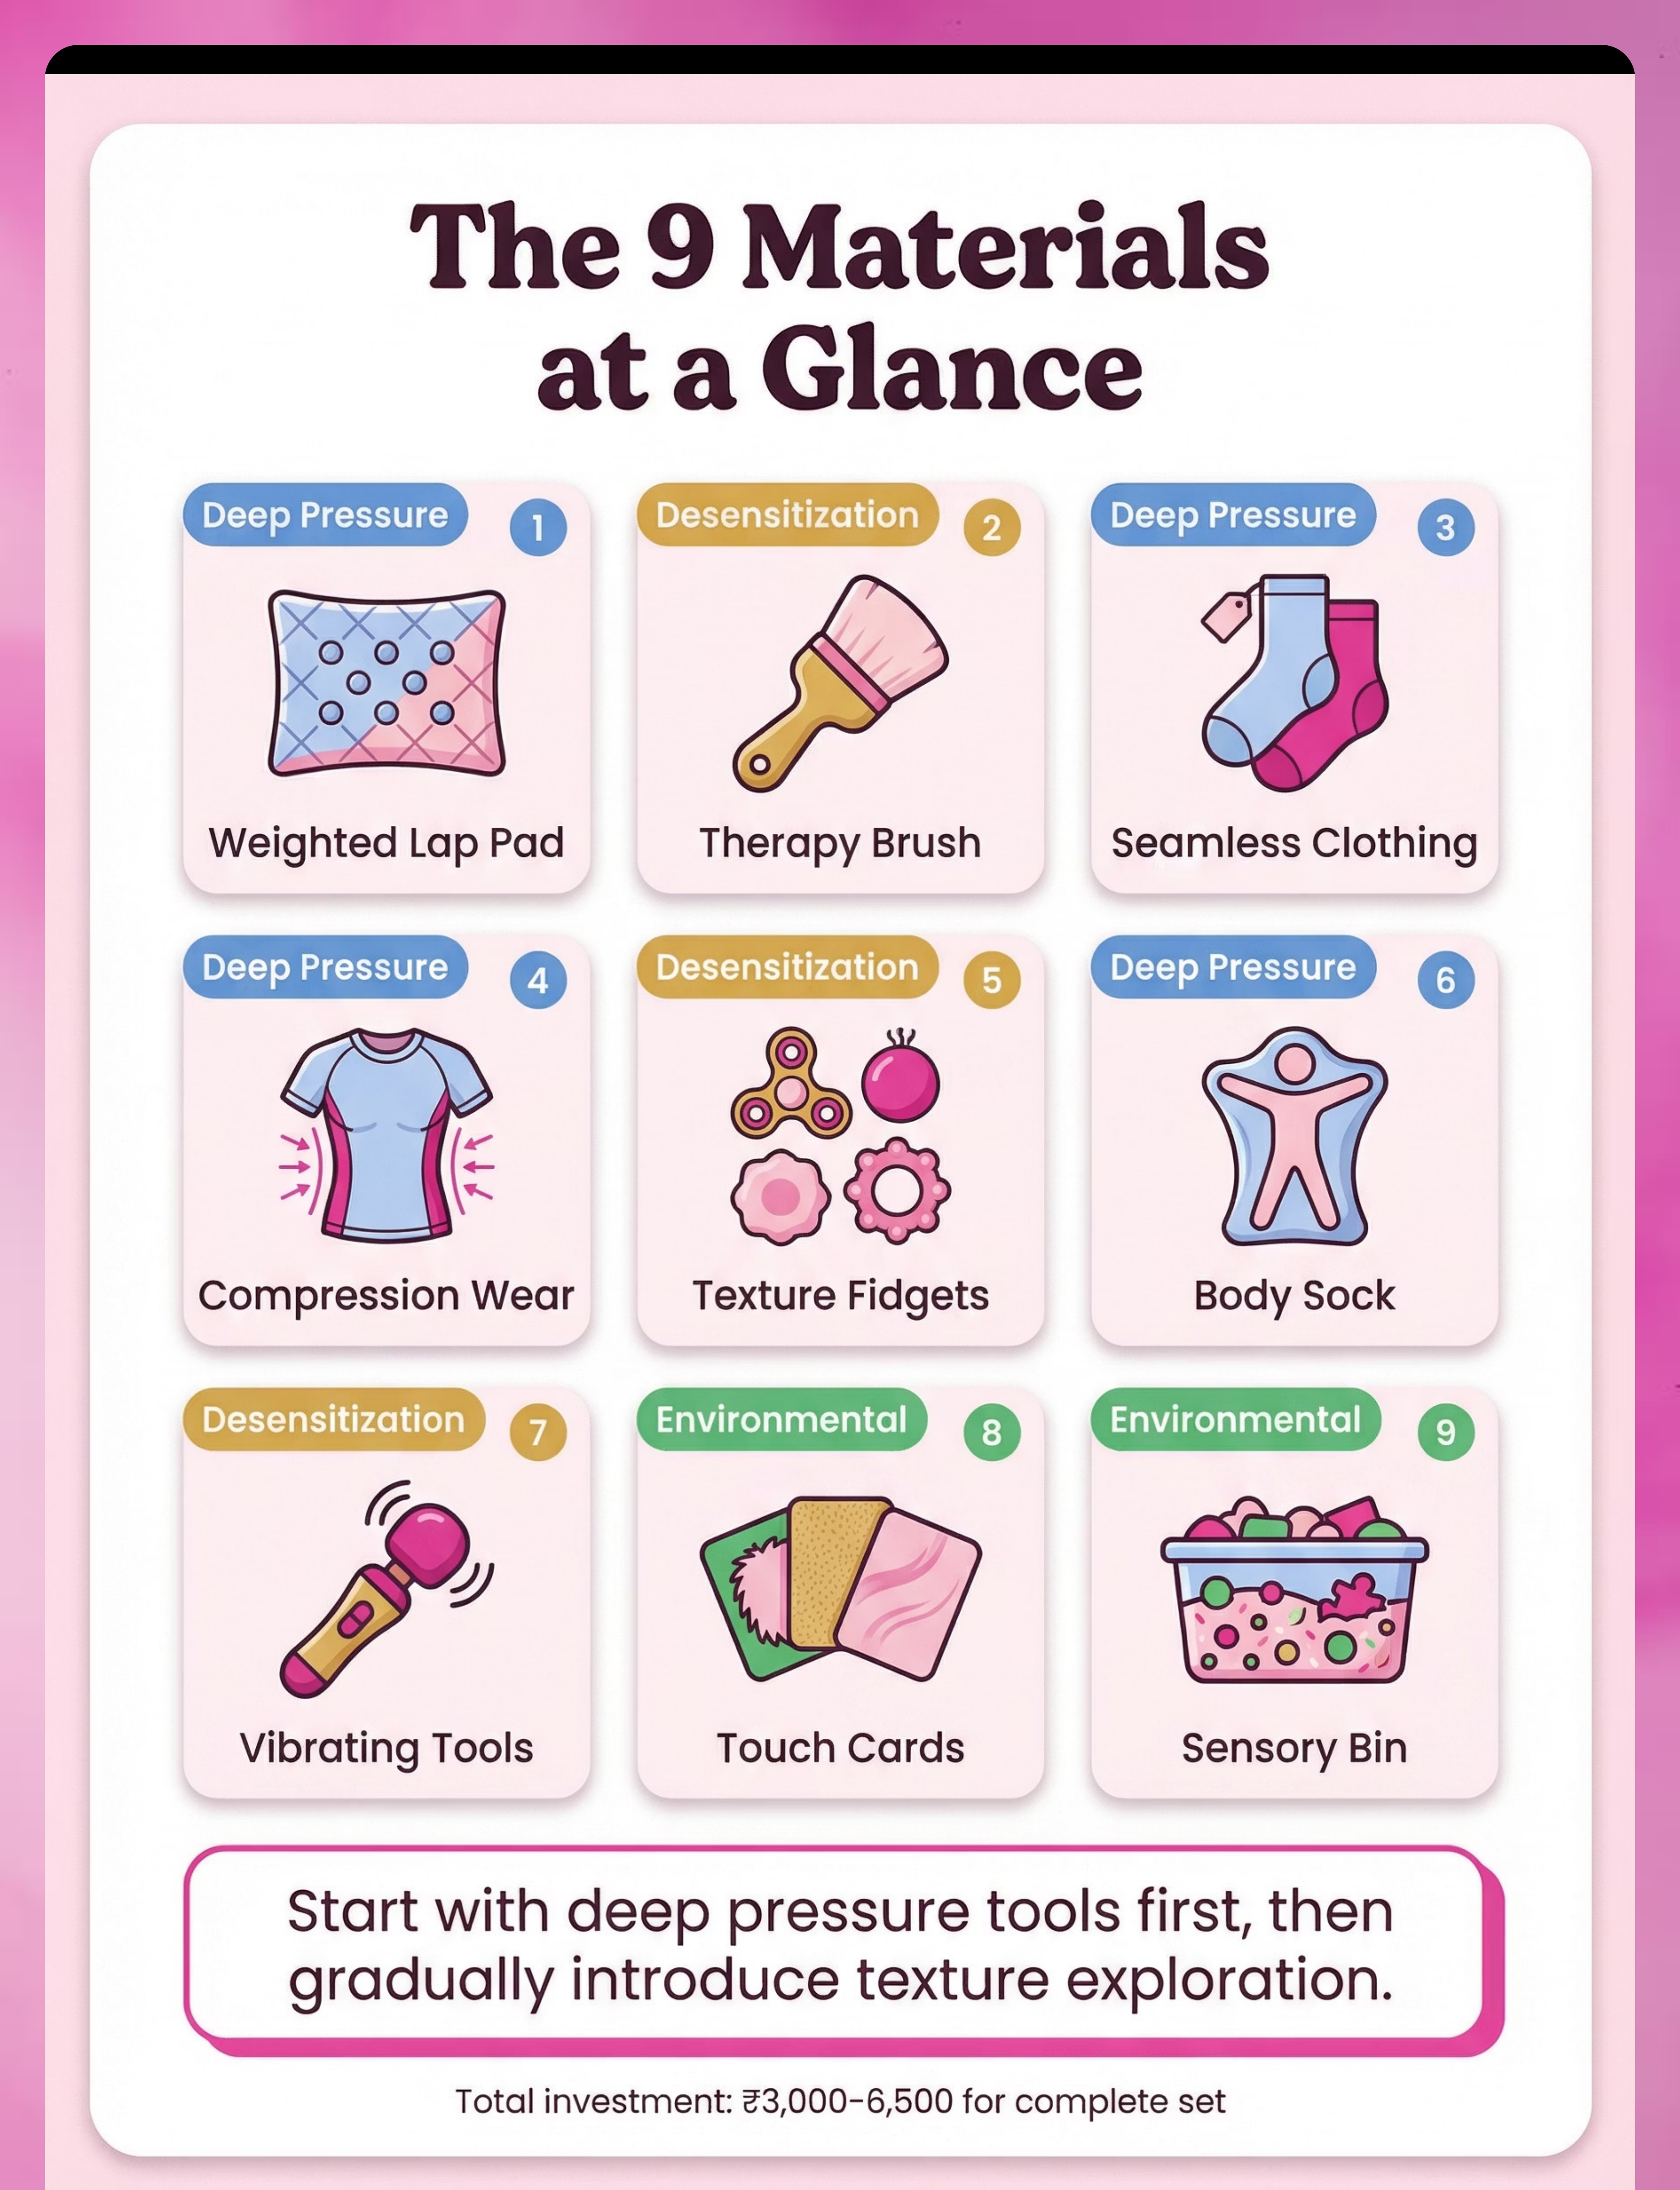
The 9 Primary Materials — At a Glance
These 9 materials form the complete tactile desensitization toolkit. Together, they address deep pressure, environmental modification, and graded texture exposure — the three pillars of tactile regulation. Total investment: ₹3,000–6,500 for the complete set.
"Pinnacle Recommends" — All 9 materials are clinically validated by 500+ pediatric OTs across the Pinnacle Blooms Network.
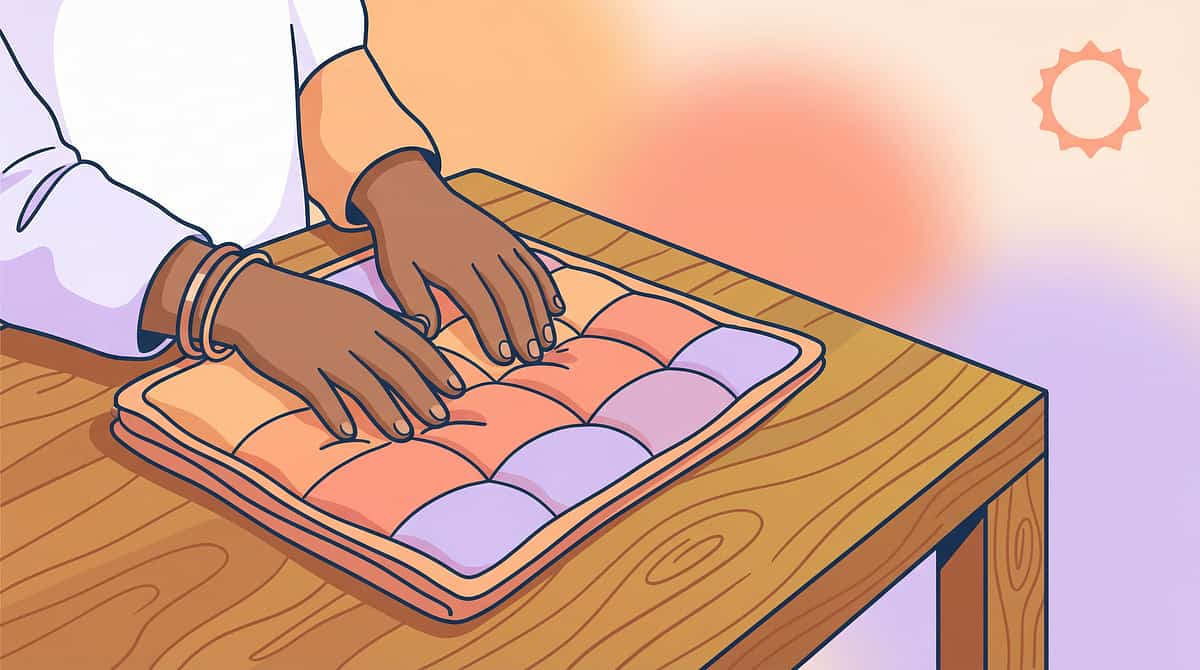
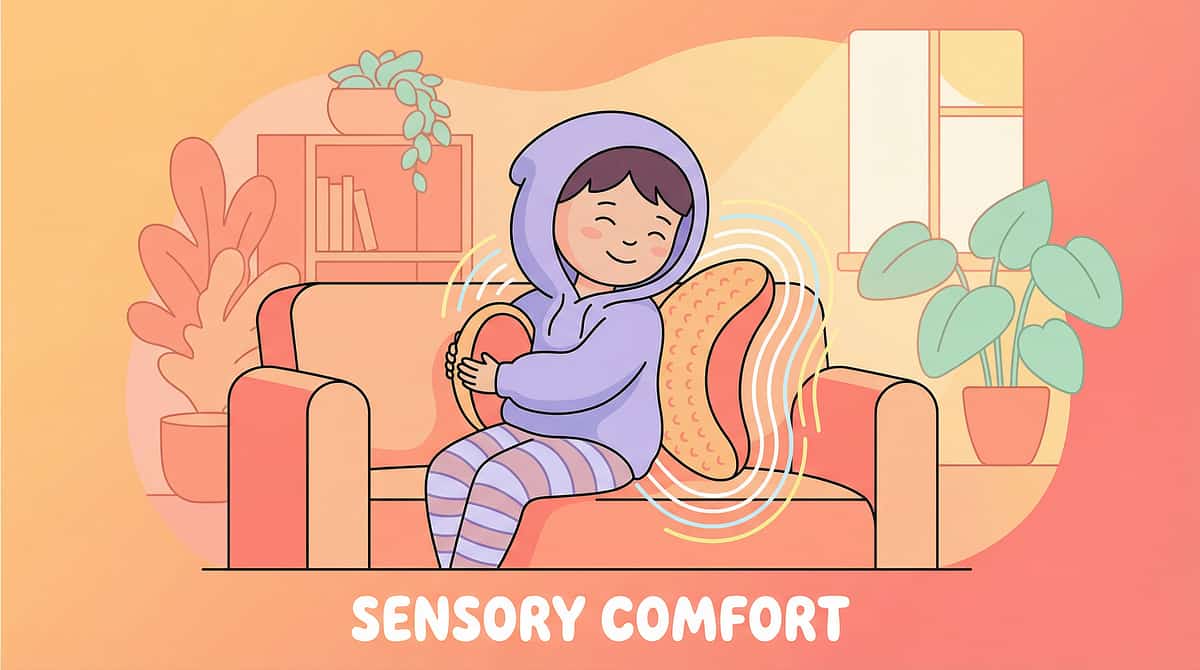
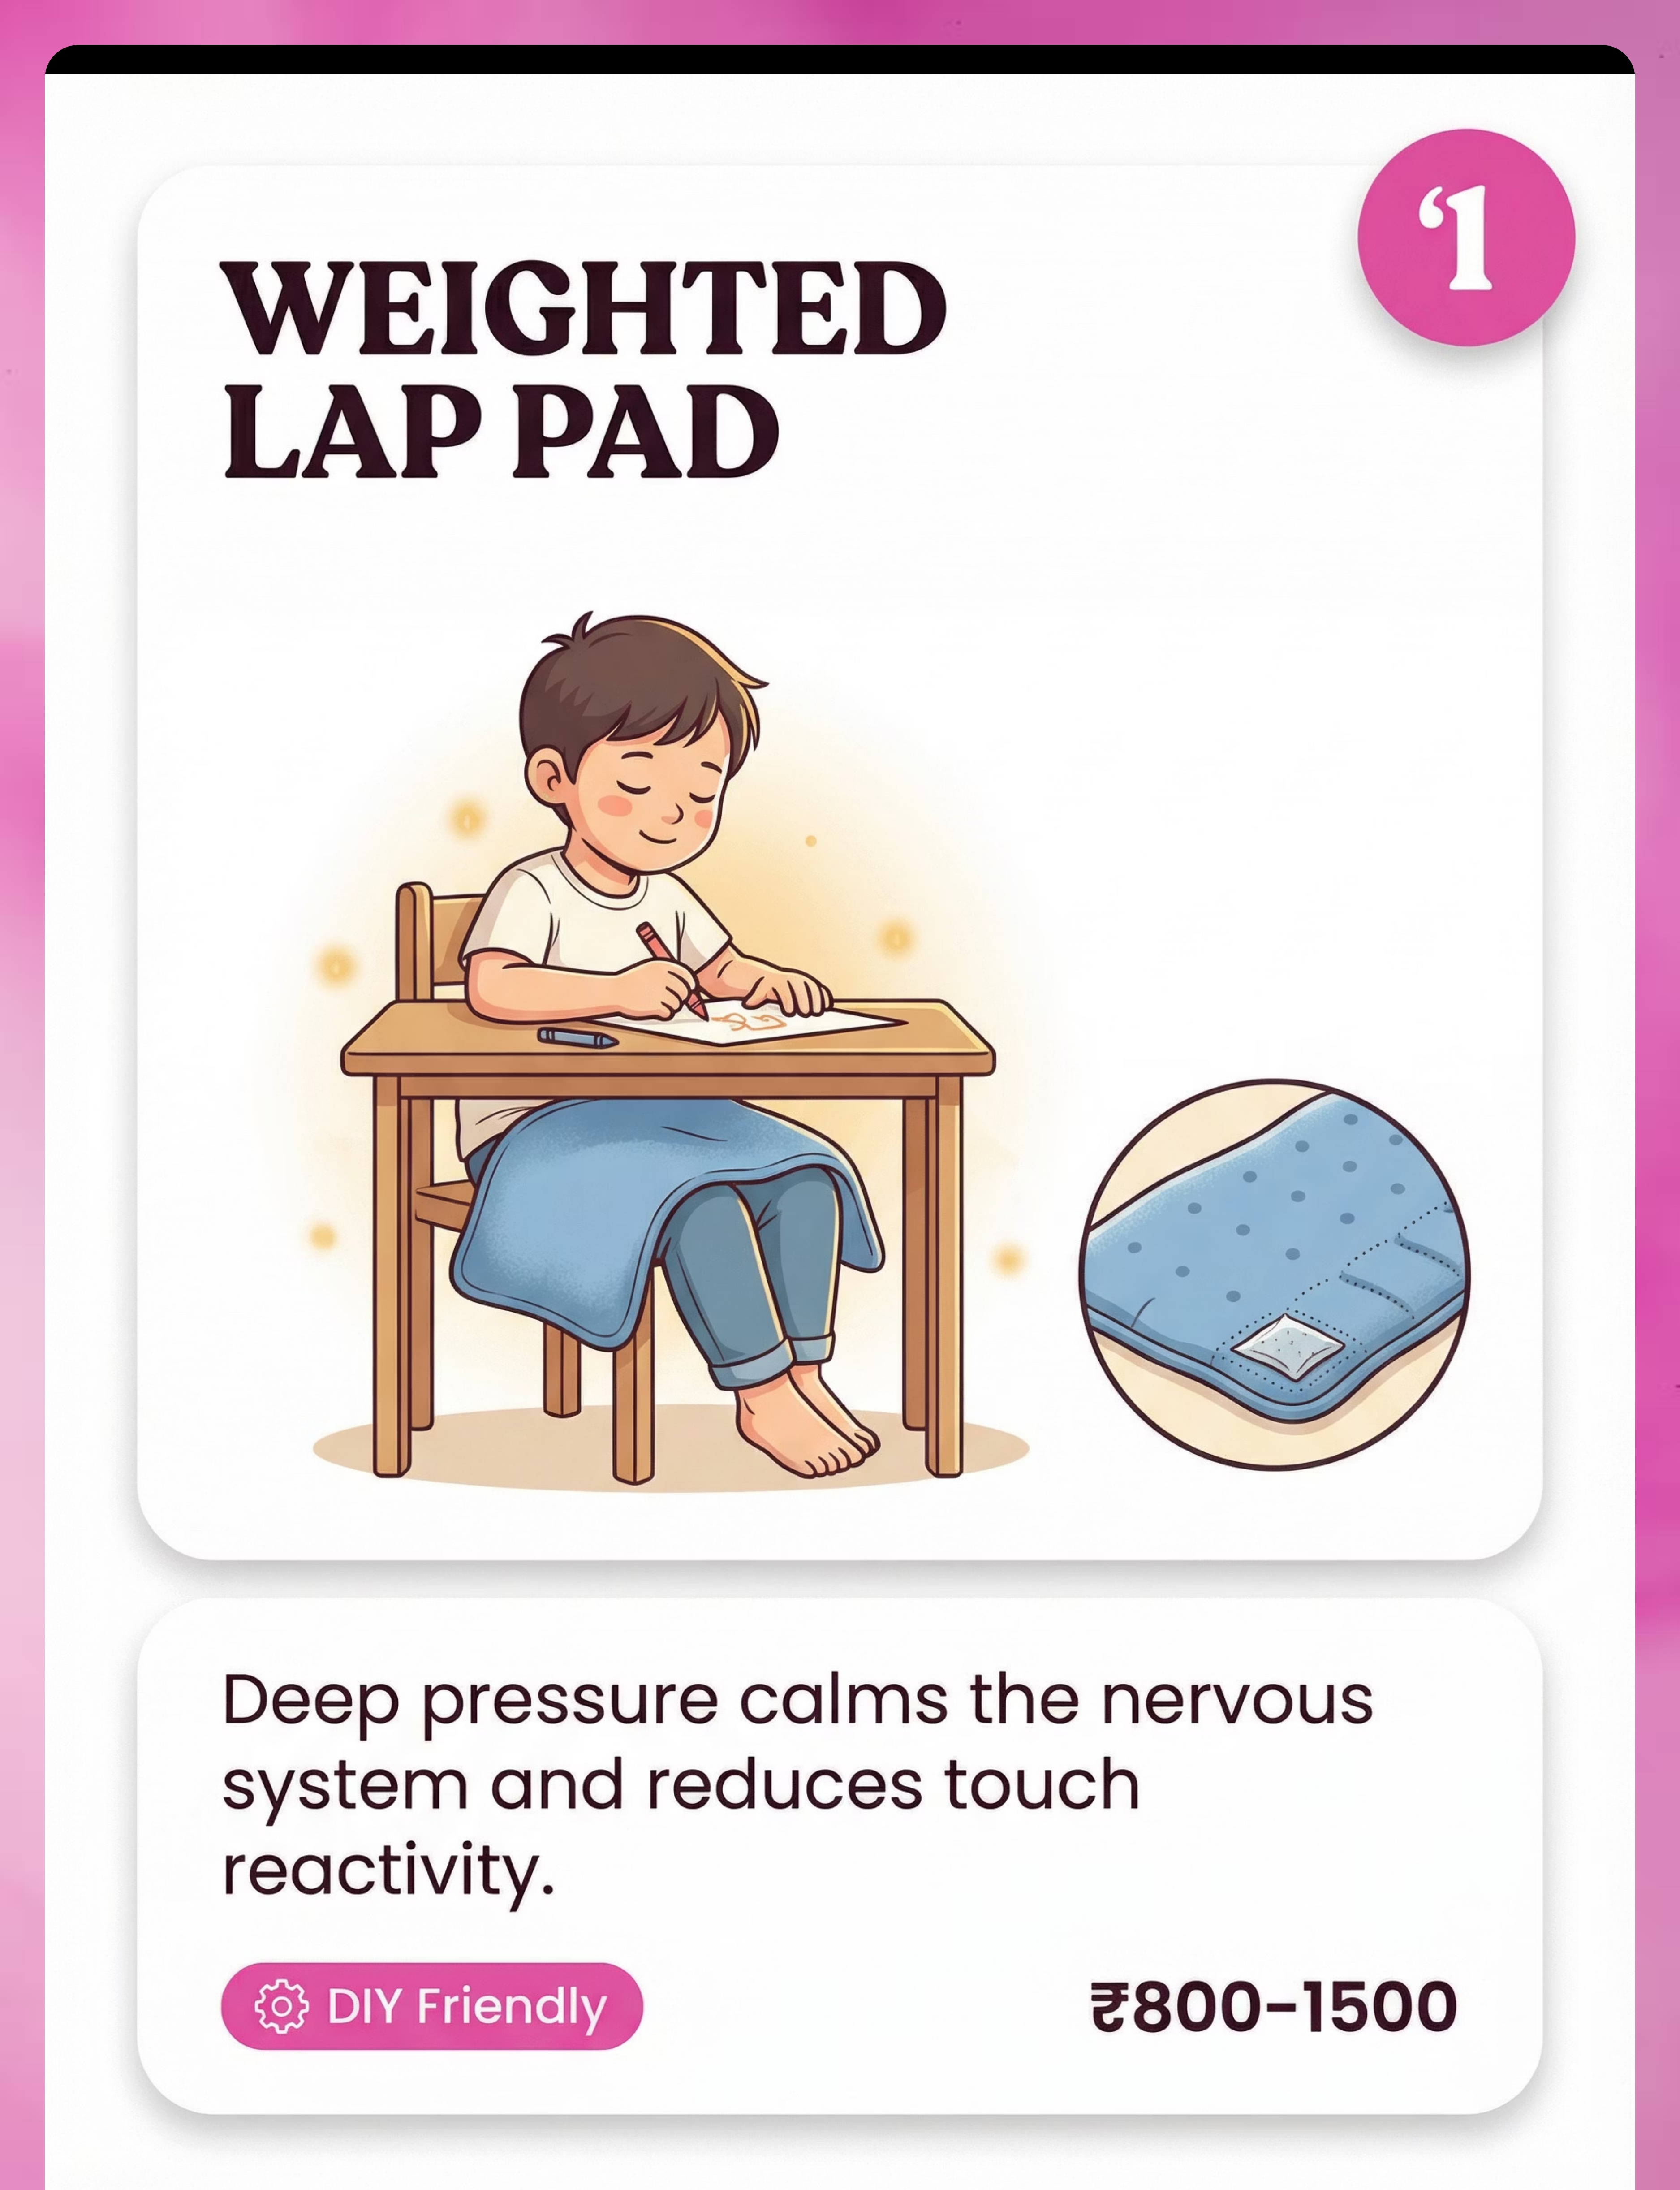
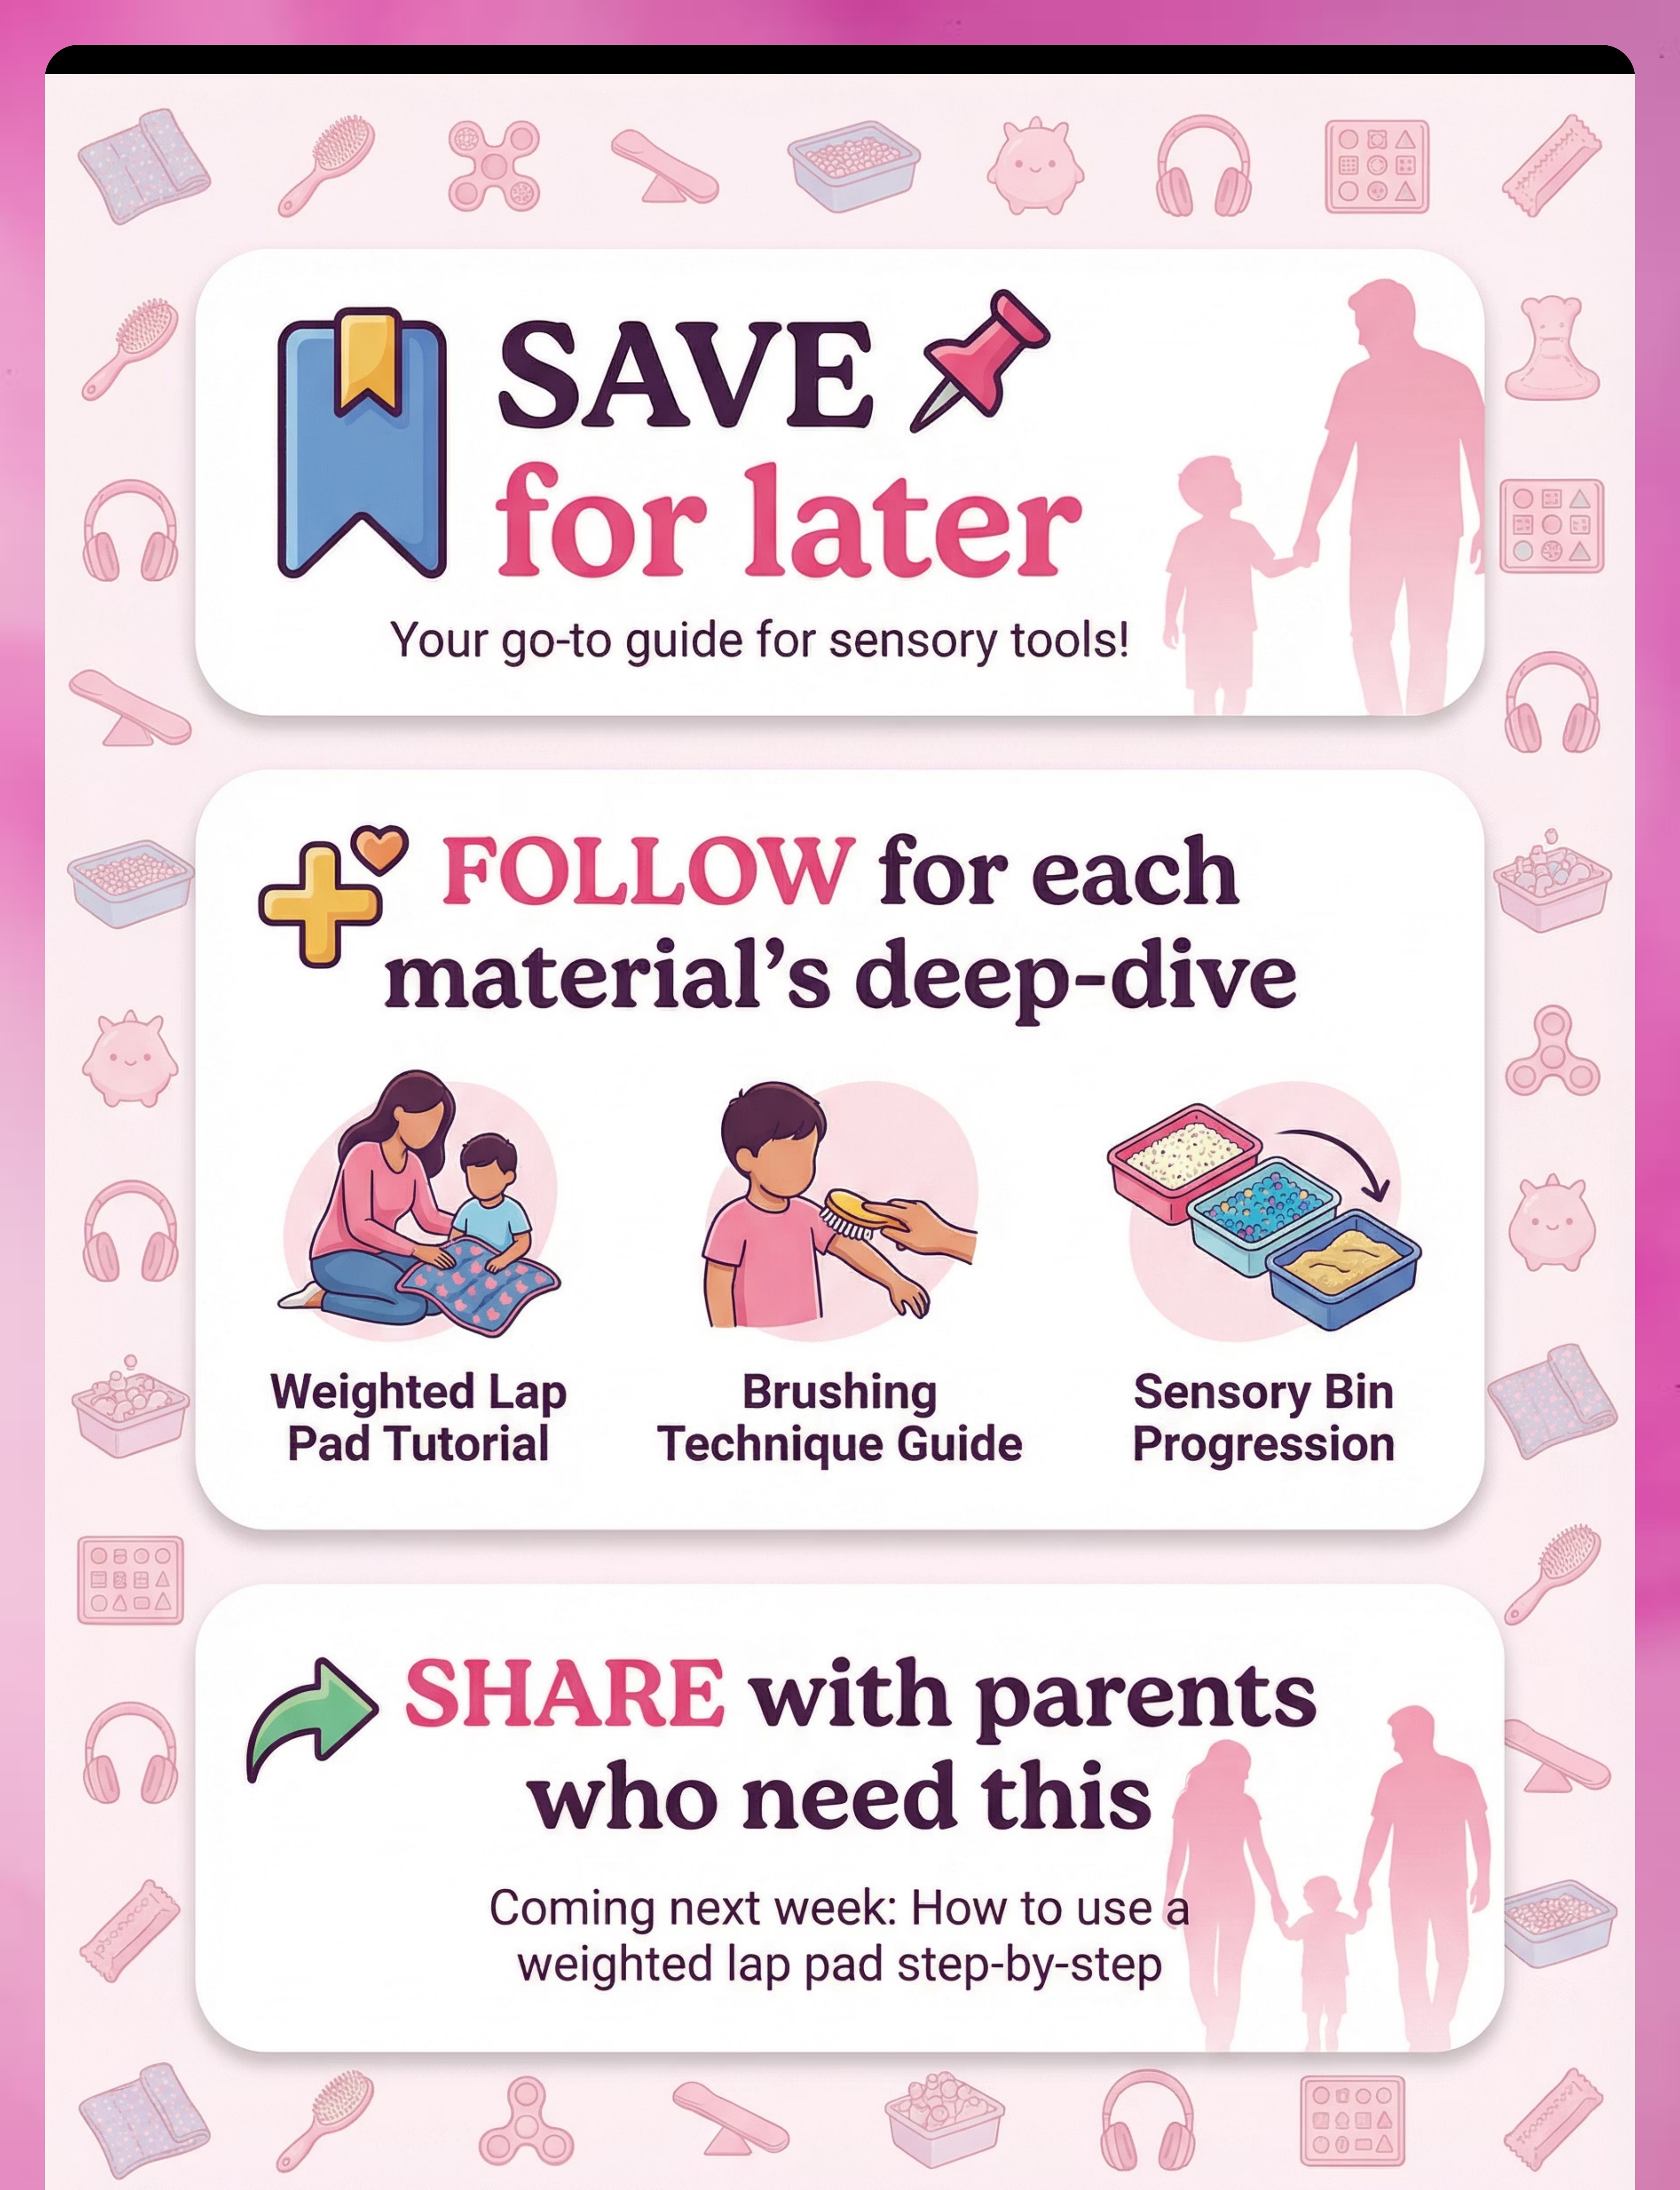
Material 1: Weighted Lap Pad
Deep Pressure
DIY Friendly ✅
₹800–1,500
Deep pressure is one of the most powerful tools for calming an over-aroused tactile system. A weighted lap pad placed on the child's lap during seated activities activates proprioceptors — the body's "position sensors" — which send a calming signal to the nervous system, reducing overall sensory reactivity.
How to Use It
Place on the child's lap during a preferred seated activity — drawing, watching a short video, or looking at a book. The weight does the therapeutic work passively. No demands needed. Start with 3–5 minutes and build toward 10–15 minutes.
Weight guideline: 5–10% of your child's body weight. Never exceed 10%.
DIY Version — Zero Cost
Fill a ziplock bag with dry rice or lentils (500g–1kg), seal completely, and wrap in a soft cloth cover. Sew or safety-pin the cover closed. The same deep pressure principle applies — weight activates proprioceptors regardless of the container.
Same neurological mechanism. Zero additional cost.
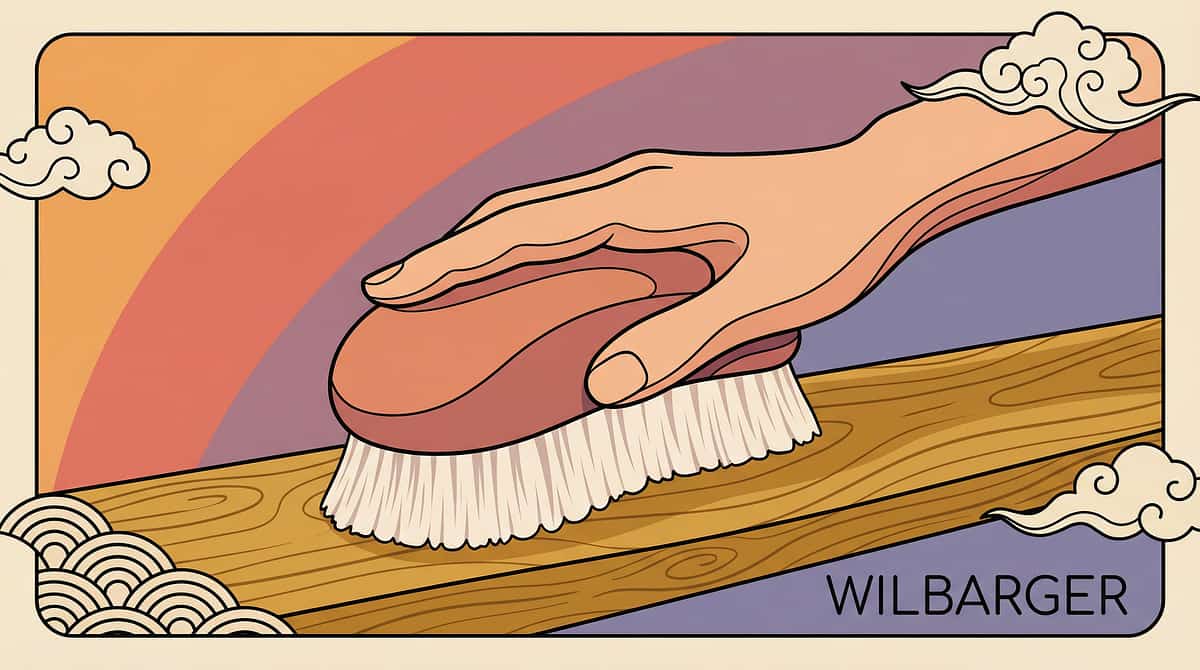
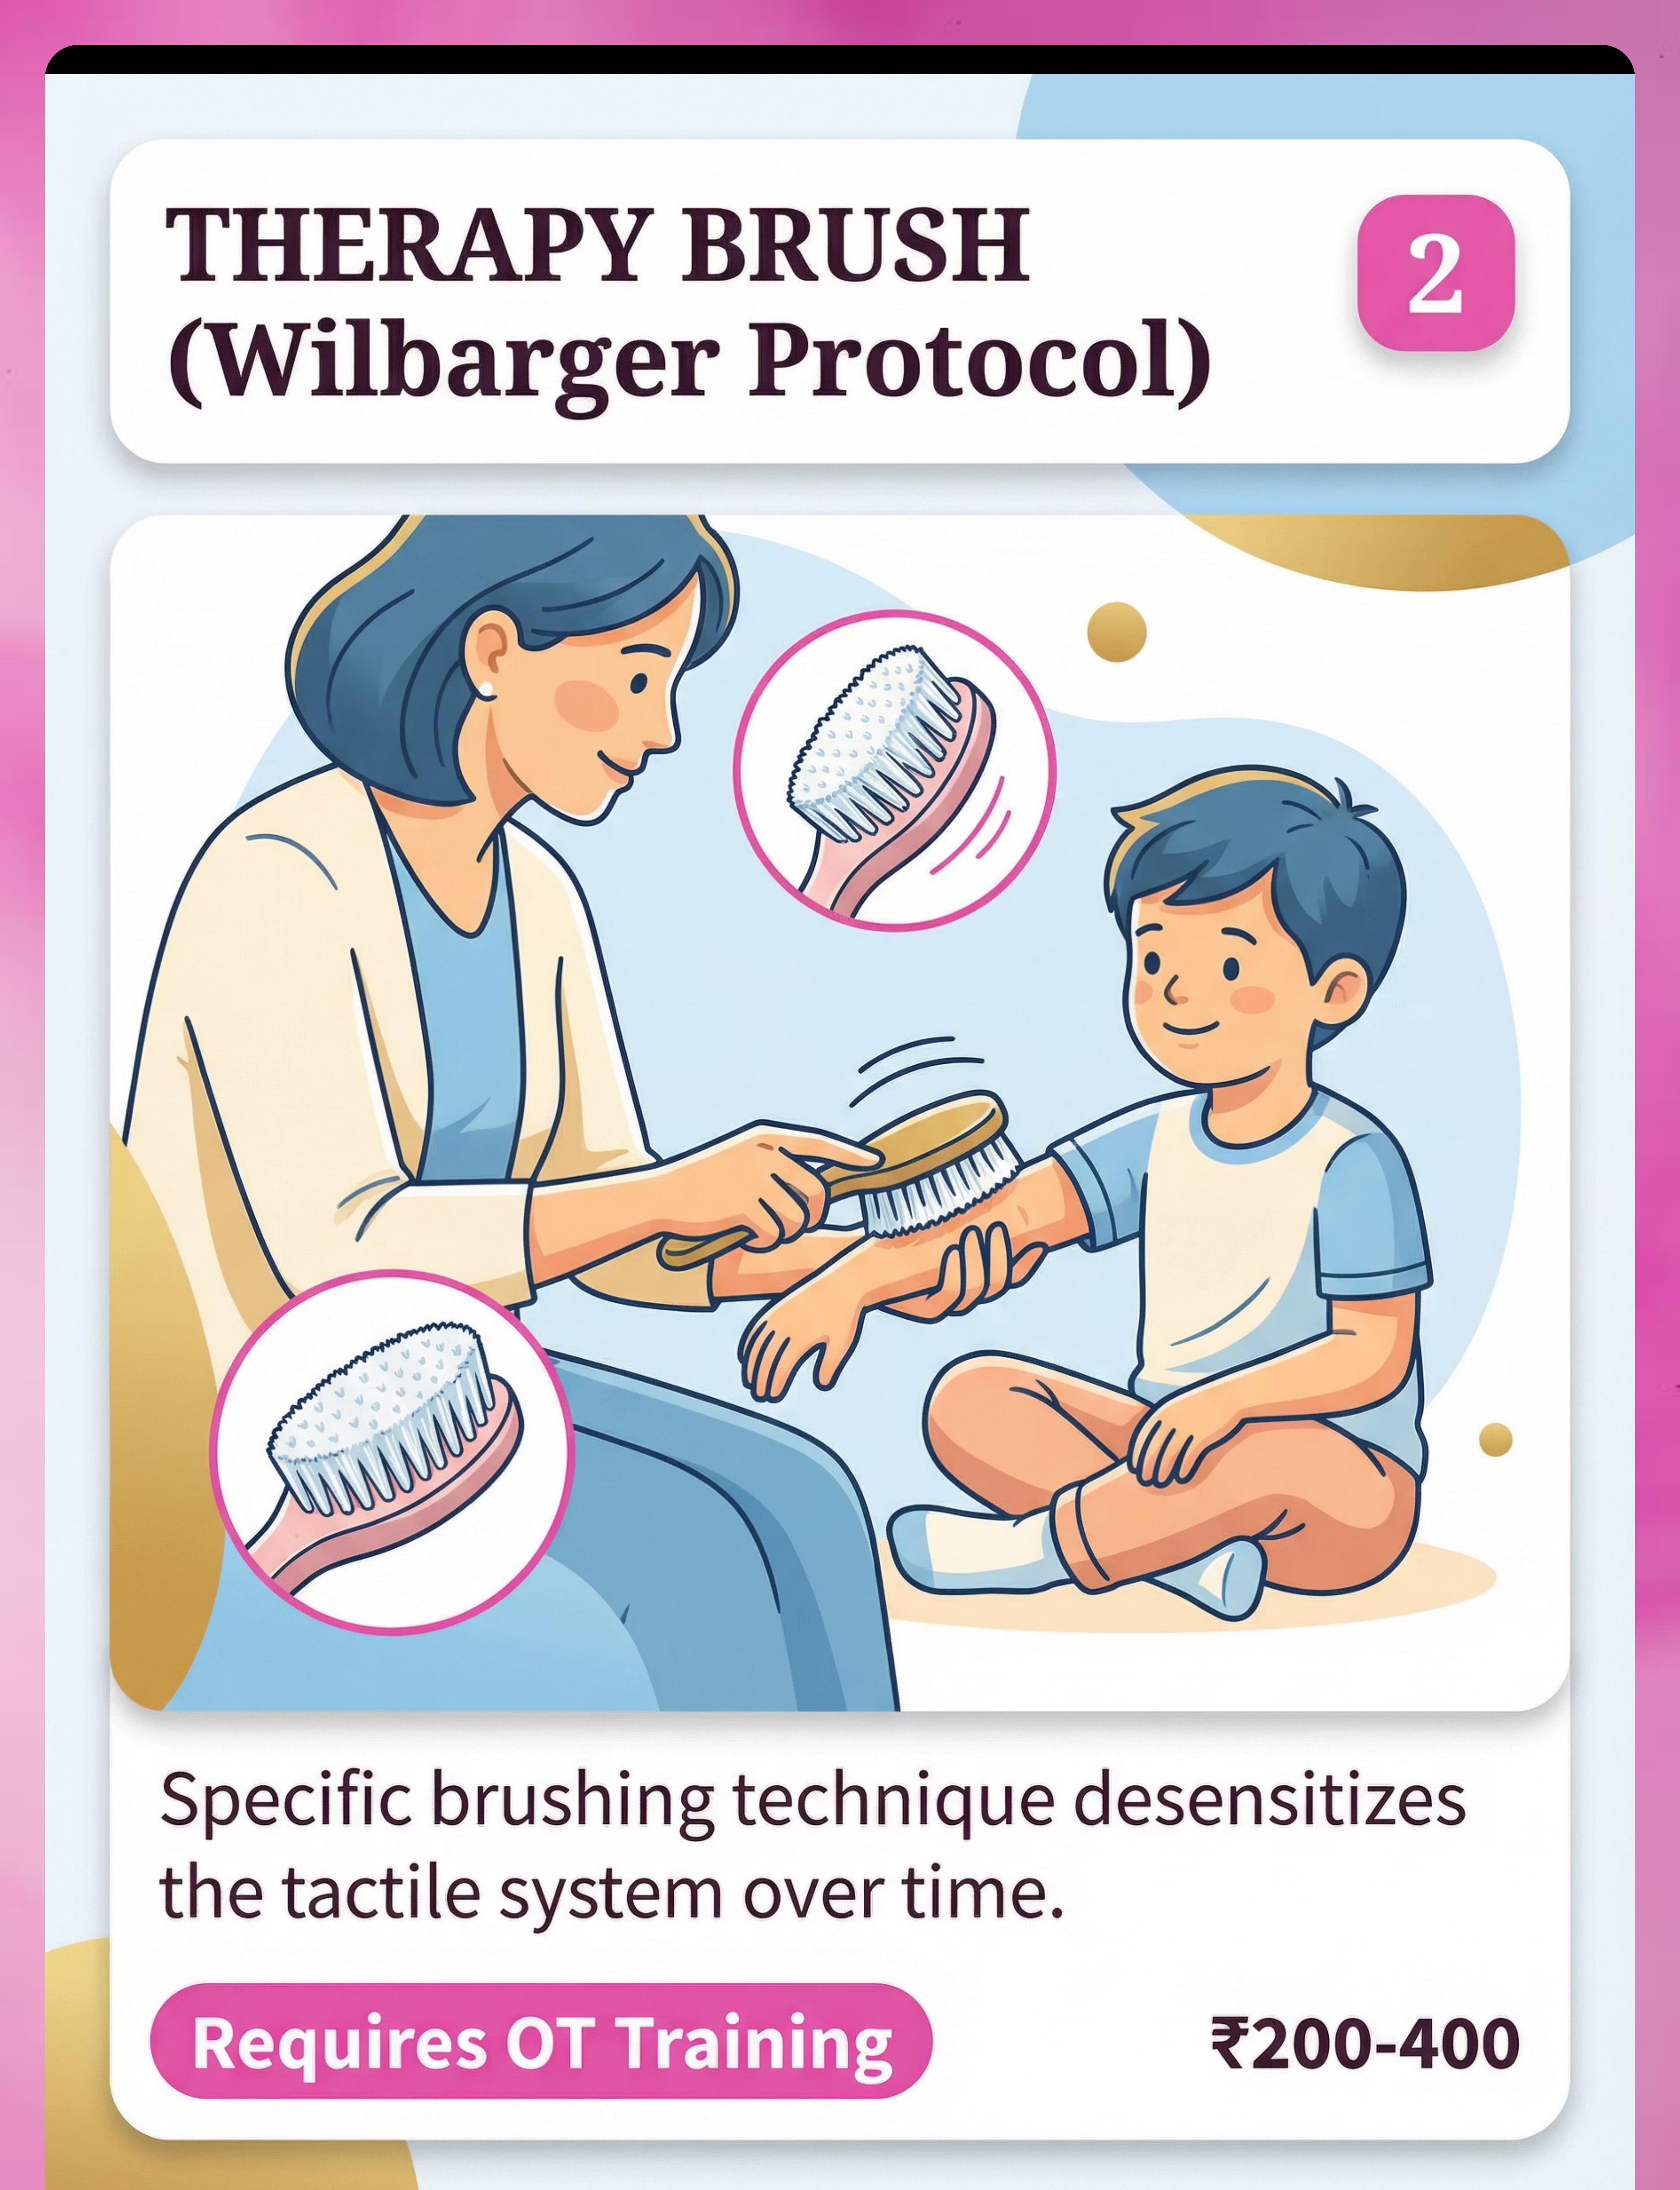
Material 2: Therapy Brush (Wilbarger Protocol)
Desensitization
⚠️ OT Training Required
₹200–400
⚠️CRITICAL: The Wilbarger Brushing Protocol MUST be demonstrated by a trained Occupational Therapist before home use. There is NO safe DIY substitute. Using the wrong brush or wrong pressure can INCREASE tactile defensiveness.
What It Does
The Wilbarger Protocol uses a specific surgical-grade brush applied with firm, rhythmic strokes across the child's skin in a precise sequence. This systematic stimulation of skin mechanoreceptors gradually desensitizes the tactile system over time — literally retraining the nervous system's response to touch input.
When administered correctly, most families see measurable changes in tactile tolerance within 2–4 weeks of consistent use, typically 2–3 times per day.
How to Get Started Safely
Book a session with a Pinnacle OT who will demonstrate the exact pressure, direction, speed, and anatomical sequence specific to YOUR child's profile. The OT will also show you joint compressions that accompany brushing.
Once trained, this becomes a powerful daily tool you administer in under 3 minutes.
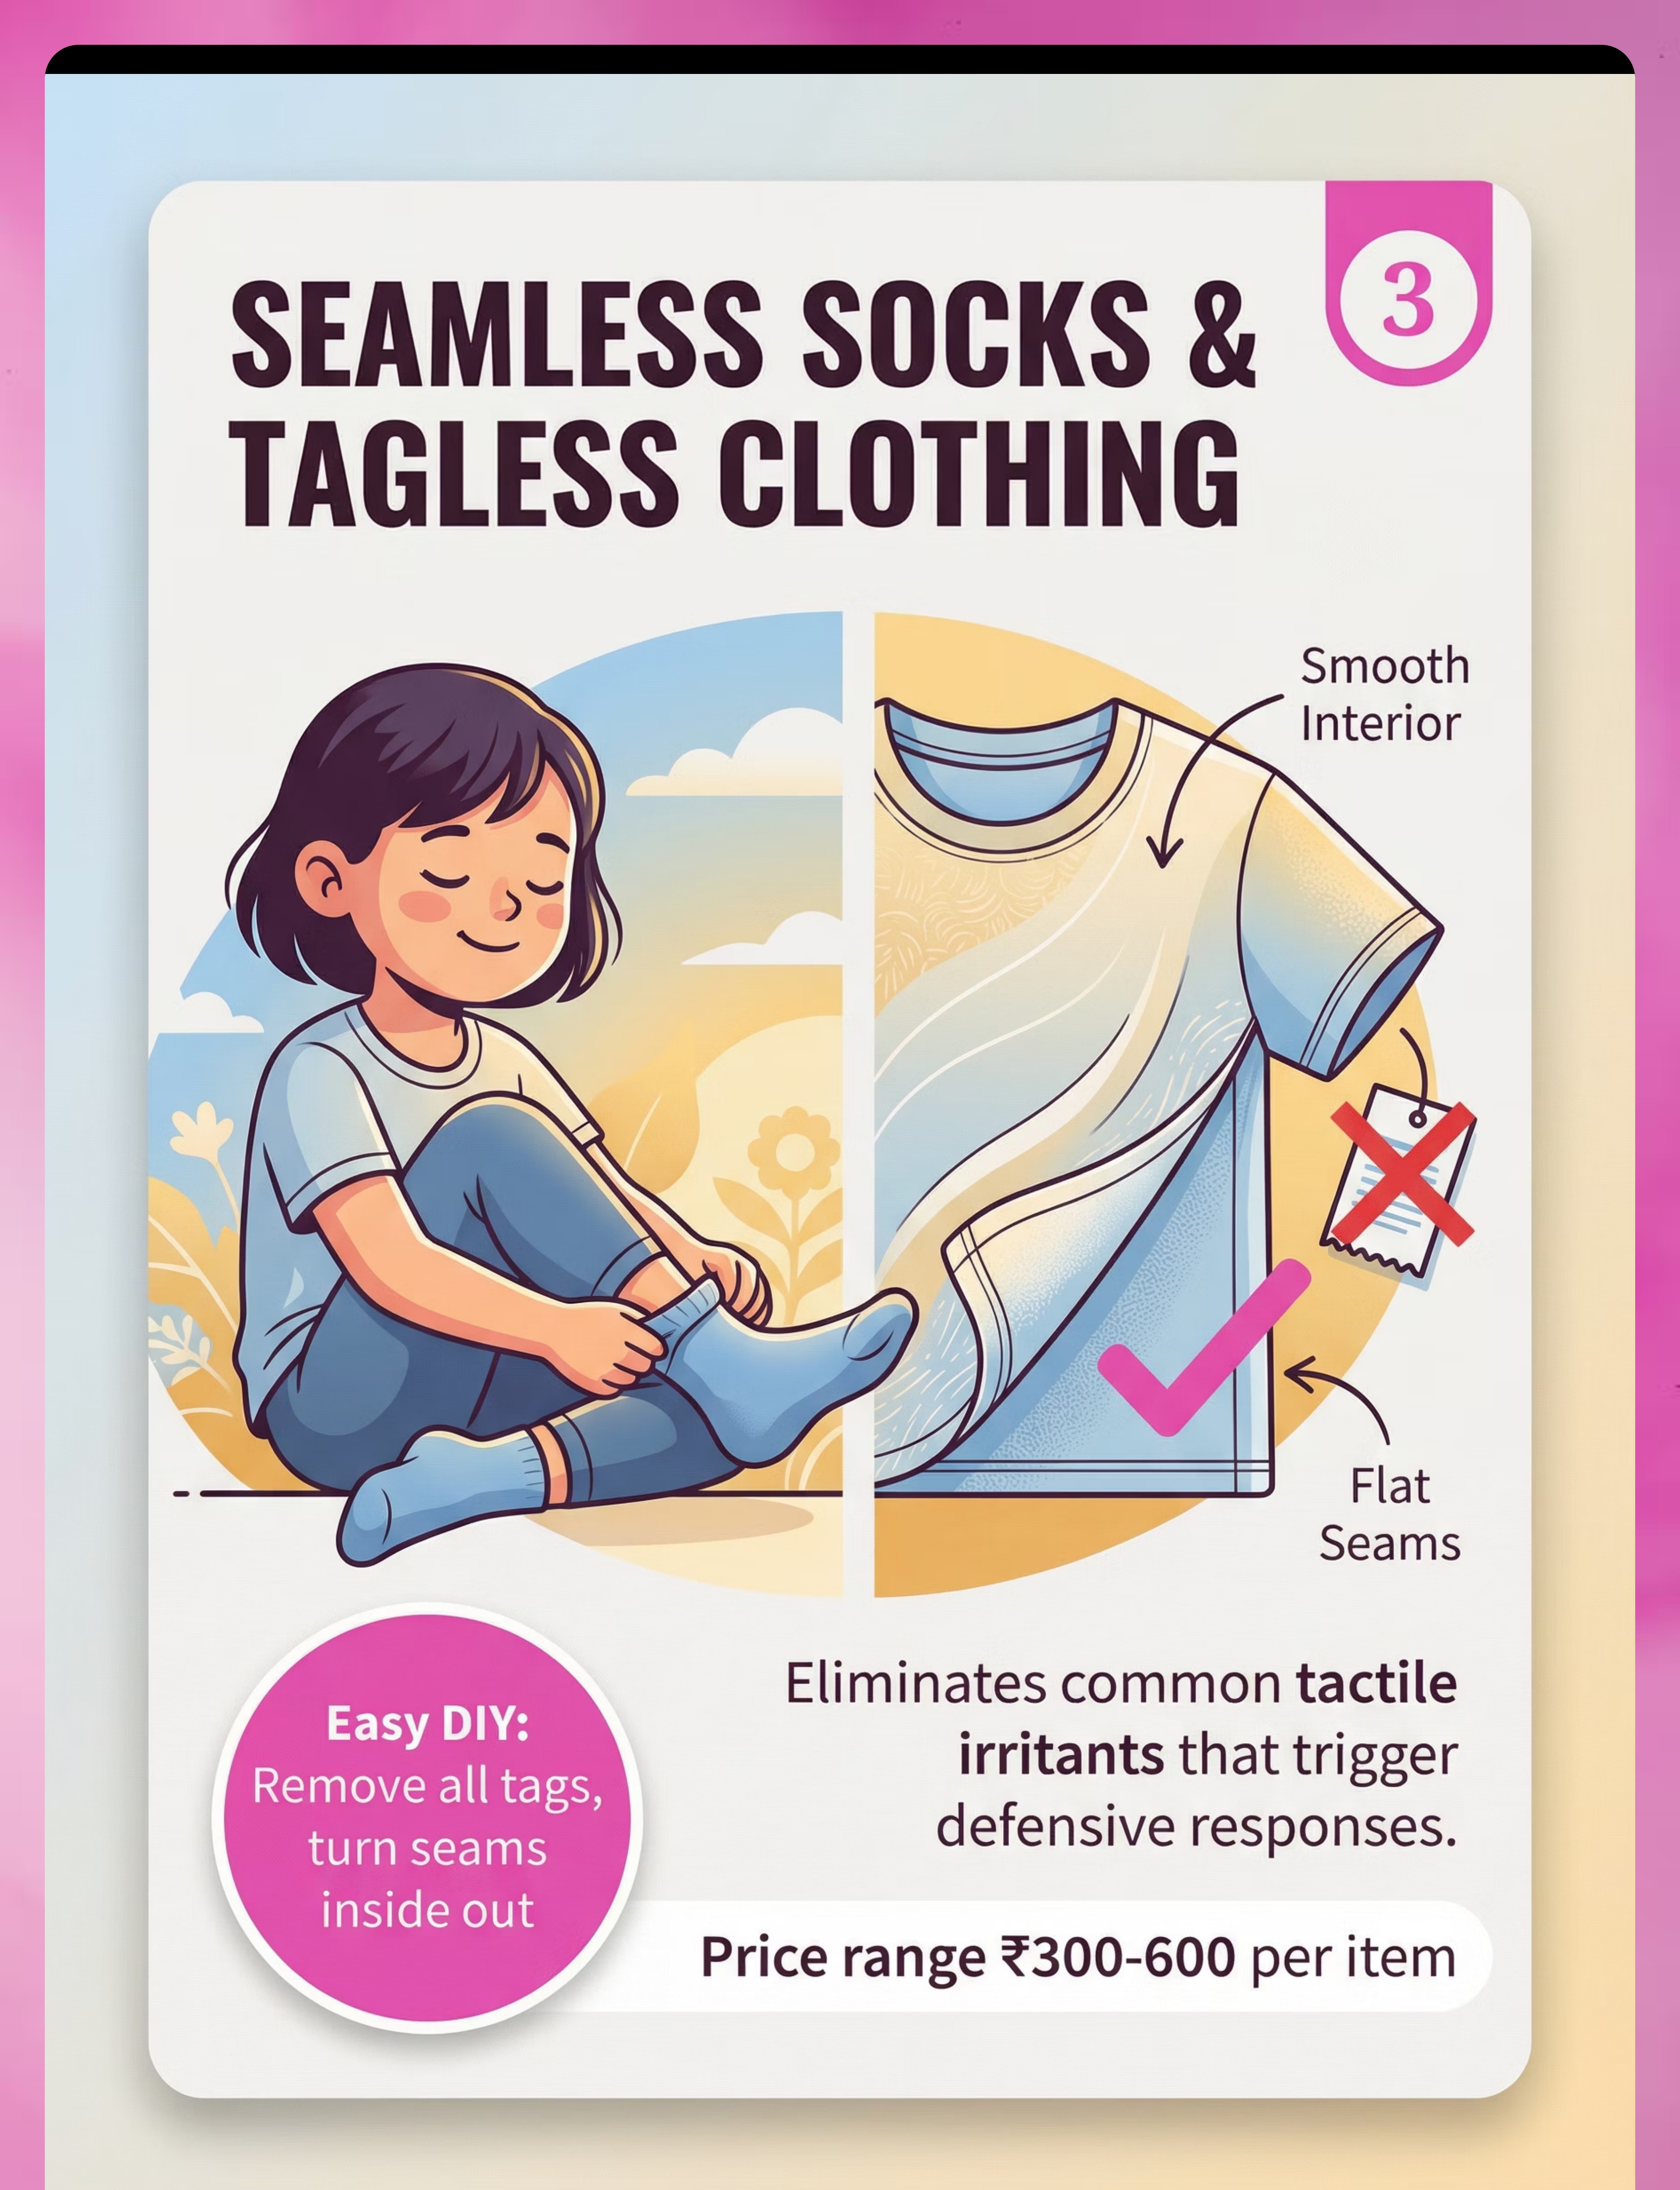
Material 3: Seamless Socks & Tagless Clothing
Environmental
Easy DIY ✅
₹300–600 per item
For many children with tactile defensiveness, clothing is the single biggest daily sensory battle. The good news: this is the most immediately actionable material on the entire list. You can start today — right now — with what's already in your home.
Remove All Tags
Cut out every clothing tag with small scissors. Even "soft" tags create a constant low-level irritant that keeps the tactile system on high alert all day long.
Turn Seams Inside-Out
For socks especially — turning inside-out places the smooth fabric surface against the skin. Many children with touch sensitivity find immediate relief from this one change.
Select Seamless Socks
Invest in purpose-made seamless socks (₹150–300/pair). The difference for a touch-sensitive child is comparable to removing a pebble from a shoe — immediate and significant.
Choose Soft, Flat-Knit Fabrics
Cotton jersey, bamboo fabric, and flat-knit polyester blends minimize seam bulk and texture variation. Avoid wool, rough denim, and textured prints near the skin.
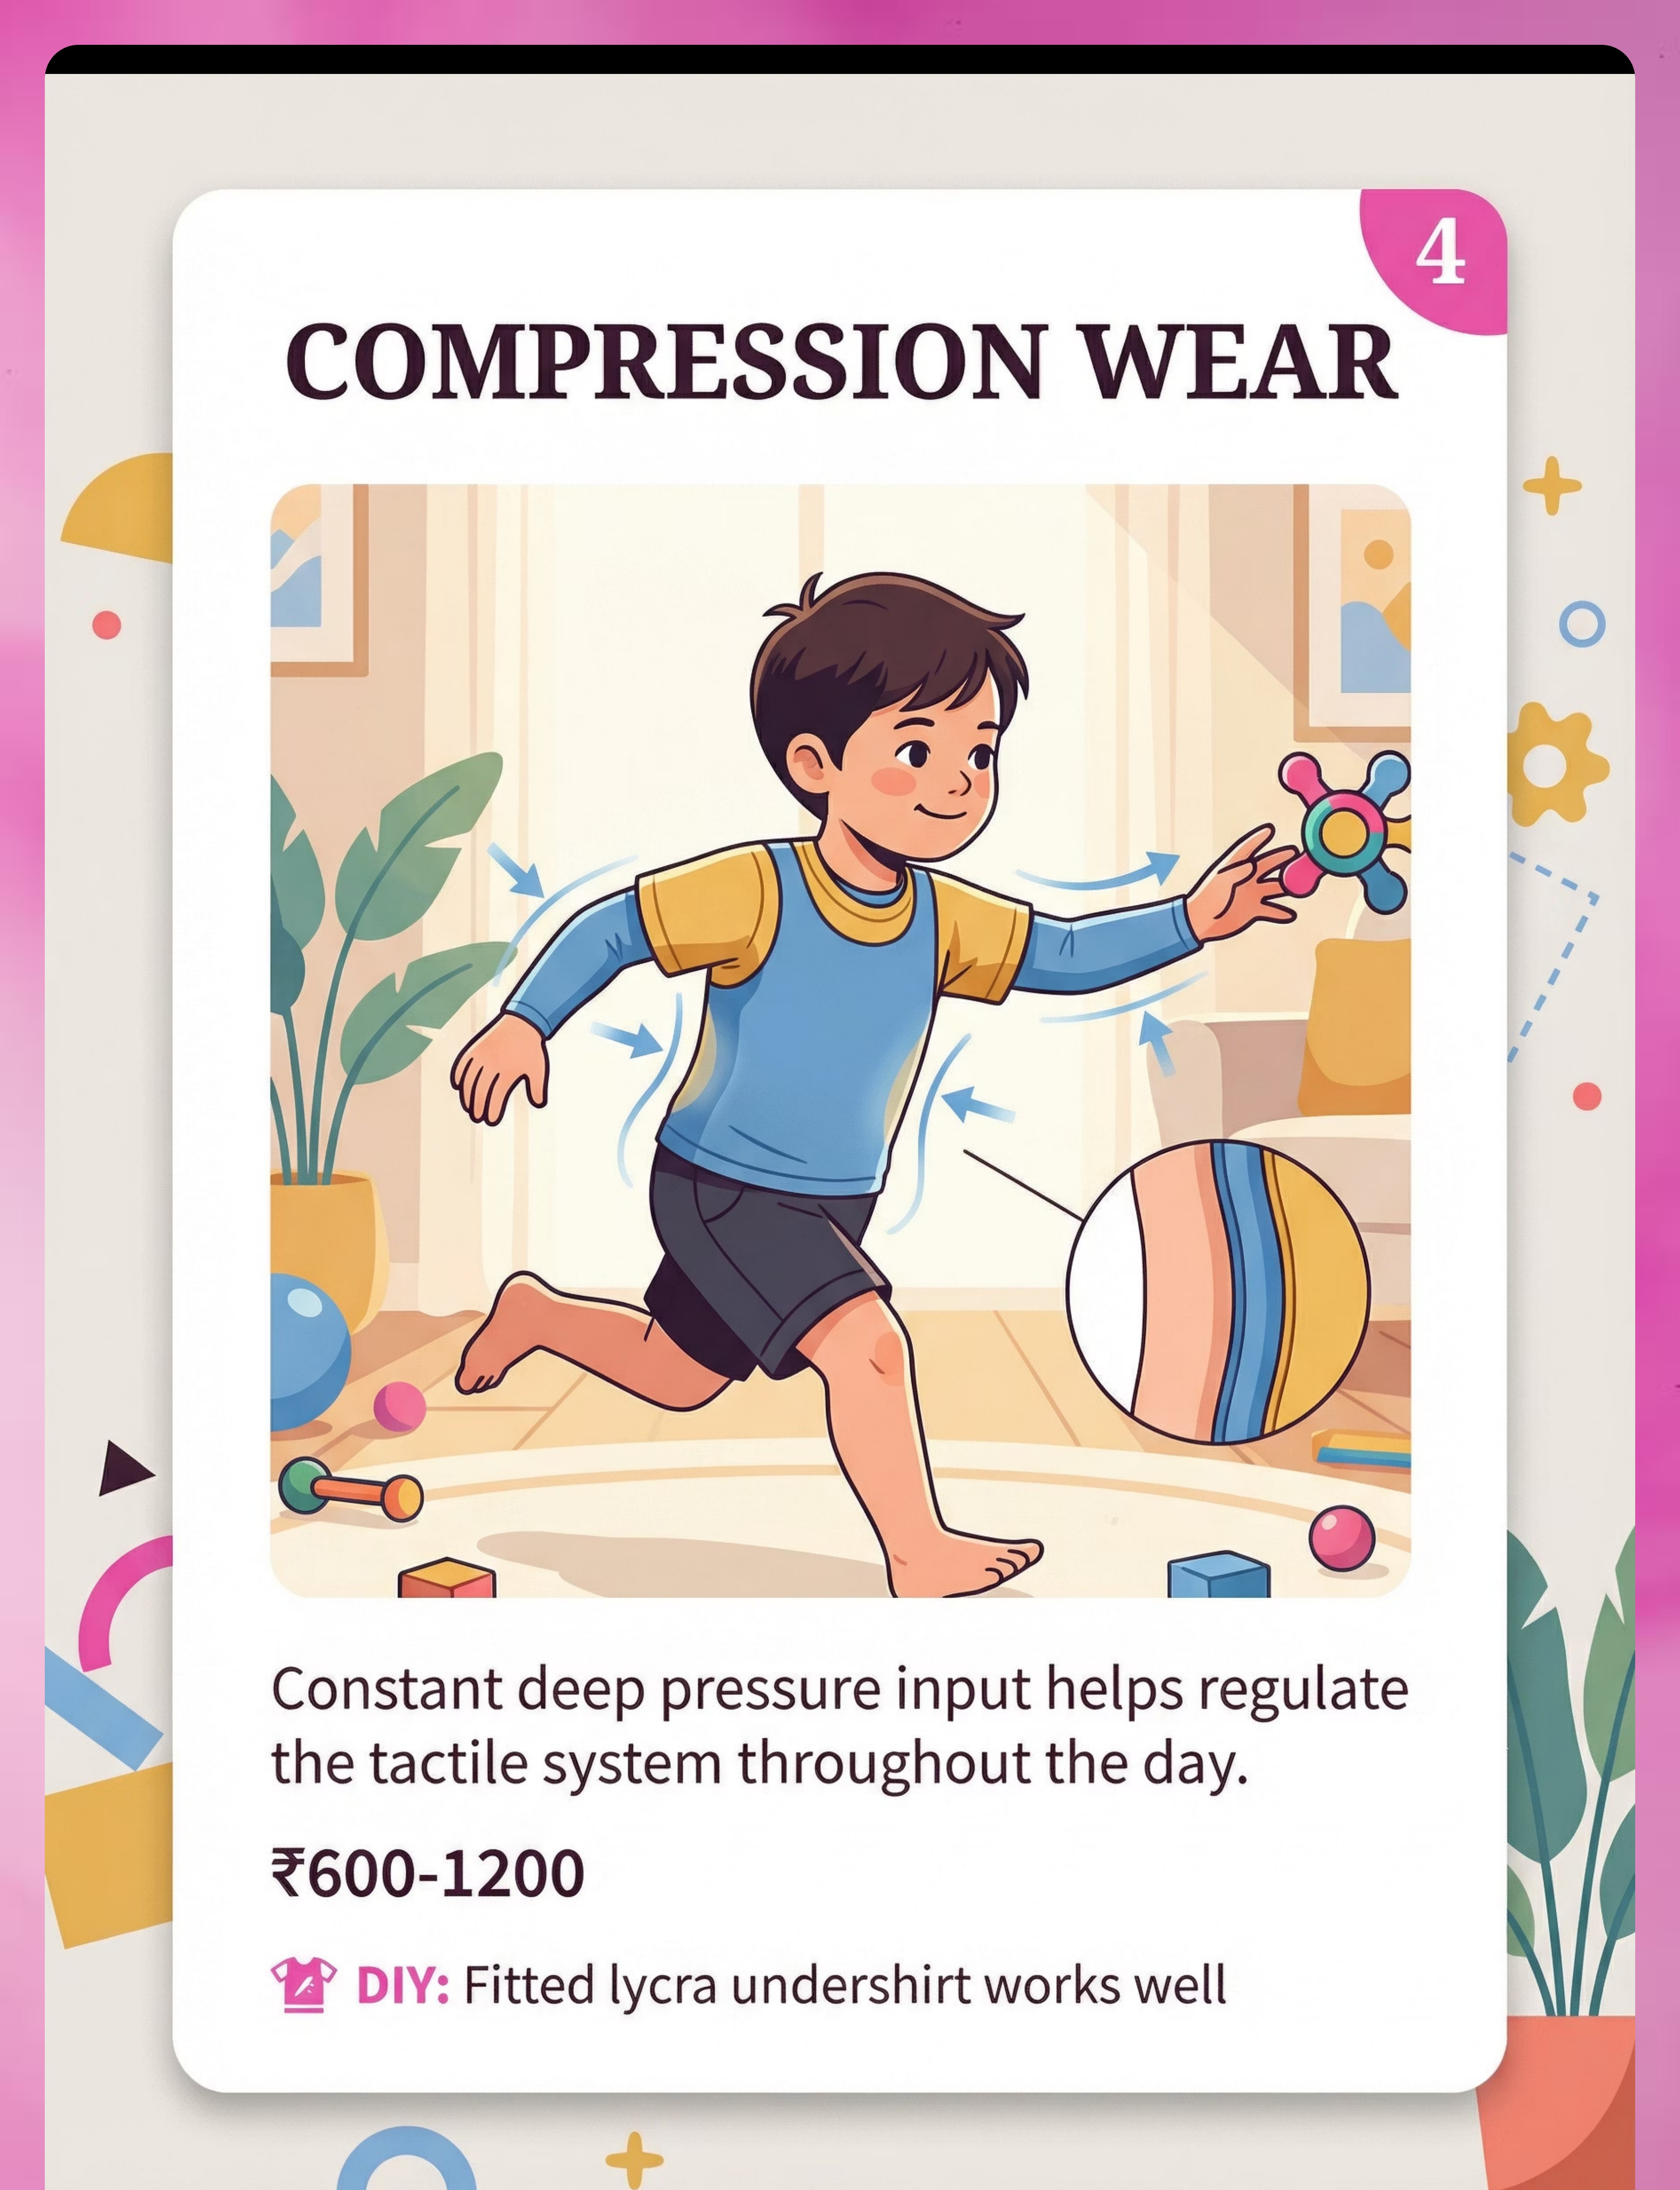
Material 4: Compression Wear
Deep Pressure
DIY Option ✅
₹600–1,200
What It Is & Why It Works
Compression garments — vests, shorts, undershirts — apply constant, gentle, circumferential pressure across the torso and limbs. This deep pressure input helps regulate the tactile system throughout the day, not just during therapy sessions.
Think of it as a continuous gentle hug that tells the nervous system: "You are safe. You are contained. Touch is not a threat." Many children who wear compression under their regular uniform show significantly reduced meltdowns by mid-morning.
How to Use It
Wear under regular clothing. Start with 1–2 hours and gradually increase. Most children adapt within 1–2 weeks and begin requesting it independently — a powerful sign of self-regulation emerging.
DIY option: A well-fitted lycra undershirt or tight swimwear worn beneath clothing provides the same circumferential pressure input at a fraction of the cost.
⚠️Safety: Check skin under garment every 2 hours. If skin changes color or child shows labored breathing, remove immediately.
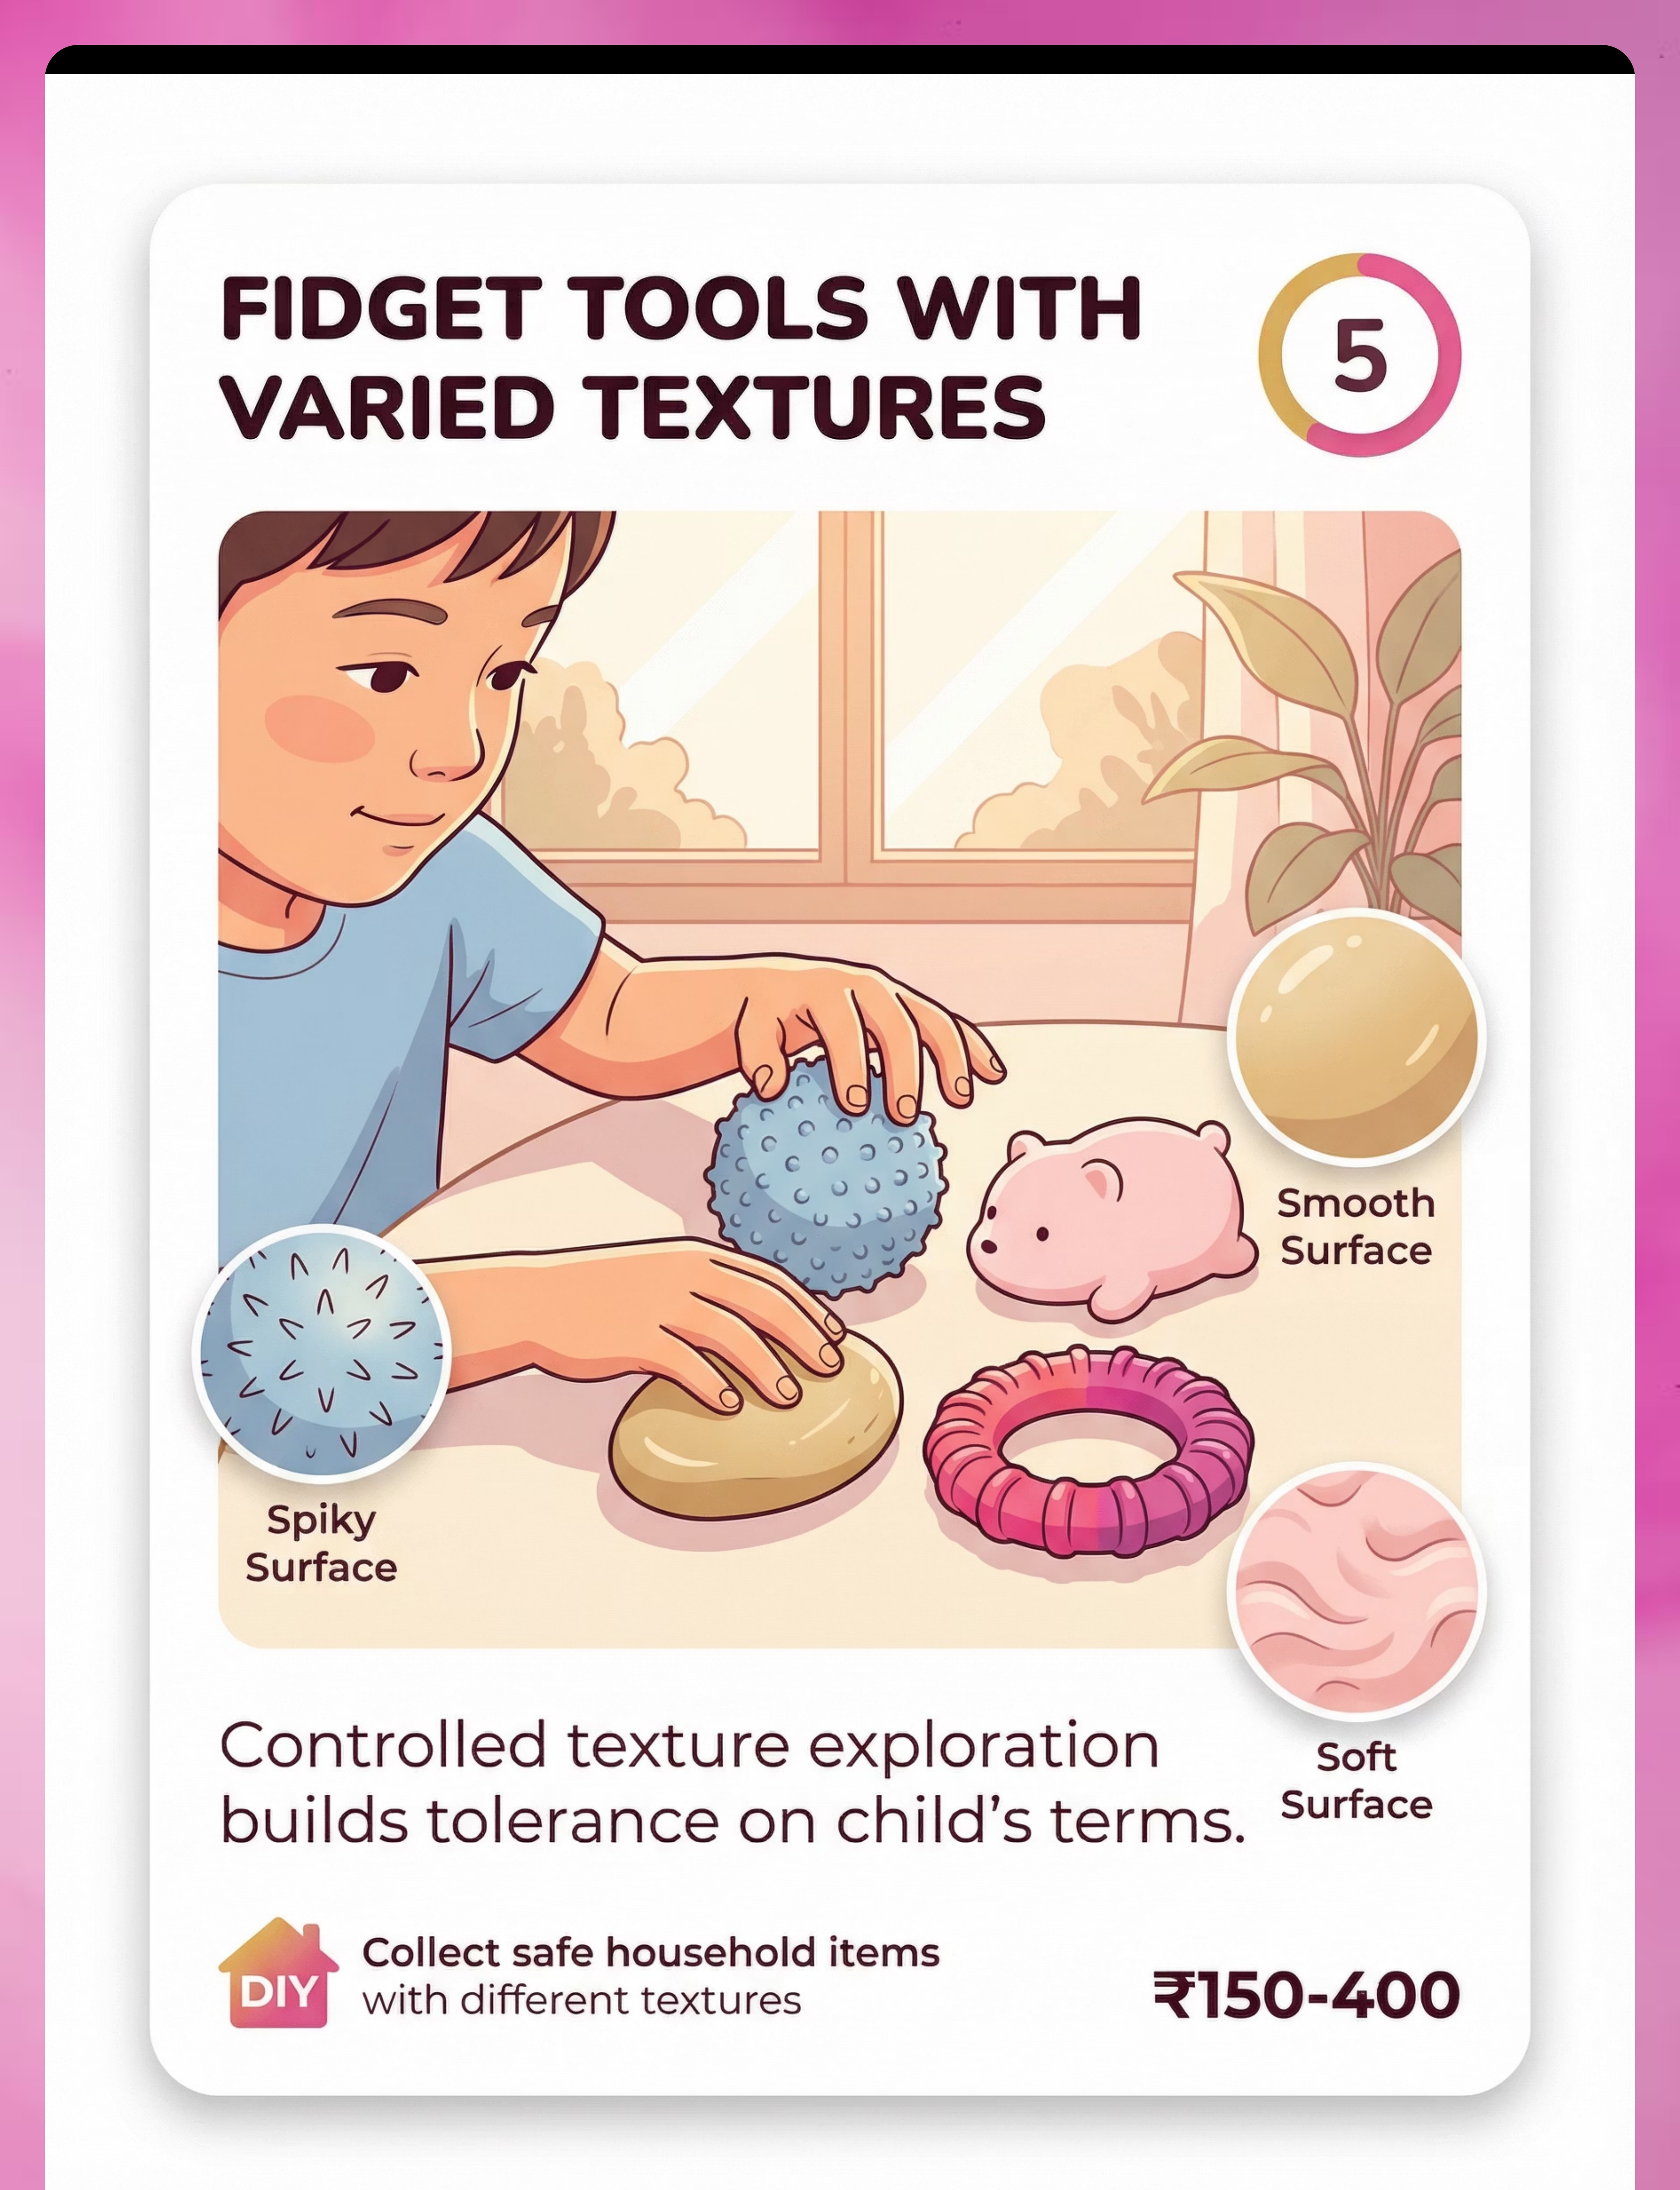
Material 5: Fidget Tools With Varied Textures
Desensitization
DIY Friendly ✅
₹150–400
Fidget tools are the child's entry point into self-directed texture exploration — they explore on their own terms, at their own pace, with full control over every contact. This sense of agency is what makes fidget tools therapeutically powerful. The child's nervous system learns: "I can touch this and I'm okay."
Spiky Surfaces
Spiky sensory balls introduce firm, localized pressure. Most children progress to these after establishing comfort with smoother textures.
Smooth Surfaces
Smooth stones, wooden beads, or polished silicone tools are excellent starting points for highly sensitive children.
Soft Surfaces
Velvet pouches, fleece squares, and soft fabric sensory pillows bridge the gap between preferred and challenging textures.
Rubbery/Stretchy
Stretchy fidgets provide proprioceptive input alongside tactile input — excellent for sensory seekers and avoiders alike.
DIY: Collect safe household items — cotton balls, sandpaper scraps, a silk scarf, a rough sponge, a smooth stone. The variety is the principle, not the brand.
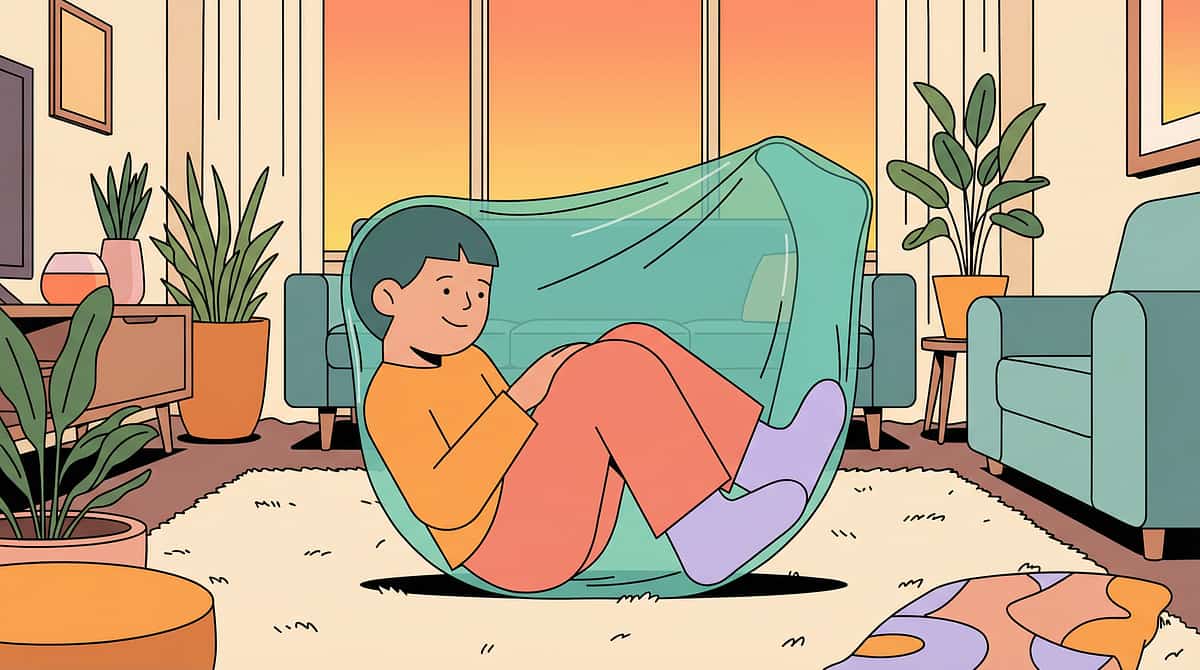
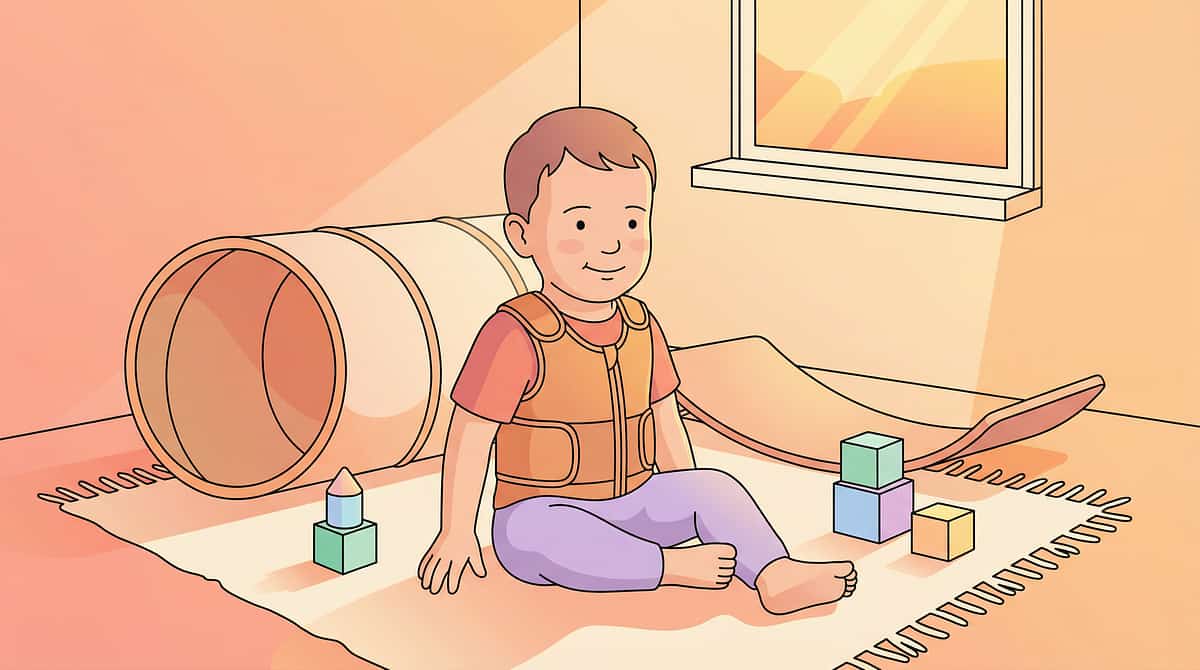
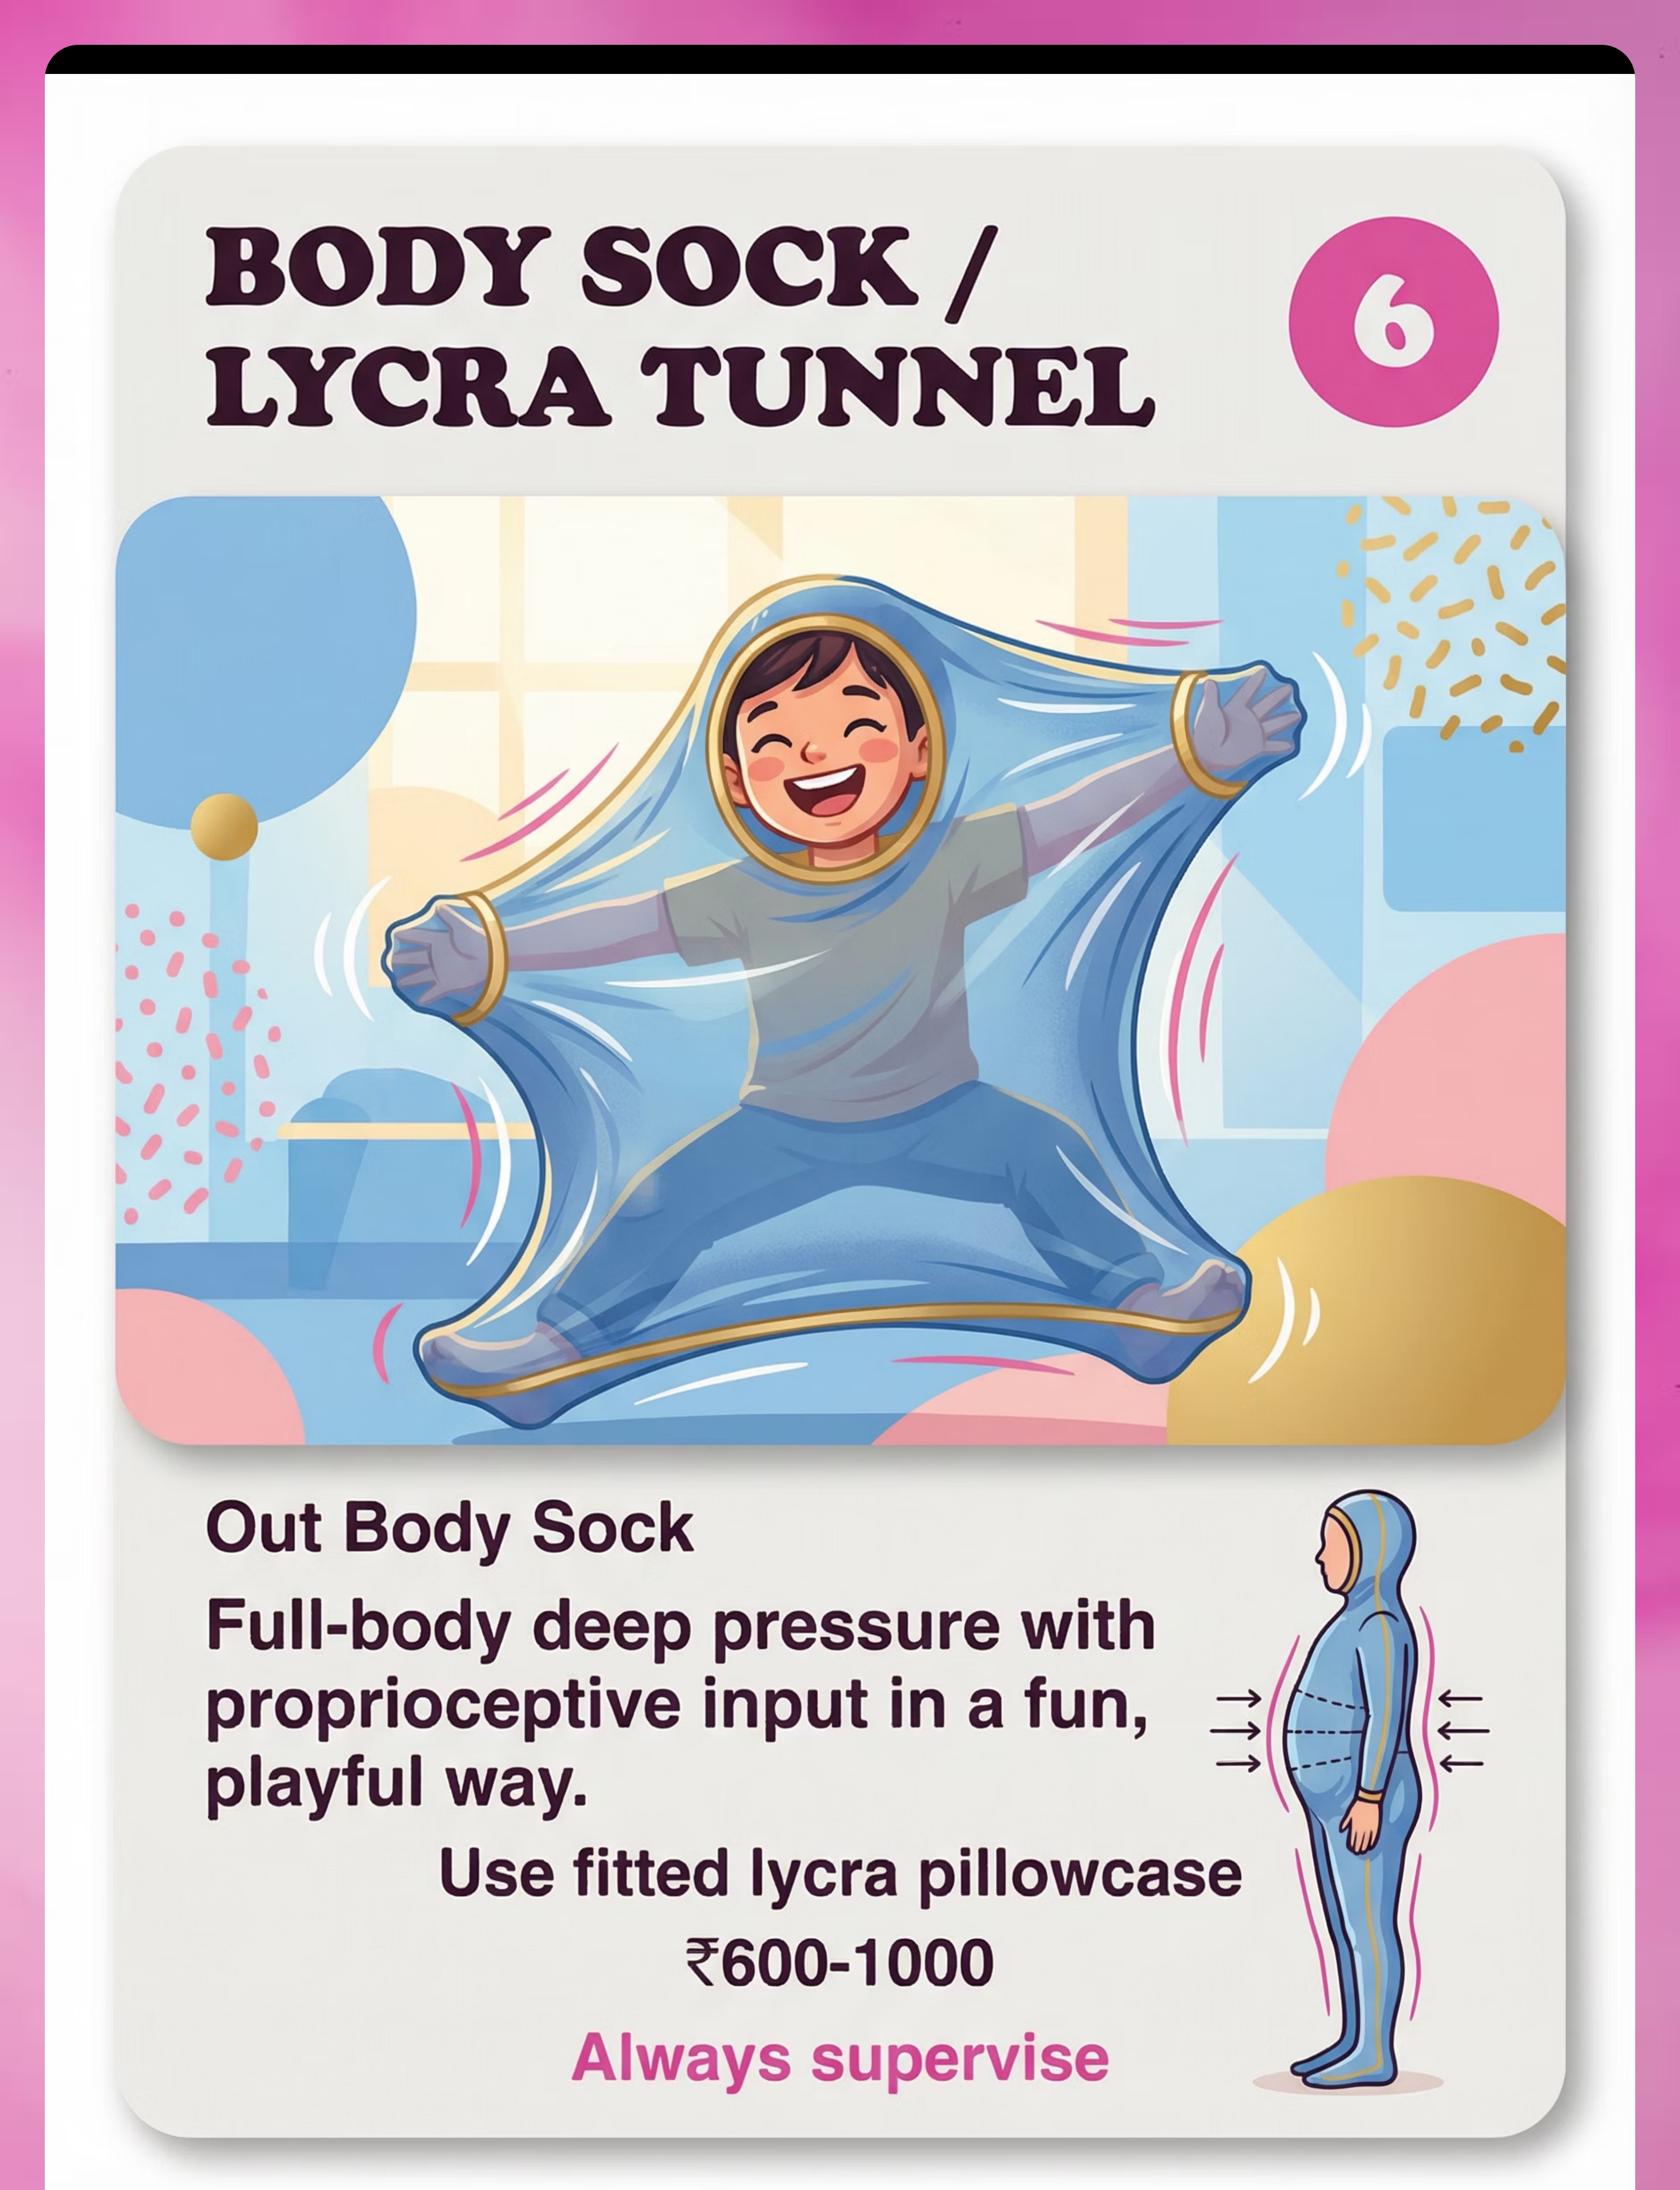
Material 6: Body Sock / Lycra Tunnel
Deep Pressure
DIY Option ✅
₹600–1,000
⚠️ Always Supervise
The body sock takes deep pressure to a whole-body, playful level. The child climbs inside a stretchy lycra sack and moves against the resistance — pushing arms and legs outward, rolling, curling. This full-body proprioceptive and tactile input is deeply organizing to the nervous system, and most children love it.
Therapeutic Benefits
- Full-body deep pressure input simultaneously
- Combines tactile desensitization with active movement
- Proprioceptive resistance calms sensory-seeking behavior
- Child-controlled — they can exit immediately
- Highly reinforcing — builds positive associations with body pressure
Safety & DIY Notes
Always supervise. Never leave the child unattended inside the body sock. Ensure the child can independently remove themselves or signal for help before introducing this tool.
DIY option: A large lycra pillowcase with a head hole carefully cut and edges secured works well. Stretchy fabric is the key property — cotton pillow cases are not suitable as they don't provide resistance.
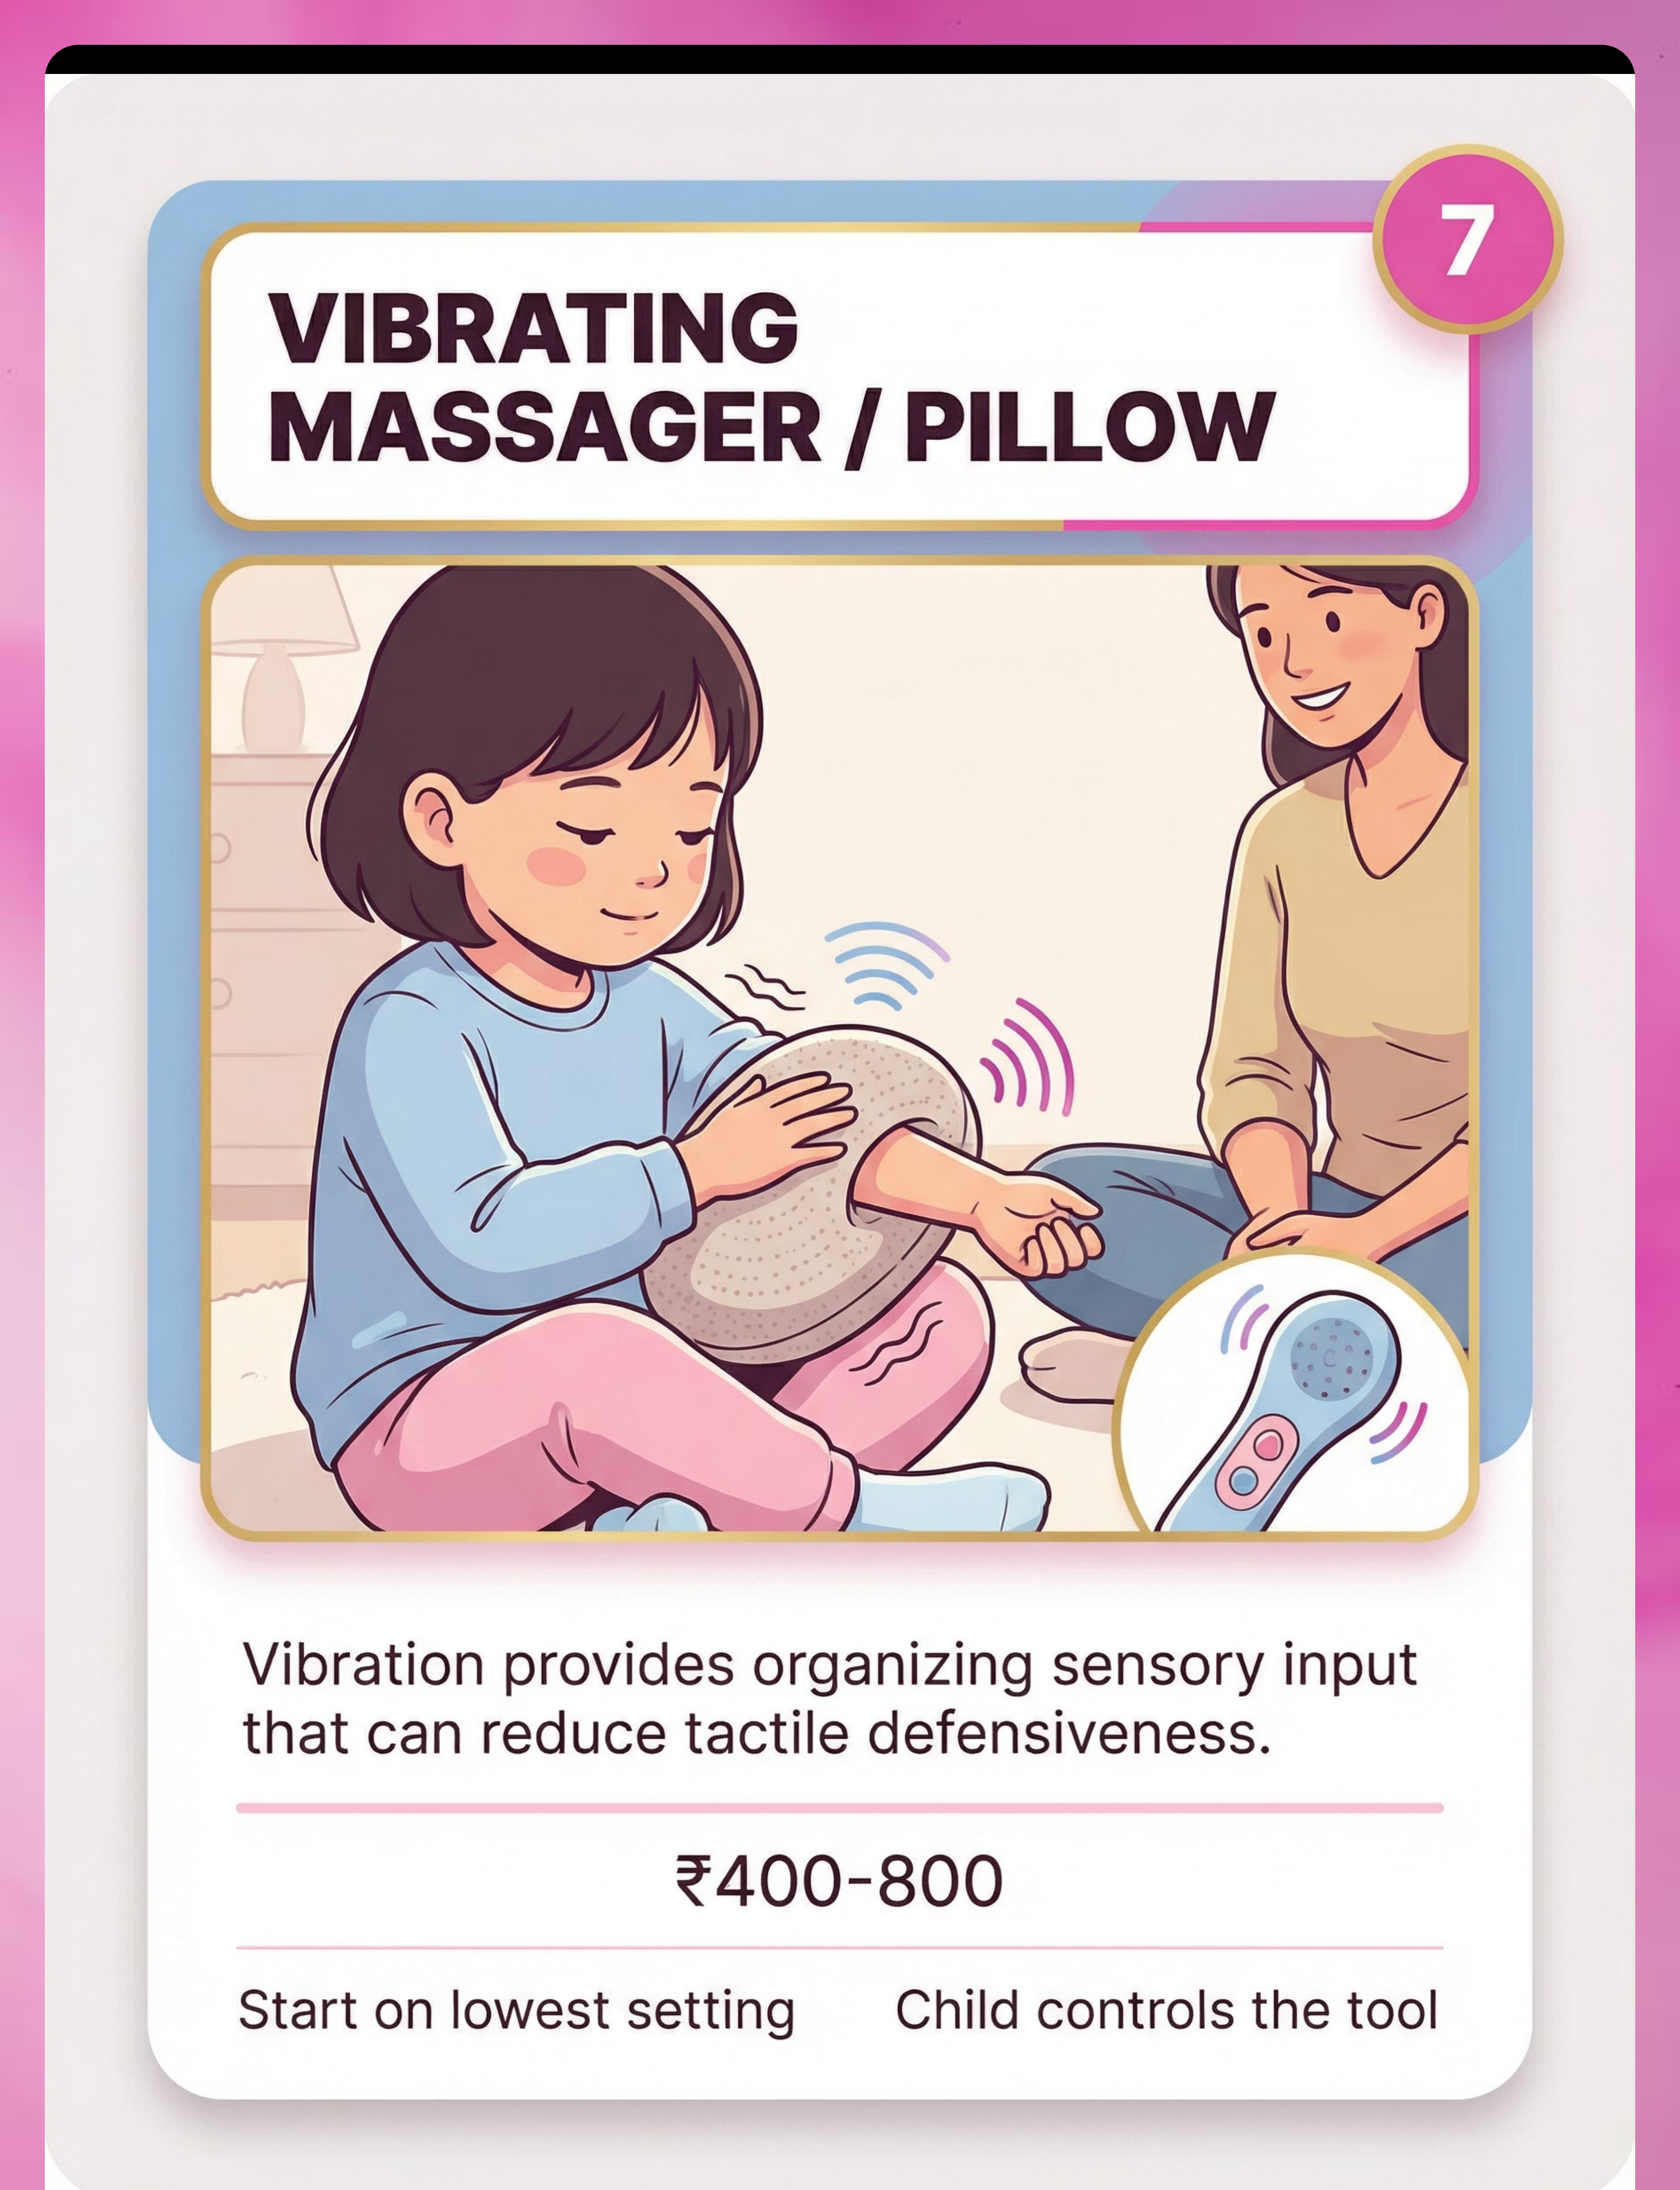
Material 7: Vibrating Massager / Pillow
Desensitization
₹400–800
Child Controls the Tool
Vibration provides a unique category of sensory input — rhythmic, predictable, and deeply organizing to the nervous system. For many children with tactile defensiveness, vibration is an easier entry point than direct hand touch because it's consistent, non-surprising, and can be completely self-controlled.
Start on the Lowest Setting
Always begin on the gentlest vibration level. Give the child full control over the on/off switch from the very first session.
Begin on Non-Sensitive Areas
Start with the back of the hand or forearm — areas typically less reactive. Progress toward more sensitive zones only as comfort is clearly established.
Child-Led Always
This is non-negotiable. The therapeutic value comes from the child feeling SAFE and IN CONTROL. The moment control is removed, vibration can become aversive.
Vibrating massagers work through a process called sensory habituation — repeated, predictable input gradually reduces the nervous system's alarm response. Consistent daily use of 5–10 minutes typically shows measurable tolerance changes within 2–3 weeks.
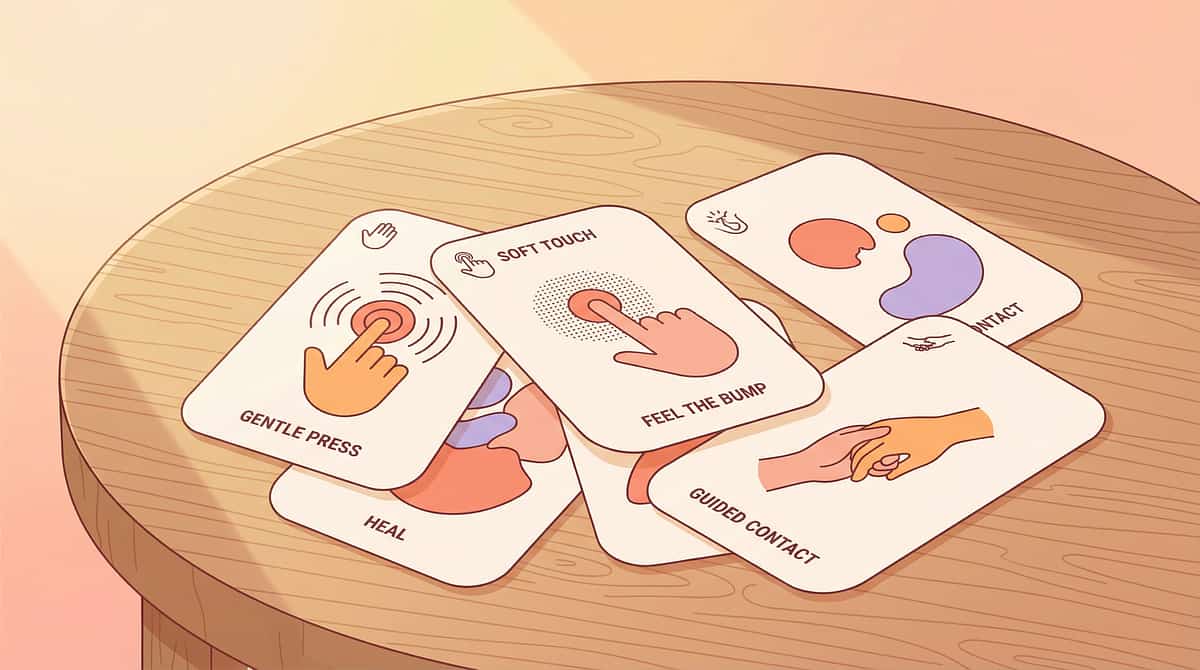
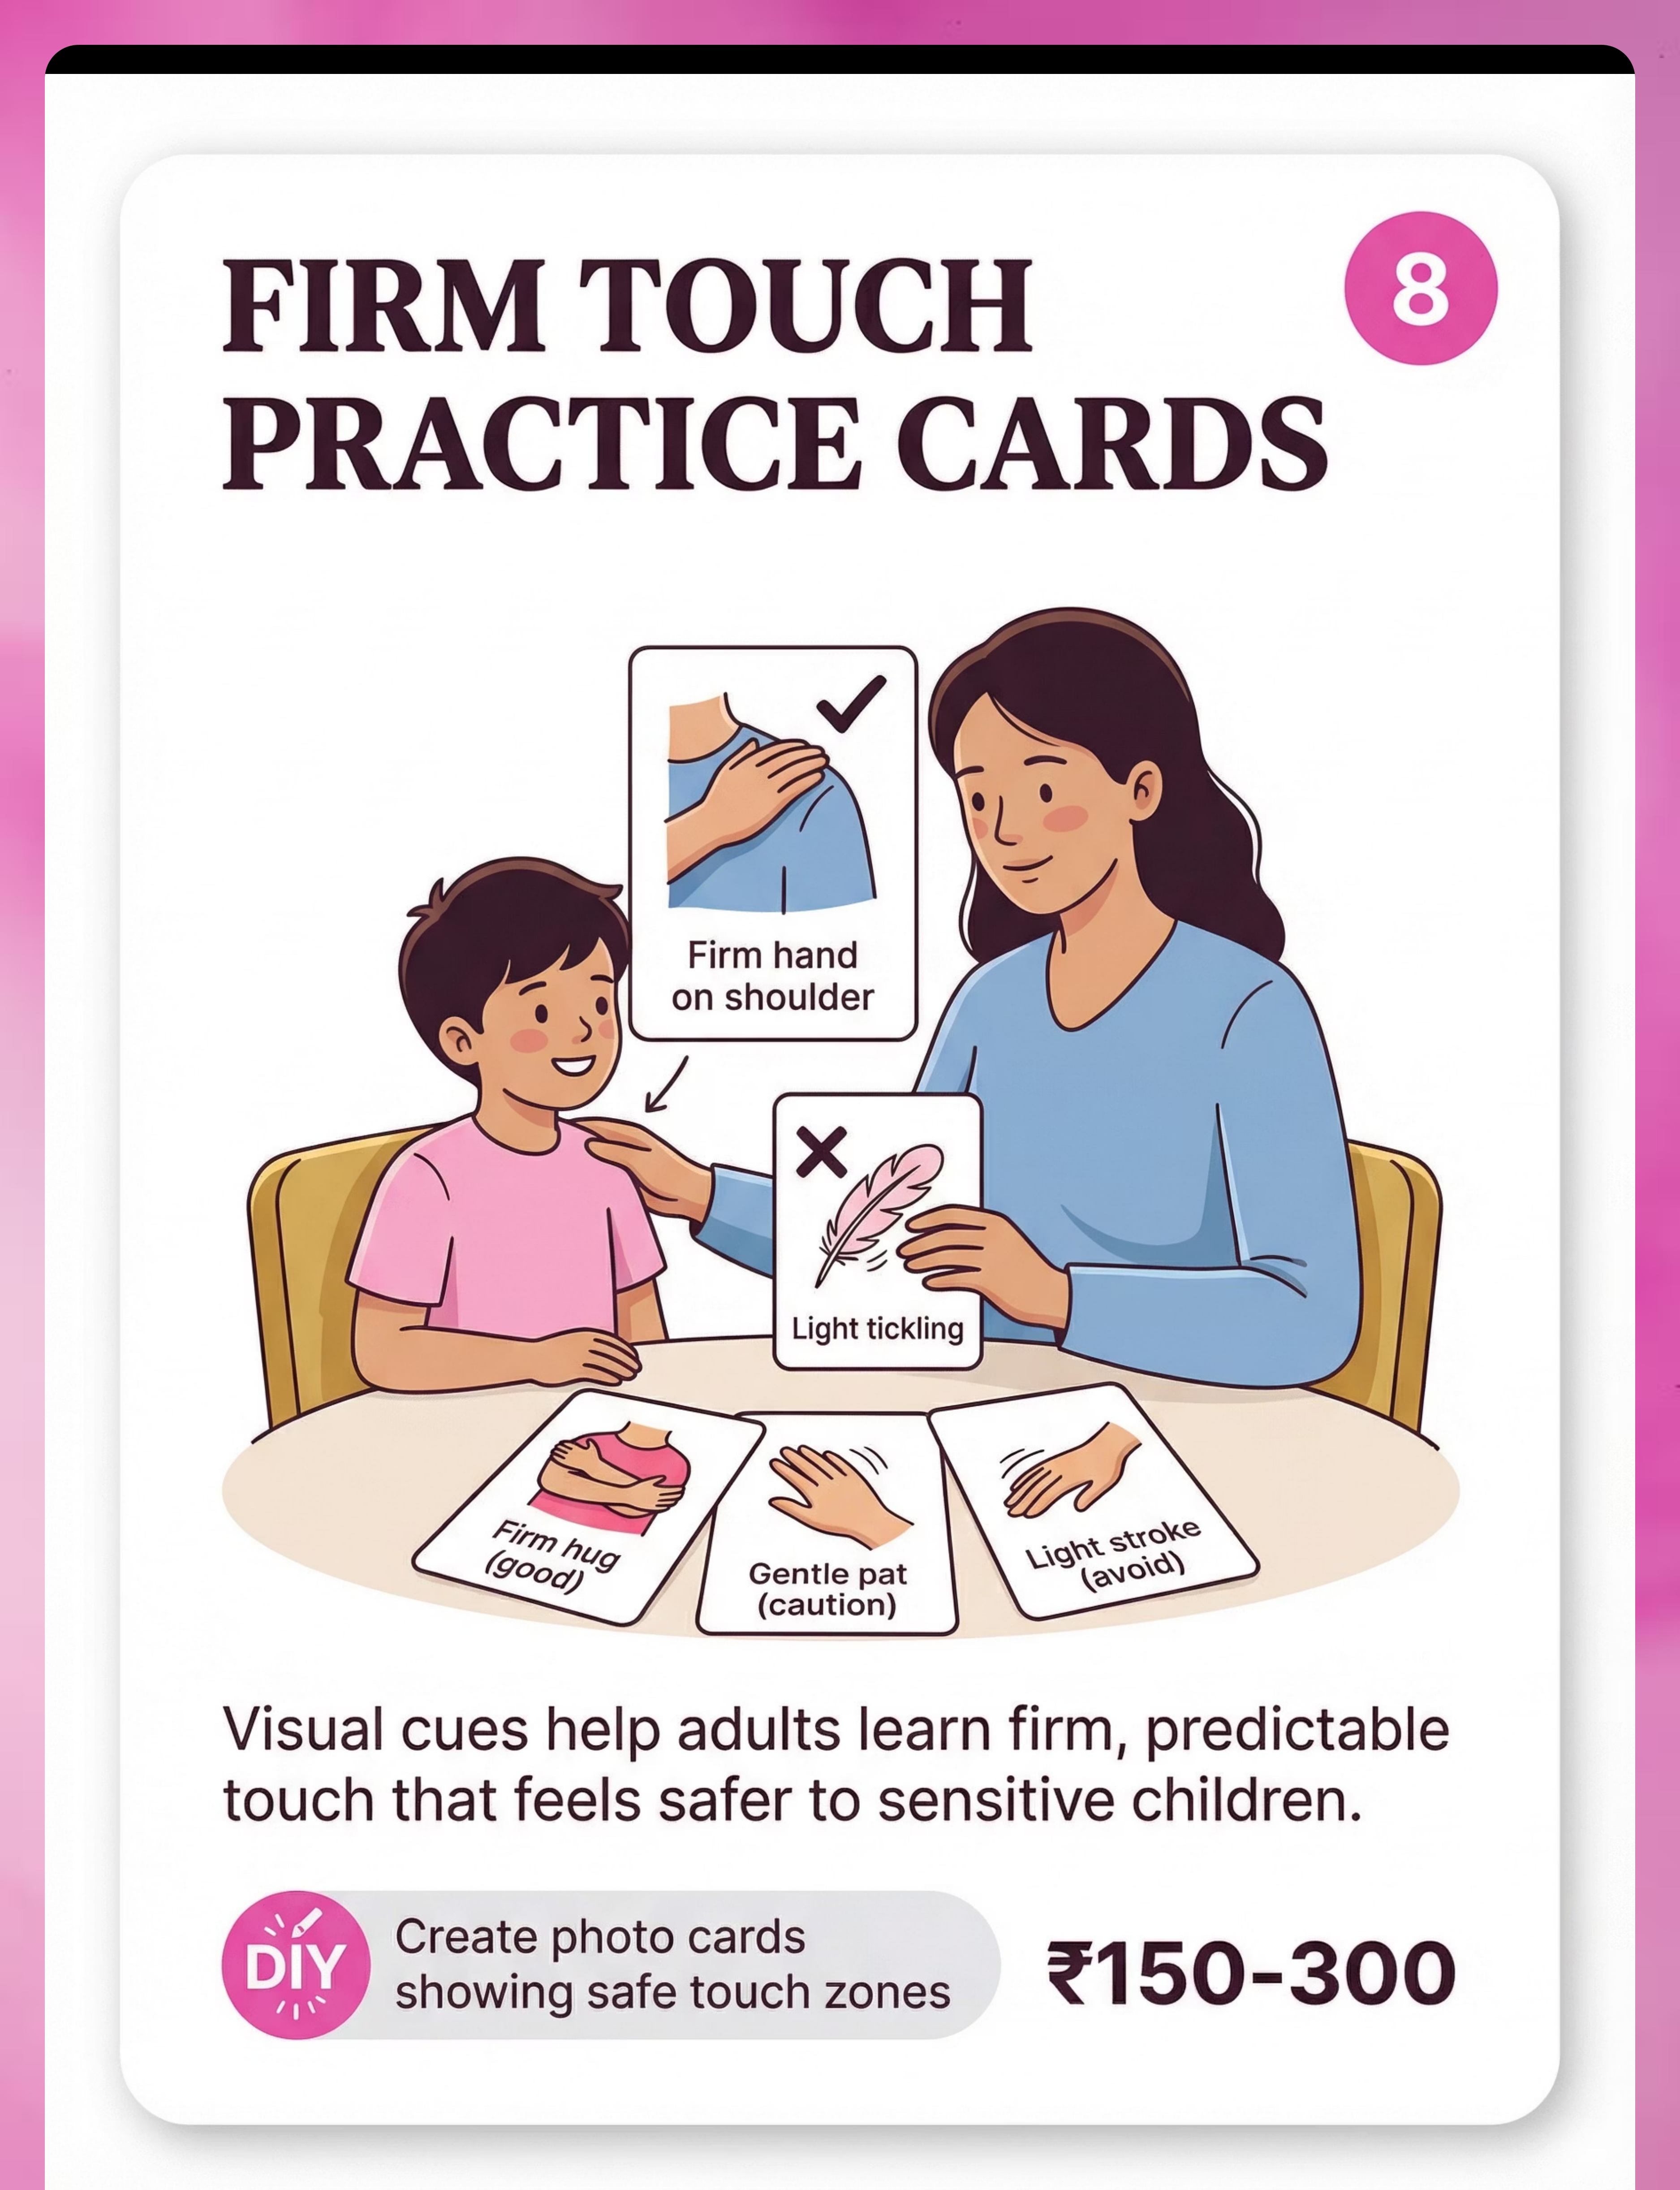
Material 8: Firm Touch Practice Cards
Environmental
DIY Friendly ✅
₹150–300
One of the most underappreciated contributors to tactile distress is unpredictable light touch from well-meaning adults. A gentle pat on the head, a soft stroke on the cheek, a feather-light touch on the shoulder — these feel safe to neurotypical adults but are intensely aversive to a touch-sensitive child. Firm Touch Practice Cards solve this by teaching everyone in the child's world how to touch safely.
The Touch Hierarchy
🟢Firm hug — deep pressure, predictable, calming. Approach from the front. Always safer than light touch.
🟡Firm hand on shoulder — approach from preferred side, apply firm steady pressure. Announce: "I'm going to touch your shoulder."
🔴Light stroke / tickle / pat — highly aversive for most touch-sensitive children. Replace with firm pressure alternatives.
How to Use Practice Cards
Create visual cards (photographs or simple drawings) showing each type of touch with a green/yellow/red indicator. Share with grandparents, teachers, babysitters, and siblings.
DIY: Print photos from your phone, laminate with tape, and place on the refrigerator. A visual reminder in shared spaces changes caregiver behavior more effectively than verbal instruction alone.
Practice with dolls or stuffed animals during play sessions before applying to real interactions.
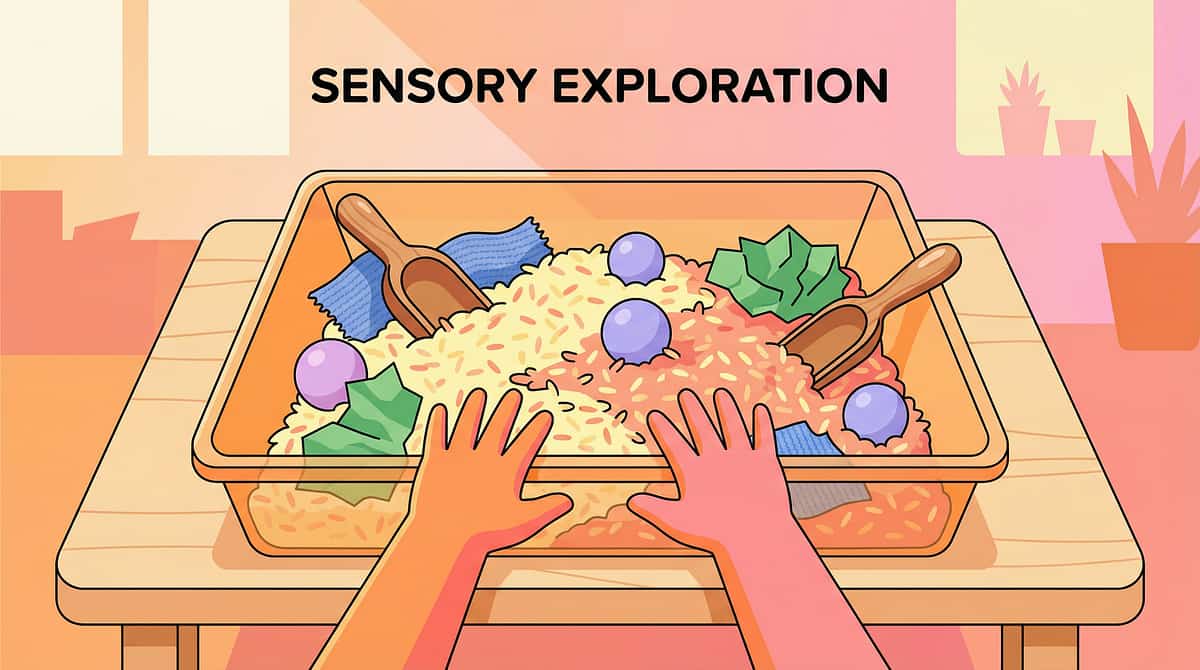
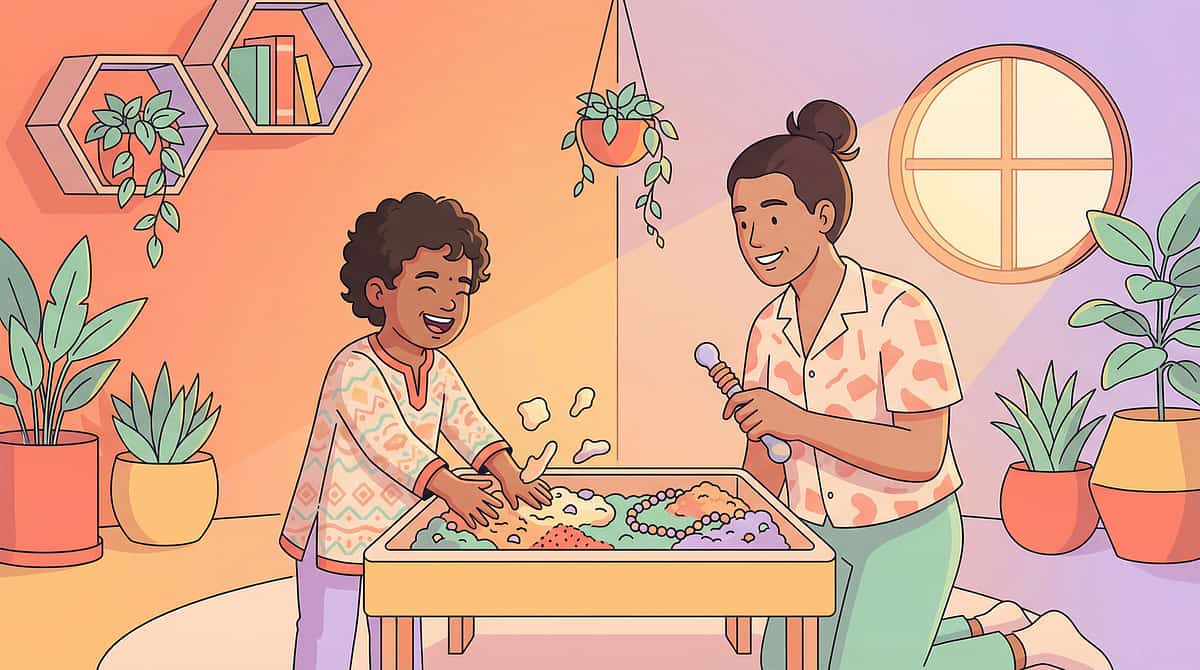
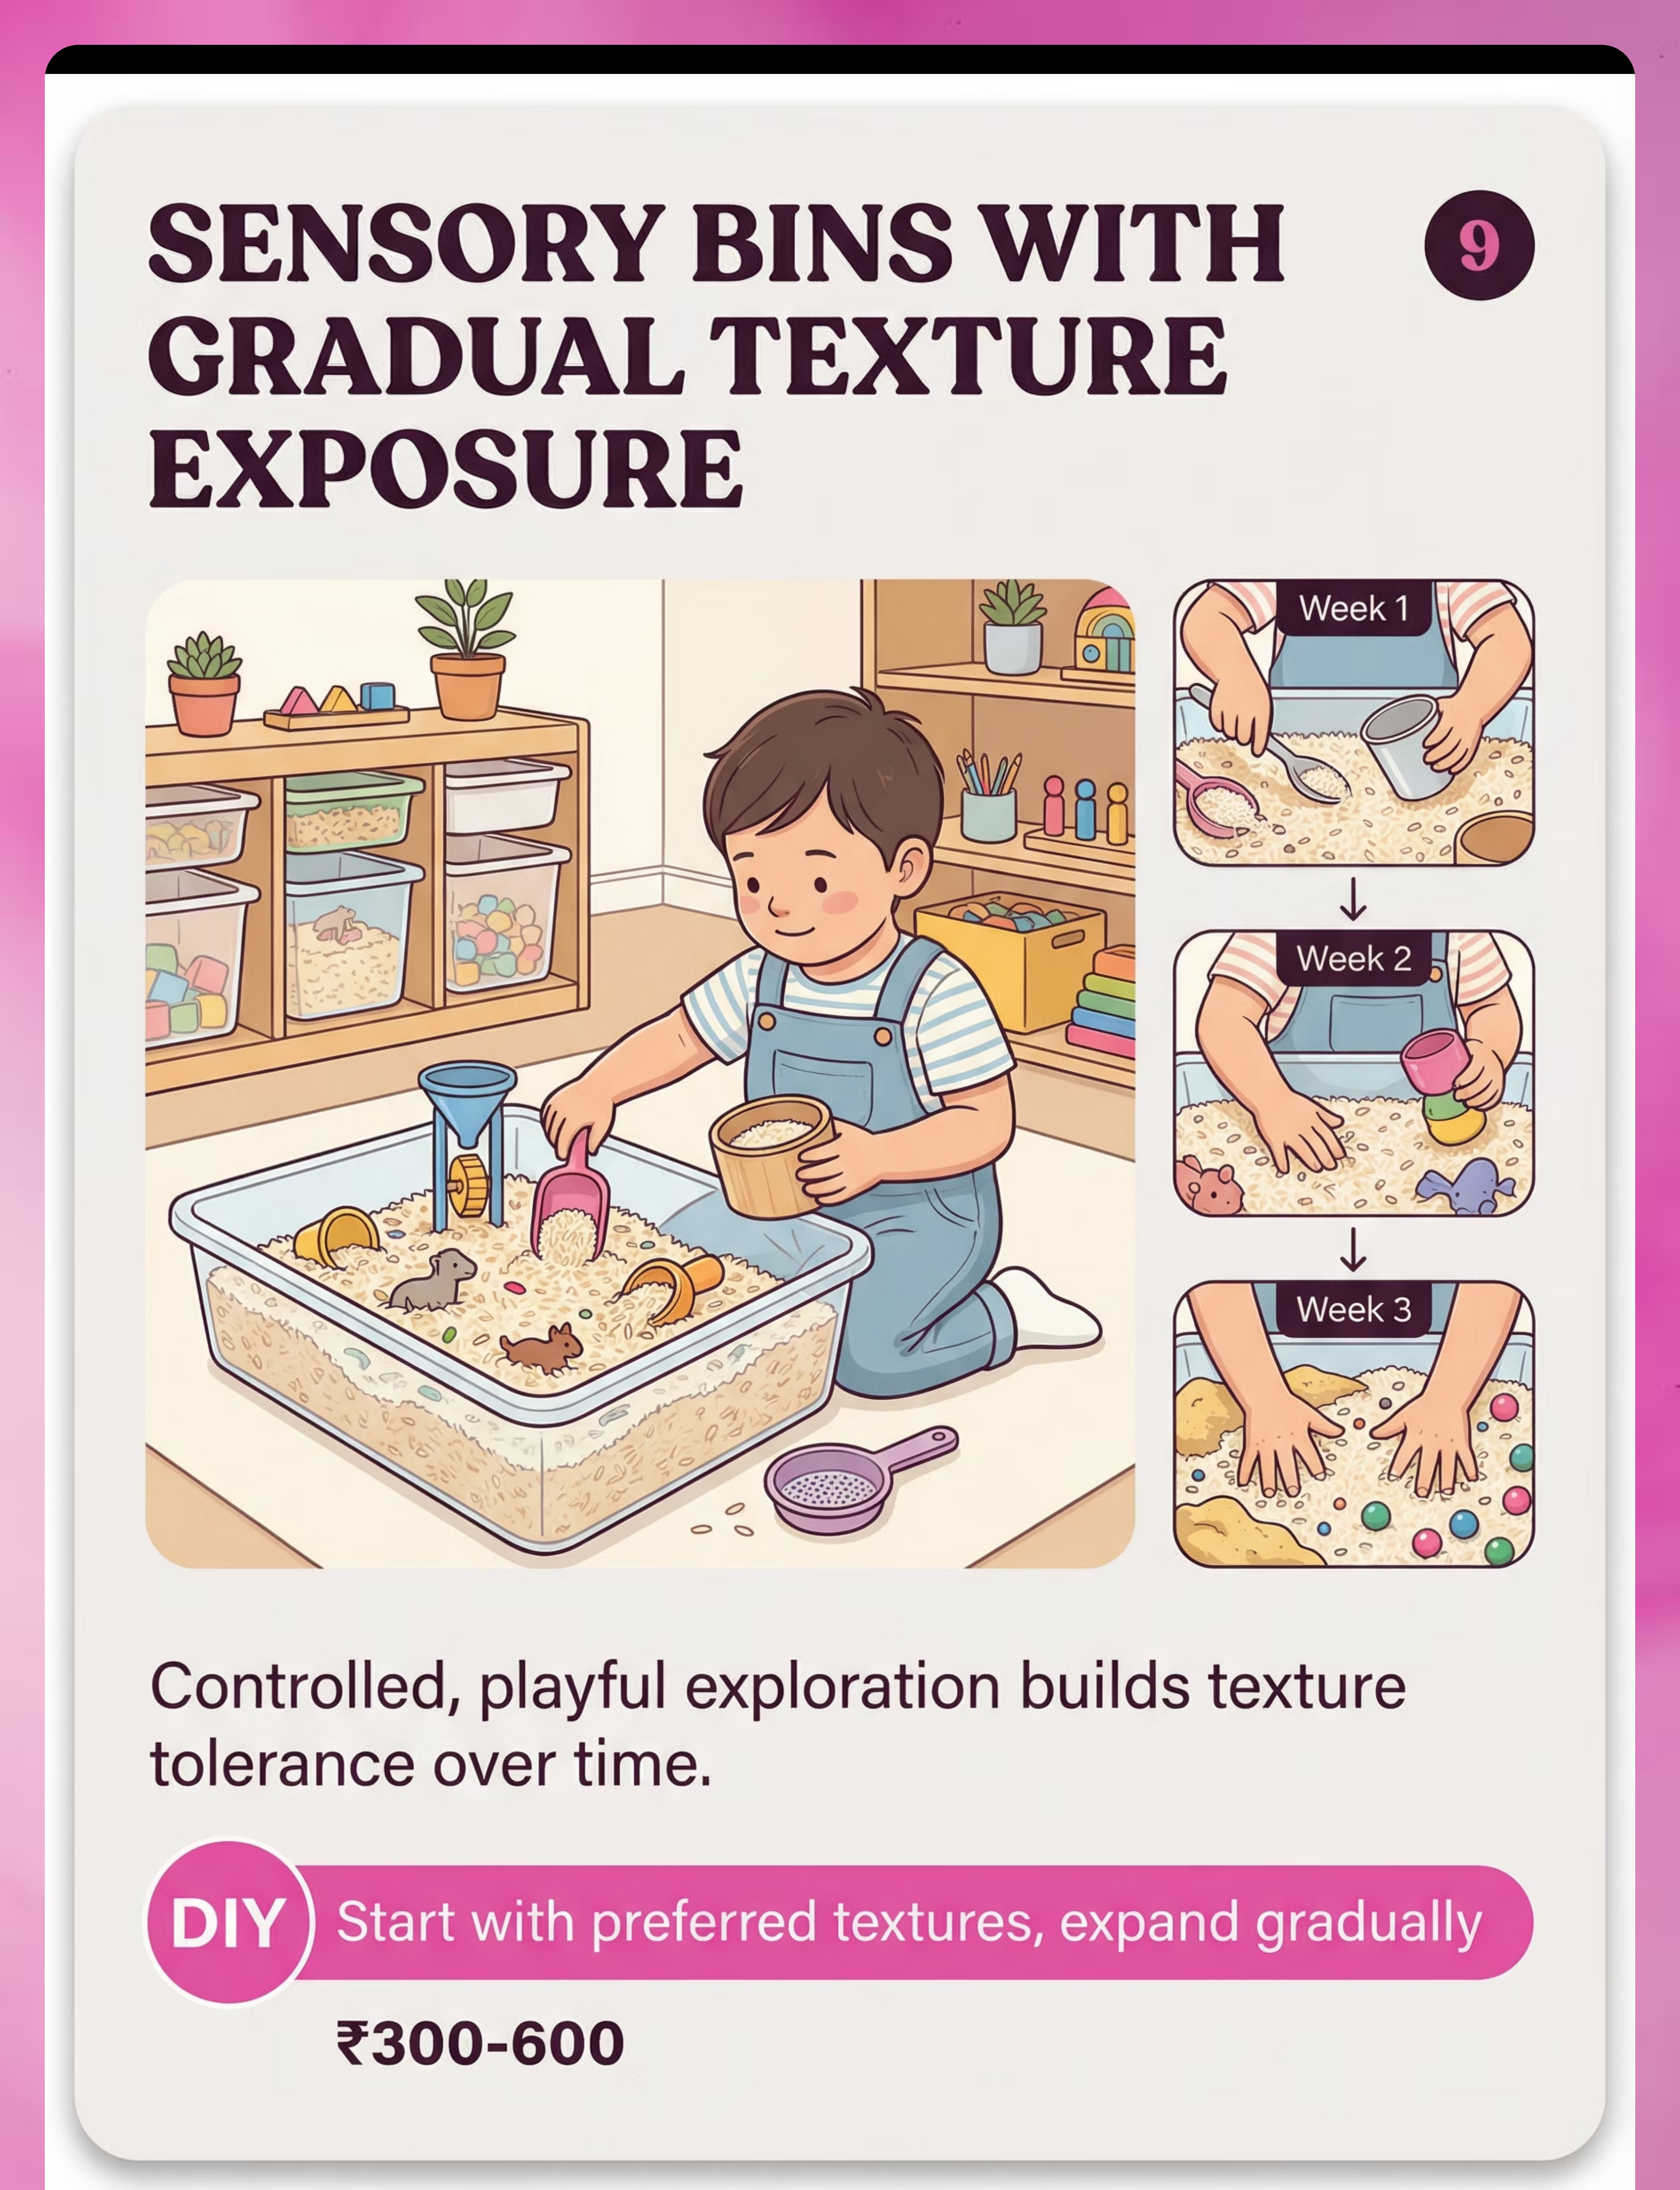
Material 9: Sensory Bins With Gradual Texture Exposure
Environmental
DIY Friendly ✅
₹300–600
Sensory bins are controlled, playful exploration stations where the child encounters new textures in a low-stakes, high-fun context. The gradual progression is the therapy — introducing one new texture at a time prevents overwhelm while continuously expanding the child's texture tolerance window.
01
Week 1: Dry Rice
Start with the most neutral, least threatening texture. Provide measuring cups, spoons, and small containers for digging and pouring. No demands — pure play.
02
Week 2: Add Dry Beans
Introduce a second texture alongside the familiar rice. The child can choose to engage with only the rice — the beans are present without pressure.
03
Week 3: Add a Soft Wet Texture
Introduce slightly moist textures — damp sand, cooked cooled pasta, or water beads. This is the biggest challenge step; proceed only if Week 2 tolerance is solid.
04
Week 4+: Child-Directed Exploration
Let the child request additions. Child-directed texture selection is the ultimate goal — it signals that touch exploration has become safe and even enjoyable.
⚠️Choking hazard note: Sensory bin items must be larger than a toilet paper roll diameter for children under 3 years old.
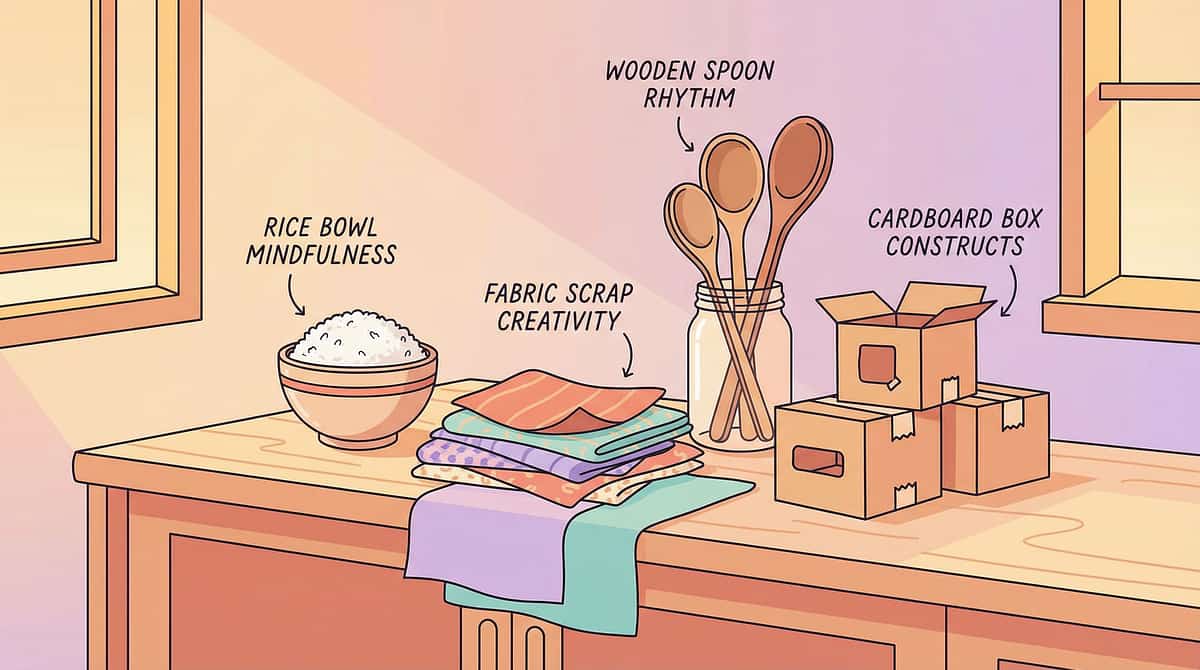
DIY & Substitute Options
The WHO Nurturing Care Framework mandates that interventions must be accessible regardless of economic status. Every technique on this page has a zero-cost version that uses the exact same neurological principle. You do NOT need to buy anything to start helping your child today.
Buy This | Make This (Zero Cost) | Why It Works | |
Weighted Lap Pad (₹800–1,500) | Fill a ziplock bag with dry rice or lentils (500g–1kg), seal, wrap in soft cloth | Same deep pressure principle — weight activates proprioceptors | |
Compression Wear (₹600–1,200) | Fitted lycra undershirt or tight swimwear under clothing | Constant circumferential pressure activates same receptors | |
Fidget Textures (₹150–400) | Collect: cotton balls, sandpaper scraps, silk scarf, rough sponge, smooth stone | Same graded texture exposure — variety is the principle | |
Body Sock (₹600–1,000) | Large lycra/stretchy pillowcase with head hole cut | Stretch resistance provides proprioceptive feedback | |
Sensory Bin (₹300–600) | Plastic container + dry rice + measuring cups | Identical texture exploration with household staples | |
Touch Practice Cards (₹150–300) | Print photos from phone or draw simple hand-on-shoulder pictures | Visual cue mechanism works regardless of production quality |
⚠️Red Line: The Wilbarger Brushing Protocol (Material 2) has NO safe DIY substitute. The specific brush and technique MUST be provided by a trained OT. Using the wrong brush or wrong pressure can increase defensiveness.
Safety First — Before You Begin
🔴 DO NOT PROCEED IF
Child has open wounds, rashes, sunburn, or skin infections on areas to be touched. Child is in active meltdown or severe dysregulation. Child has undiagnosed seizure activity. Weighted materials exceed 10% of child's body weight. Child shows respiratory distress with body sock or compression wear. Wilbarger Protocol has NOT been OT-demonstrated.
🟡 MODIFY IF
Child is tired, hungry, or recently ill — shorten to 5 minutes. Child has shown increased anxiety today — start with preferred material only. Trying a new material for the first time — introduce one new material per week. Vibrating tools: always start on lowest setting, child controls on/off.
🟢 SAFE TO PROCEED WHEN
Child is fed, rested, and in a calm-alert state. Environment is set up per the space preparation guide. You have read the full protocol at least once before first session. An adult is present and supervising throughout — mandatory for body sock and compression wear.
STOP IMMEDIATELY if: child's skin changes color under compression wear, child shows labored breathing with weighted materials, or child's distress escalates rather than diminishes within 2 minutes of material introduction.

Set Up Your Space
Spatial precision prevents 80% of session failures. The most common parent error is setting up in a busy room with the TV on. Your child's nervous system cannot process therapeutic touch input while simultaneously processing background sensory noise.
Room Setup Positions
1️⃣Child's position: Seated on floor mat or at child-sized table (center of clear space)
2️⃣Parent's position: Seated at same height, to the child's preferred side — beside or at 45° angle, NOT directly facing
3️⃣Material placement: Within arm's reach of child, on a low tray or mat
4️⃣Transition object: Child's preferred calming item visible but not in the active play zone
Environment Checklist
- ✅ Remove visual clutter — solid-colored mat or sheet on floor
- ✅ Reduce sound — TV off, fans low, windows closed to traffic noise
- ✅ Soft lighting — no overhead fluorescents; use side lamps or natural light
- ✅ Temperature: 22–26°C (cold increases tactile sensitivity)
- ✅ Prepare 2–3 materials only — not all 9 at once
- ✅ Timer visible to parent, not visible to child for first sessions
Pro Tip: Spatial precision prevents 80% of session failures. Prepare the space before bringing your child in. Let it feel calm and inviting — not clinical.

Is Your Child Ready? — Pre-Session Readiness Check
A 60-second readiness check before every session prevents the most common protocol failures. The best session is one that starts right — a forced session teaches your child that these materials mean distress, which is the opposite of what we need.
Child has eaten within the last 2 hours
Hunger amplifies sensory reactivity significantly.
Child has slept adequately — no fatigue signs
Fatigue lowers the nervous system's regulation capacity.
No meltdown in the last 30+ minutes
The nervous system needs recovery time after dysregulation episodes.
Child is not ill
Illness — fever, stomach upset, pain — intensifies all sensory sensitivity.
Child is in a calm-alert state
Eyes open, responsive, engaged — not zoned out or agitated.
Environment set up and materials prepared
Space prepped per the setup guide. 2–3 materials ready within reach.
✅ All Checked → GO
Proceed to Step 1: The Invitation
🟡 1–2 Unchecked → MODIFY
One preferred material only. Shorten to 5 minutes. Skip any new introduction.
🔴 3+ Unchecked → POSTPONE
Offer preferred calming activity instead. Try again tomorrow.
Step 1: The Invitation
Step 1 of 6
⏱️ 30–60 seconds
What You Say: "Look what I have! Do you want to see something cool?" Place the material on the floor or table between you. Do NOT place it on the child. Touch it yourself first. Smile. Show it's safe through your own body language.
Body Language That Signals Safety
- Relaxed shoulders, open posture
- Sitting at child's eye level — never looming
- Voice: warm, calm, slightly playful — not instructional
- No rushing. No "come on, try it."
Reading Your Child's Response
✅Acceptance: Glances at material, reaches toward it, moves closer, asks "what's that?", touches briefly, or simply doesn't move away.
⚠️Resistance: Turns away, moves backward, says "no," covers body, shows anxiety. Response: "That's okay! It'll be here when you're ready." Leave material visible. Try again in 5 minutes or next session. NEVER force contact.
Step 2: The Engagement
Step 2 of 6
⏱️ 1–3 minutes
Material Introduction Script (example: Weighted Lap Pad): "I'm going to put this on my lap. See? It feels nice and warm." Model: Place the pad on YOUR lap first. Pat it. Show comfort. Then: "Want to try? I'll put it right here on your lap — you can take it off whenever you want."
How to Present: Slow movement — no sudden placement. Approach from the child's preferred side. Let the child see the material approach. Use firm, steady placement — light touch is MORE triggering than firm pressure.
🟢 Engagement
Child touches, holds, adjusts, leaves it on lap → Continue to Step 3. Reinforce immediately: "You're so brave! Look at you!"
🟡 Tolerance
Child allows it but seems neutral or slightly tense → Stay at this step. Don't add anything new. Praise tolerance specifically.
🔴 Avoidance
Child pushes away, stands up, shows distress → Remove immediately. Say "All done! Great job looking at it." Return to Step 1 next session.
Reinforcement timing is critical: The MOMENT the child touches or tolerates the material — within 3 seconds — deliver specific, enthusiastic praise. This is what builds the positive neural association.
Step 3: The Therapeutic Action
Step 3 of 6
⏱️ 3–8 minutes
The child is now in contact with the material. Your job is to maintain the exposure at a comfortable level while gently expanding the boundary. This is where the nervous system recalibrates.
Deep Pressure Materials
Weighted Lap Pad, Compression Wear, Body Sock: Let the child sit with the material for 3–8 minutes during a preferred activity. The deep pressure does the work passively — the weight/compression is the therapeutic input. You don't need to do anything additional.
Desensitization Materials
Therapy Brush, Fidget Textures, Vibrating Tools: Guide 3–5 touches of varied intensity on non-sensitive areas first (back of hand, forearm). Move toward sensitive areas only if child shows clear comfort. Never start at the most sensitive zone.
Environmental Materials
Seamless Clothing, Touch Cards, Sensory Bins: Embedded into daily routines rather than isolated sessions. Seamless clothing is worn all day. Touch cards are practiced during play. Sensory bins are 5–10 minute exploration stations.
❌ Common errors: placing weighted pad without warning; using light, feathery touch (MORE triggering than firm); rushing through textures. ✅ Correct approach: firm, predictable, slow, child-led pace.
Step 4: Repeat & Vary
Step 4 of 6
⏱️ 3–5 minutes
Repetition Guidance
Target: 3–5 exposures per session — but always read your child, not a fixed number.
Variation: Alternate between 2 materials within the same session (e.g., weighted lap pad → fidget texture → weighted lap pad).
Golden principle: 3 good repetitions are worth more than 10 forced repetitions. Quality over quantity, every session.
Satiation Indicators — When to Stop
Your child will communicate readiness to stop. Respect these signals immediately:
- Turns attention away from materials
- Pushes material aside gently
- Requests a different activity
- Shows restlessness unrelated to the material
- Says "all done" or equivalent communication
Satiation is NOT failure. It is the nervous system communicating: "I've processed enough input for now." Respecting it builds trust.
Research anchor: SI therapy dosage of 2–3 sessions/week for 8–12 weeks is the typical evidence-based protocol. Pinnacle clinical data confirms this range as optimal for home administration.

Step 5: Reinforce & Celebrate
Step 5 of 6
⏱️ 30–60 seconds
"Wow! You touched the spiky ball! That was so brave!" — Specific, immediate, enthusiastic. This is exactly what effective reinforcement sounds like.
Verbal Praise
Always. Free. Immediate. The most powerful reinforcer available. Make it specific: name the exact behavior you're celebrating.
Preferred Activity Access
3 minutes of tablet time, a favorite toy, or a preferred game. Deliver within seconds of the target behavior.
Token / Sticker Chart
Sticker on chart → earns a bigger reward after 5 sessions. Visual progress charts are highly motivating for young children.
Physical Reinforcer (If Tolerated)
High five, firm hug, or back pat — IF the child tolerates it. Never use a physical reinforcer that itself triggers defensiveness.
The Golden Rule: Celebrate the ATTEMPT, not just the success. A child who looked at the sensory bin but didn't touch it has still moved closer to tolerance. That's real progress worth celebrating.
Step 6: The Cool-Down
Step 6 of 6
⏱️ 1–2 minutes
The cool-down creates a predictable ending ritual that helps your child's nervous system transition smoothly back to baseline activity. Abrupt endings can leave the system dysregulated — a gentle transition maintains the gains made during the session.
Transition Warning Script
"Two more touches, then all done!"
"One more... and... all done! Great work today!"
Material Put-Away Ritual
If child can participate: "Can you help me put the lap pad back in its spot?" This creates closure and routine.
If child cannot participate, narrate: "I'm putting our sensory tools away. We'll use them again tomorrow."
Cool-Down Activity
Offer the child's preferred calming input: deep pressure hug (if tolerated), quiet preferred toy, soft music, or dim lights. Let the nervous system return to baseline before transitioning to the next activity.
If Child Resists Ending
Offer one more exposure (maximum), then warm and firm: "I know you're having fun. We'll do this again tomorrow. Right now it's time for [next activity]." Use a visual timer if ending resistance is recurring.
Visual supports are evidence-based practice for autism (NCAEP, 2020). A simple visual timer or picture schedule showing "sensory time → snack → play" can reduce ending resistance by 60% or more.
Capture the Data — Right Now
⏱️ Within 60 Seconds of Session End
Sixty seconds of data now saves hours of guessing later. Simple, consistent tracking is what separates families who plateau from families who see continuous progress. Your data also feeds GPT-OS® to personalize your child's next recommendation.
1
Which Materials Used?
Check from your list of 9. Even noting "LP + FB" (Lap Pad + Fidget Ball) takes 5 seconds.
2
Tolerance Level: 1–5
1 = refused contact | 2 = brief touch then withdrew | 3 = tolerated with mild discomfort | 4 = tolerated comfortably | 5 = engaged/enjoyed
3
Session Duration (minutes)
Total active engagement time. Even "LP-4-12min" (Lap Pad, tolerance 4, 12 minutes) in your phone notes is enough.
"60 seconds of data now saves hours of guessing later." — Your data contributes to the global evidence base that helps every child like yours.

What If It Didn't Go as Planned?
Session difficulties are not failures — they are data. Every imperfect session teaches you something precise about your child's nervous system. Here are the five most common challenges and exactly what to do next.
Problem 1: Child Refused to Touch Any Material
Why: First exposure is overwhelming. The child needs proximity before contact.
Fix: Next session, place materials 3 feet away. Let the child observe you interacting with them. Reduce expectation to "being in the same room as the material."
Fix: Next session, place materials 3 feet away. Let the child observe you interacting with them. Reduce expectation to "being in the same room as the material."
Problem 2: Child Became Distressed and Cried
Why: Material was too intense or introduced too quickly.
Fix: Next session, start with the child's most tolerated texture. Reduce exposure to 10 seconds. Build from success, not from challenge.
Fix: Next session, start with the child's most tolerated texture. Reduce exposure to 10 seconds. Build from success, not from challenge.
Problem 3: Child Loved One Material but Refused All Others
Why: This is normal and positive. The child has identified their "safe entry point."
Fix: Build 3–5 sessions on the preferred material ONLY. Then introduce a second material alongside the preferred one — not replacing it.
Fix: Build 3–5 sessions on the preferred material ONLY. Then introduce a second material alongside the preferred one — not replacing it.
Problem 4: Session Was Going Well, Then Sudden Meltdown
Why: Sensory satiation reached suddenly. The nervous system hit its threshold without warning.
Fix: End immediately. No shame. Next session, cut duration by 50% and build back gradually.
Fix: End immediately. No shame. Next session, cut duration by 50% and build back gradually.
Problem 5: Parent Felt Frustrated or Discouraged
Why: Expectations were set too high for early sessions.
Fix: Progress in tactile desensitization is measured in SECONDS of tolerance gained. If your child touched a texture for 3 seconds longer than yesterday — that is real neural pathway formation.
Fix: Progress in tactile desensitization is measured in SECONDS of tolerance gained. If your child touched a texture for 3 seconds longer than yesterday — that is real neural pathway formation.
"Session abandonment is not failure — it's data." If the child became severely distressed (inconsolable crying >5 minutes, self-injury, breath-holding): provide deep pressure if tolerated, move to safe calm space, do NOT retry today. Three severe sessions in a row → book teleconsultation immediately.
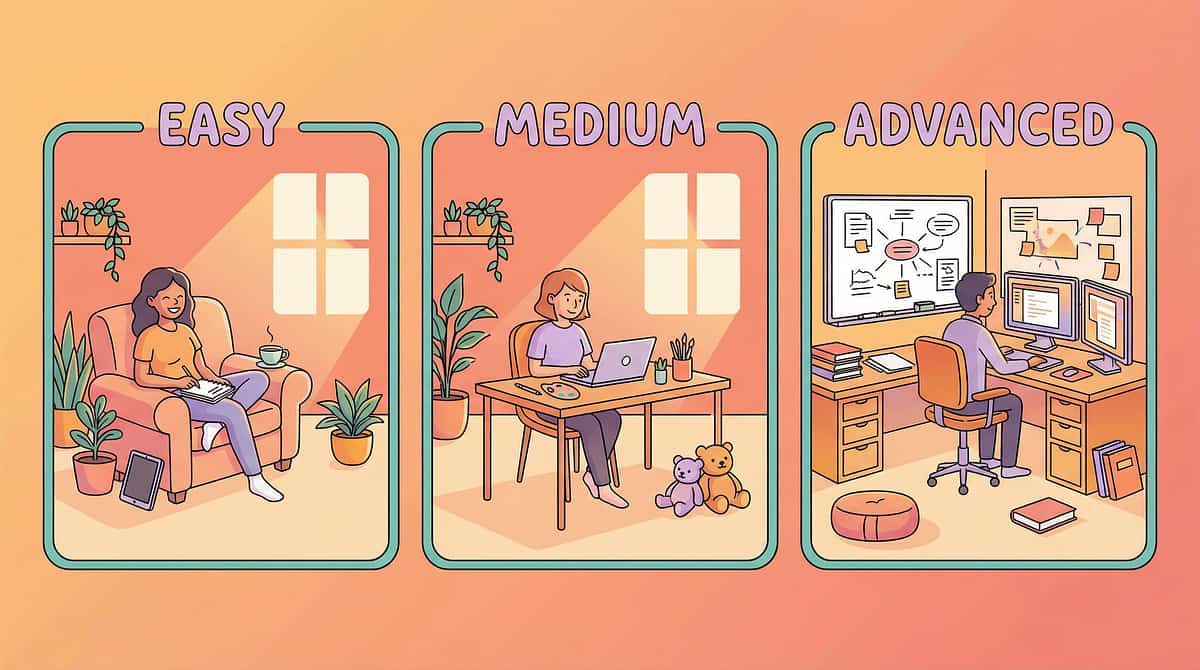
Adapt & Personalize — Setting the Right Difficulty
No two children are identical. The protocol adapts to your child's profile, not the other way around. Use the difficulty spectrum below to calibrate every session to exactly the right challenge level.
1
EASIER Version
Bad days, early sessions, younger children. One material only (most preferred). Session: 5 minutes. No new textures. Deep pressure only (passive). Zero demand beyond proximity.
2
STANDARD Version
Typical sessions. 2–3 materials. Session: 10–15 minutes. One new texture per week. Mix deep pressure + desensitization. Active child participation encouraged.
3
HARDER Version
Breakthroughs, older children, advanced tolerance. 4–5 materials including novel textures. Session: 15–20 minutes. Texture challenges with eyes closed. Community settings: park, school, playdates.
🔵 Sensory SEEKER (craves touch)
Emphasize Materials 1, 4, 6 (weighted, compression, body sock). Increase weight and pressure. Add movement-based activities WITH materials. This child needs more input, not less.
🔴 Sensory AVOIDER (flinches, withdraws)
Emphasize Materials 3, 8, 5 (seamless clothing, touch cards, fidget textures). Go extremely slowly. Child controls ALL contact. Never surprise with new textures. Start with 10-second exposures.

Week 1–2: What to Expect
Act IV: The Progress Arc
Early Stage
Weeks 1–2 test your patience more than your child's tolerance. You may feel "Is this working?" The honest answer: YES — but the nervous system doesn't transform in 14 days. The changes happening now are invisible and foundational. Trust the process. Trust the data.
What Progress Looks Like at This Stage
Child tolerates being in the same room as the material without distress. Child briefly touches the material (even 2–3 seconds counts). Reduced intensity of negative reaction (from screaming to frowning — that's real progress). Child allows weighted lap pad for 1–2 minutes during a preferred activity.
What Is NOT Progress Yet — And That's Okay
Child voluntarily seeking out materials. Tolerating multiple textures comfortably. Zero meltdowns during daily routines. Wearing new clothing types without resistance. These come later — in weeks 4–8.
The metric that matters: "If your child tolerates the material for 3 seconds longer than last week — that is real, measurable neural pathway formation."

Week 3–4: Consolidation Signs
Progress: ~40%
Something is shifting. You can feel it in sessions — your child moves toward materials more willingly. They remember them. They may even ask for them. The somatosensory cortex is literally rewiring. This is neuroplasticity in action.
Child Anticipates the Session
Moves toward materials, asks for them, shows excitement at setup time. This is a profound indicator — the nervous system has tagged these materials as "safe."
Tolerance Duration Doubles or Triples
If Week 1 tolerance was 2 minutes, Week 3–4 sees 5–6 minutes becoming comfortable. Track this with your simple data system.
Reduced Resistance in ONE Daily Routine
Tolerates shirt tags better, or accepts the bathtime washcloth with less distress. Generalization is beginning.
Spontaneous Self-Regulation Emerging
Child reaches for weighted pad when upset without being prompted. This is the earliest seed of independent self-regulation — celebrate it loudly.
Parent milestone: You may notice you're more confident too. The anxiety of early sessions has softened. You're reading your child's cues faster. That's YOUR neuroplasticity — you're becoming a better sensory partner.

Week 5–8: Mastery Indicators
Progress: ~75%
Your child is approaching mastery. The neural pathways established over the first four weeks are now consolidated and beginning to generalize — appearing in new settings, with new people, in daily routines that were once battlegrounds.
Material Mastery Criteria
Tolerates 6+ of the 9 materials at comfort level 4–5 for 10+ minutes. This is the benchmark for "graduated from this material."
Daily Routine Improvement
Wears seamless clothing without daily battles. Participates in sensory bin play with 3+ textures. 50%+ reduction in grooming routine meltdowns from baseline.
Social Generalization
Tolerating incidental touch from peers during play. Accepting firm touch from familiar adults. Skill appearing at school, grandparent's house, and playground.
Maintenance Check
Does progress persist when you skip 2–3 sessions? If YES → neural pathway consolidated. If regression occurs within a day → continue protocol, pathway needs strengthening.
🏆 Mastery Unlocked — Ready for Next Level

Celebrate This Win
You Did This.
Your child grew because of your commitment — your patience, your consistency, your willingness to show up every single day and offer a weighted lap pad one more time when it would have been easier to stop.
You started with a child who flinched when you reached for their hand. Over 5–8 weeks of daily, consistent exposure to 9 carefully selected materials, your child's nervous system learned a new truth: touch can be safe. Touch can be comforting. Touch can be something they choose.
🫙 Create a "Touch Victories" Jar
Write down every new texture tolerated, every new clothing item worn, every time your child held your hand in public. Read them together on difficult days. These invisible wins are the mountain.
📸 Document the Milestone
Take a photo of your child engaging with their favorite material. Write the date and one sentence: "Today, [name] held the textured ball for 5 minutes and smiled." These records become your family's proof of progress.

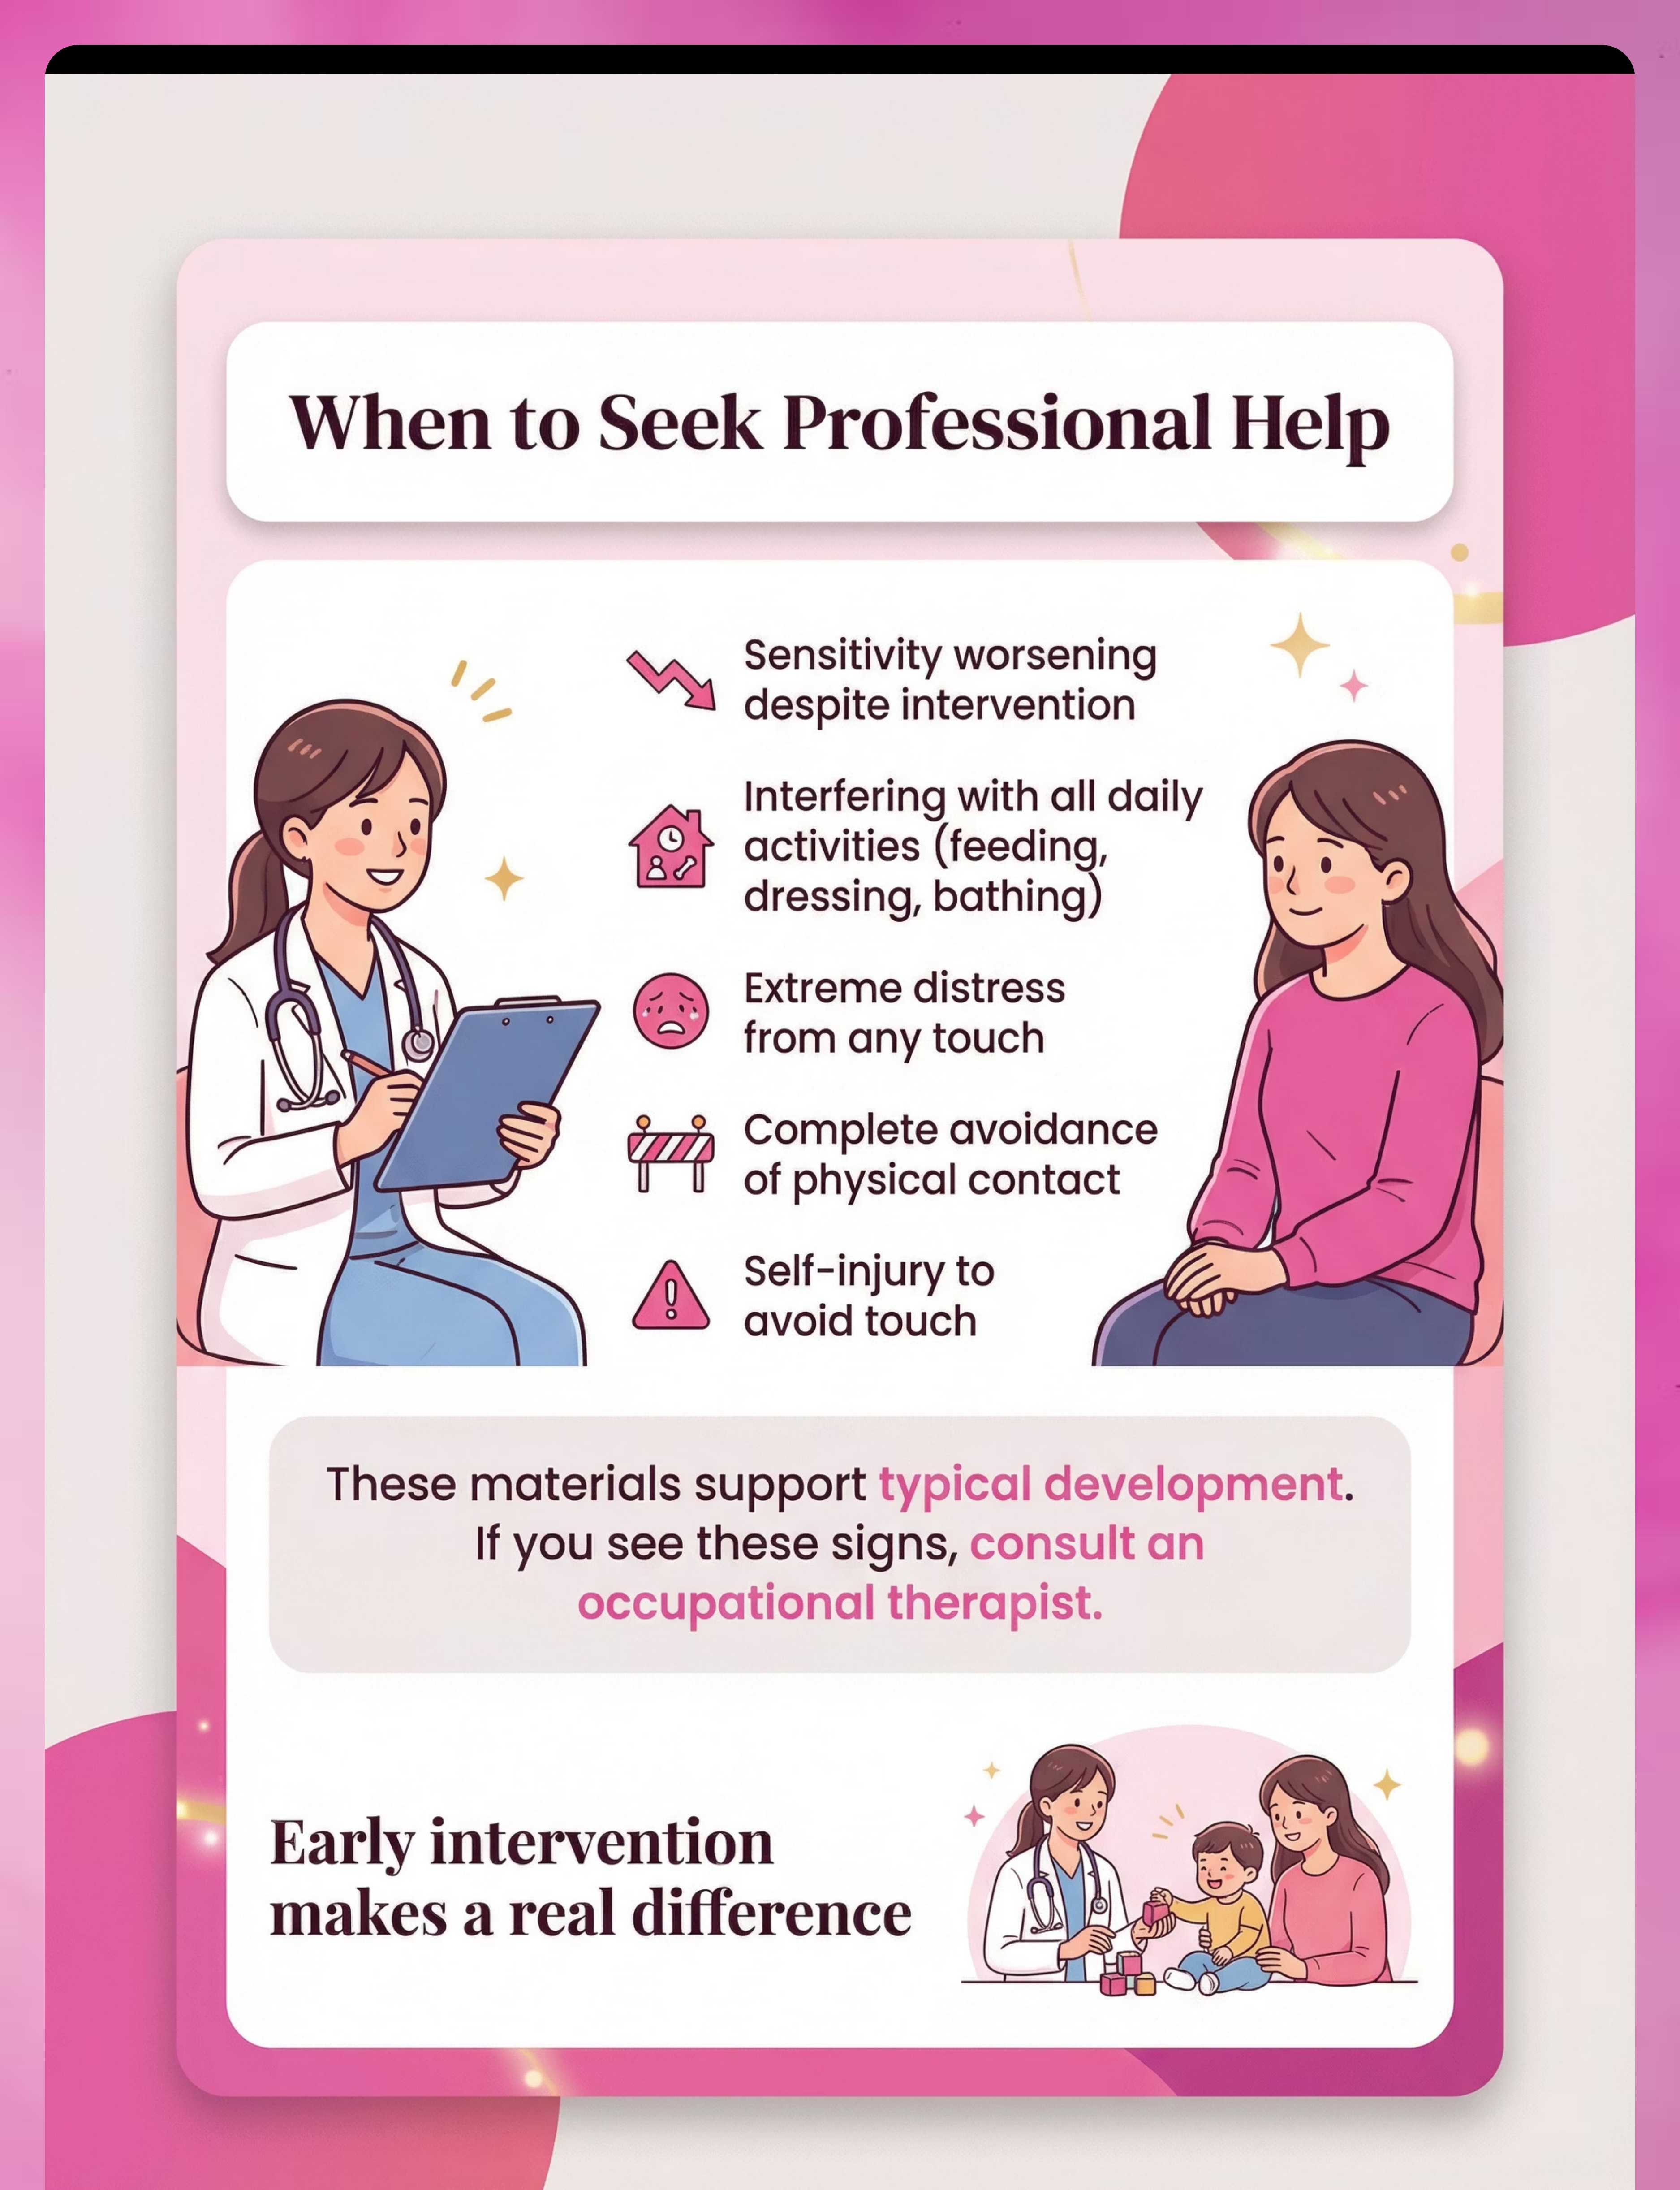
Red Flags — When to Pause and Seek Help
Trust your instincts. You are with your child every day. If something feels wrong, the right response is always to pause and ask — no protocol is more important than your child's wellbeing.
🚩 Pause and Seek Professional Guidance If:
- Sensitivity is INCREASING despite 4+ weeks of consistent protocol
- Child develops NEW sensitivities to previously tolerated textures
- Self-injury appears (biting, scratching, head-banging to avoid touch)
- Child shows skin reactions (hives, redness, swelling) after material contact
- Sleep disruption correlates with sessions (sensory overload not clearing)
- Regression in other developmental areas during the protocol
01
Level 1: Self-Resolve
Review Cards on troubleshooting and adaptation. Most challenges resolve with protocol adjustment.
02
Level 2: Teleconsult
Book a Pinnacle Teleconsultation for personalized protocol review with a qualified OT.
03
Level 3: In-Clinic Assessment
Visit the nearest Pinnacle Center for comprehensive sensory assessment and protocol redesign.

The Progression Pathway — Where You're Going
This technique is one powerful milestone on a longer journey. Now that your child has built a foundational relationship with therapeutic touch, you have three clear pathways forward — choose based on your child's current needs and your family's goals.
When your child's tactile system regulates, it cascades across all 12 developmental domains — social participation, fine motor skills, feeding, and emotional regulation all improve together.
Related Techniques in This Domain
You already own the materials for most of these techniques. The investment you've made in this protocol unlocks significant reach across related tactile and sensory techniques — your toolkit is more powerful than you realize.

Deep Pressure Therapy Protocol
🟢 Intro Level | Uses: Weighted Blanket, Compression Vest. The foundational companion to this technique — structured deep pressure sessions for daily regulation.
Wilbarger Brushing Program (OT-Guided)
🟡 Core Level | Uses: Therapy Brush ⚠️ OT Required. Deep desensitization for moderate-to-severe tactile defensiveness under professional supervision.
Sensory Bin Progression: 12-Week Program
🟢 Intro Level | Uses: Sensory Bins, Fidgets. A structured 12-week texture exploration ladder — the extended version of Material 9.
Therapeutic Messy Play for Tactile Avoiders
🟡 Core Level | Uses: Tactile Kit, Sensory Bins. Structured messy play as a desensitization tool — graduated from dry to wet to truly messy textures.

Clothing Desensitization: Tag-to-Texture Ladder
🟡 Core Level | Uses: Seamless Clothing. A progressive program from tagless basics to varied fabric types — solving the daily dressing battle systematically.
Your Child's Full Developmental Map
Touch sensitivity is one piece of a 12-domain developmental picture. When the tactile system regulates, it creates a cascade of improvement across multiple domains — making this one of the highest-leverage starting points in the entire Pinnacle technique library.
How Tactile Progress Cascades
- Social (C): Proximity is no longer threatening — peer play expands
- Fine Motor (E): Child willingly touches varied textures — hand skills advance
- Feeding (J): Food texture tolerance increases as oral desensitization generalizes
- Emotional (D): One fewer sensory threat → lower baseline anxiety throughout the day
This Technique Is One Piece of a Larger Plan
GPT-OS® tracks progress across all 12 domains simultaneously — so as your child grows in tactile tolerance, the system identifies which domain to support next, creating a continuously optimized developmental roadmap unique to your child.
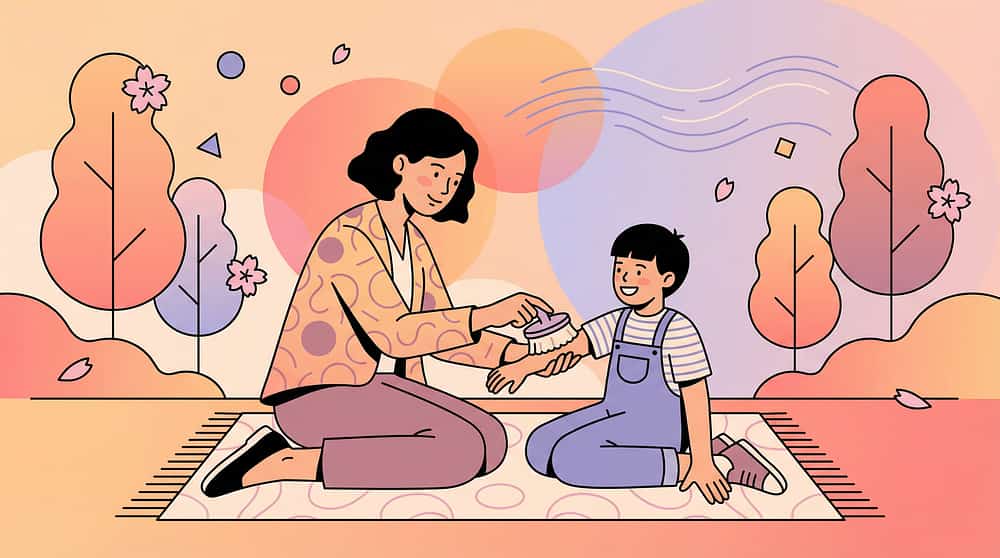
Preview of 9 materials that help with touch sensitivity Therapy Material
Below is a visual preview of 9 materials that help with touch sensitivity therapy material. The pages shown help educators, therapists, and caregivers understand the structure and content of the resource before use. Materials should be used under appropriate professional guidance.

Link copied!
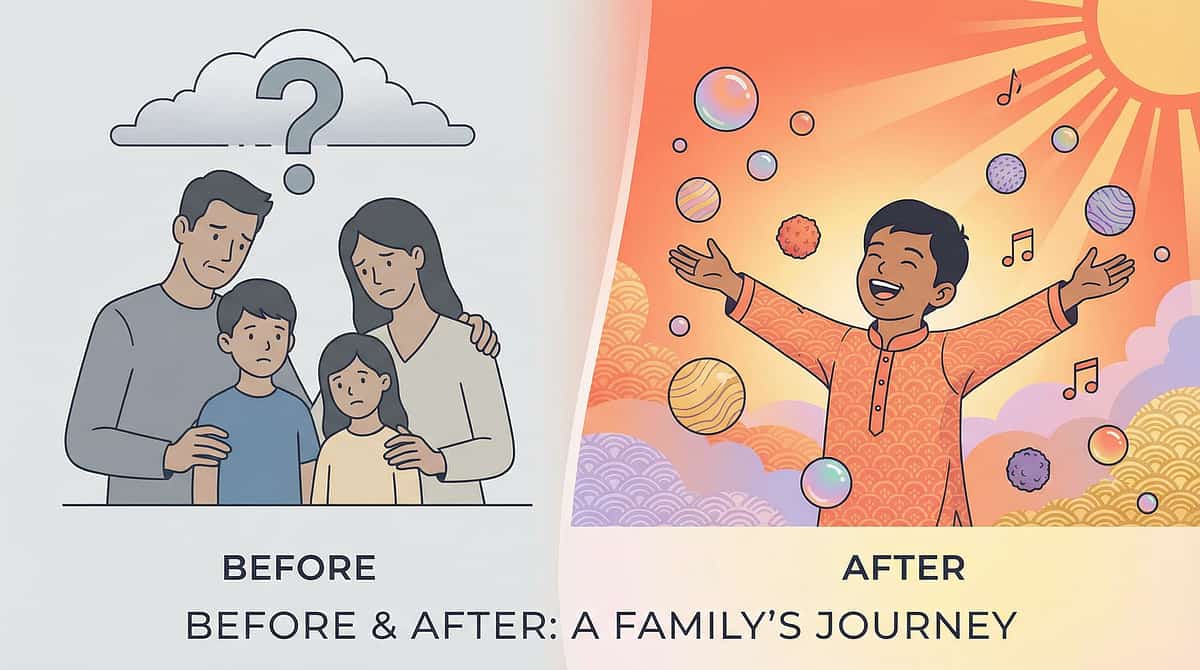
Families Who've Been Here — Their Stories

Sarah M. — Mother of a 6-Year-Old
Before: "He screamed every time we tried to wash his hair. Getting dressed for school took 45 minutes of tears — his and mine."
After 3 months: "We started with the weighted lap pad during TV time — just 5 minutes. By month 3, he let me hold his hand in the market. I couldn't believe it."
Dressing time: 45 minutes → 10 minutes. Social participation: significantly increased.

Priya R. — Mother of a 4-Year-Old
Before: "My daughter would only wear one specific cotton dress. She refused shoes. Every meal was a battle because she couldn't handle the spoon touching her lips."
After 8 weeks: "Seamless socks were the breakthrough. She now wears 4 different outfits without a single battle."
Clothing tolerance: 1 outfit → 4+ outfits. Feeding protocol initiated successfully.
💬 Join the Community
Tactile Sensitivity Parent WhatsApp Group — 2,400+ parents sharing daily tips and breakthroughs.
🧑🤝🧑 Get a Peer Mentor
Connect with a parent who has navigated this exact journey. They've been where you are. Request a Peer Mentor
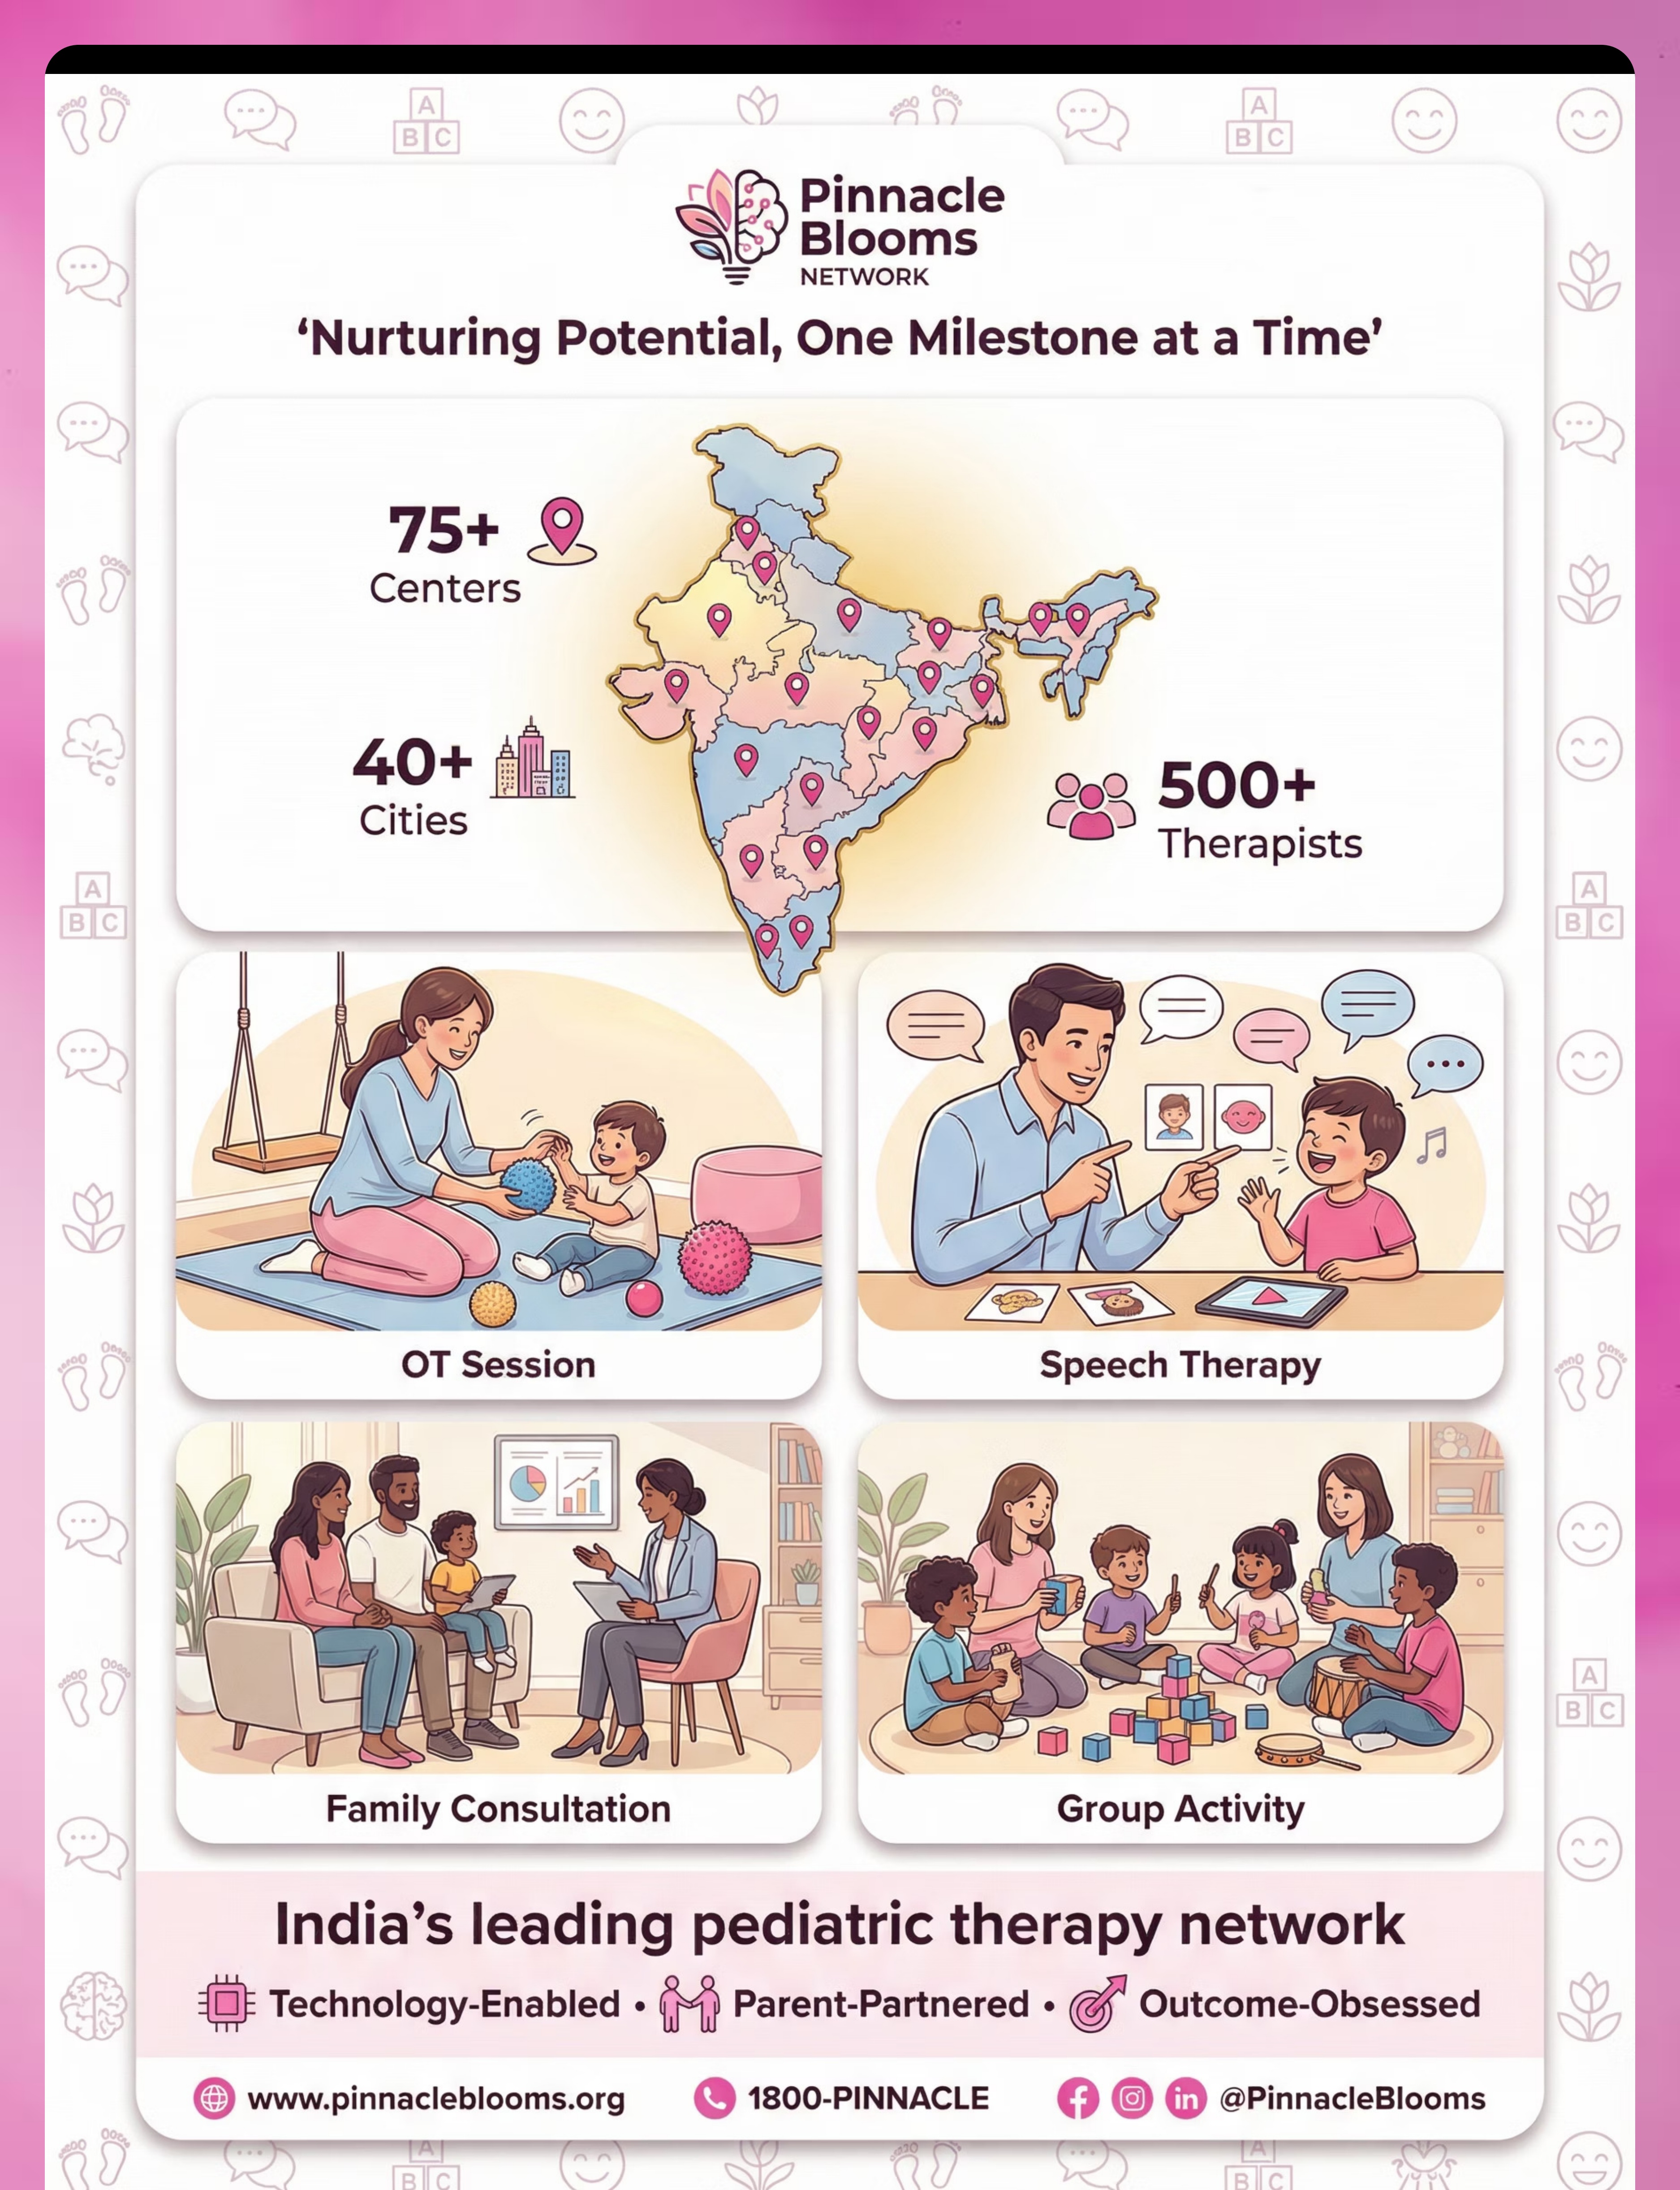
📍 Find Your Center
75+ Pinnacle Centers across 40+ Indian cities. Teleconsultation available in 70+ countries. Find Your Center
Frequently Asked Questions
Q: How long until I see results?
Most families notice initial tolerance changes within 2–3 weeks. Meaningful functional changes (new clothing, accepting grooming) typically emerge by weeks 5–8.
Q: Do I need to use all 9 materials?
No. Start with 2–3 from the deep pressure category (Materials 1, 3, 4). Add desensitization tools (5, 7, 9) after 2 weeks of established comfort. Material 2 requires OT training.
Q: Is the Wilbarger Brushing Protocol safe at home?
ONLY after a trained OT has demonstrated the specific pressure, direction, and frequency on YOUR child. Incorrect brushing can increase defensiveness. All other 8 materials can be introduced at home safely.
Q: What if my child is a sensory SEEKER, not an avoider?
Sensory seekers benefit from Materials 1, 4, 6 (weighted, compression, body sock) with INCREASED intensity and movement-based activities. See the Adapt & Personalize section for seeker-specific modifications.
Q: Can I use these for my neurotypical child who seems sensitive?
Yes. Touch sensitivity exists on a spectrum. Neurotypical children can benefit from deep pressure and texture exposure. These materials support typical sensory development as well.
Q: My child is making progress but plateaued. What now?
Options: increase variety (add a new material), change the setting (outdoor, school), or book a teleconsult for protocol review. Plateaus are normal and navigable.
Your Next Step — Start Now
You've read the evidence. You've seen the protocol. Your child is waiting.
Pinnacle Blooms Clinical Consortium
OT • SLP • ABA • SpEd • NeuroDev • Pediatrics • Research
"From fear to mastery. One technique at a time."
Pinnacle Blooms Network — India's leading pediatric therapy network | 75+ Centers | 40+ Cities | 500+ Therapists | 21 Million+ Therapy Sessions | 15,000+ Children Served | 97%+ Proven Improvement
Medical Disclaimer: This content is educational and does not replace assessment by a licensed occupational therapist. If you're concerned about your child's sensory processing, please consult a qualified professional. Individual results may vary. Statistics represent aggregate outcomes across the Pinnacle Blooms Network. Wilbarger Protocol requires professional training before home use. © 2026 Pinnacle Blooms Network. All rights reserved. Powered by GPT-OS® Therapy Intelligence.