
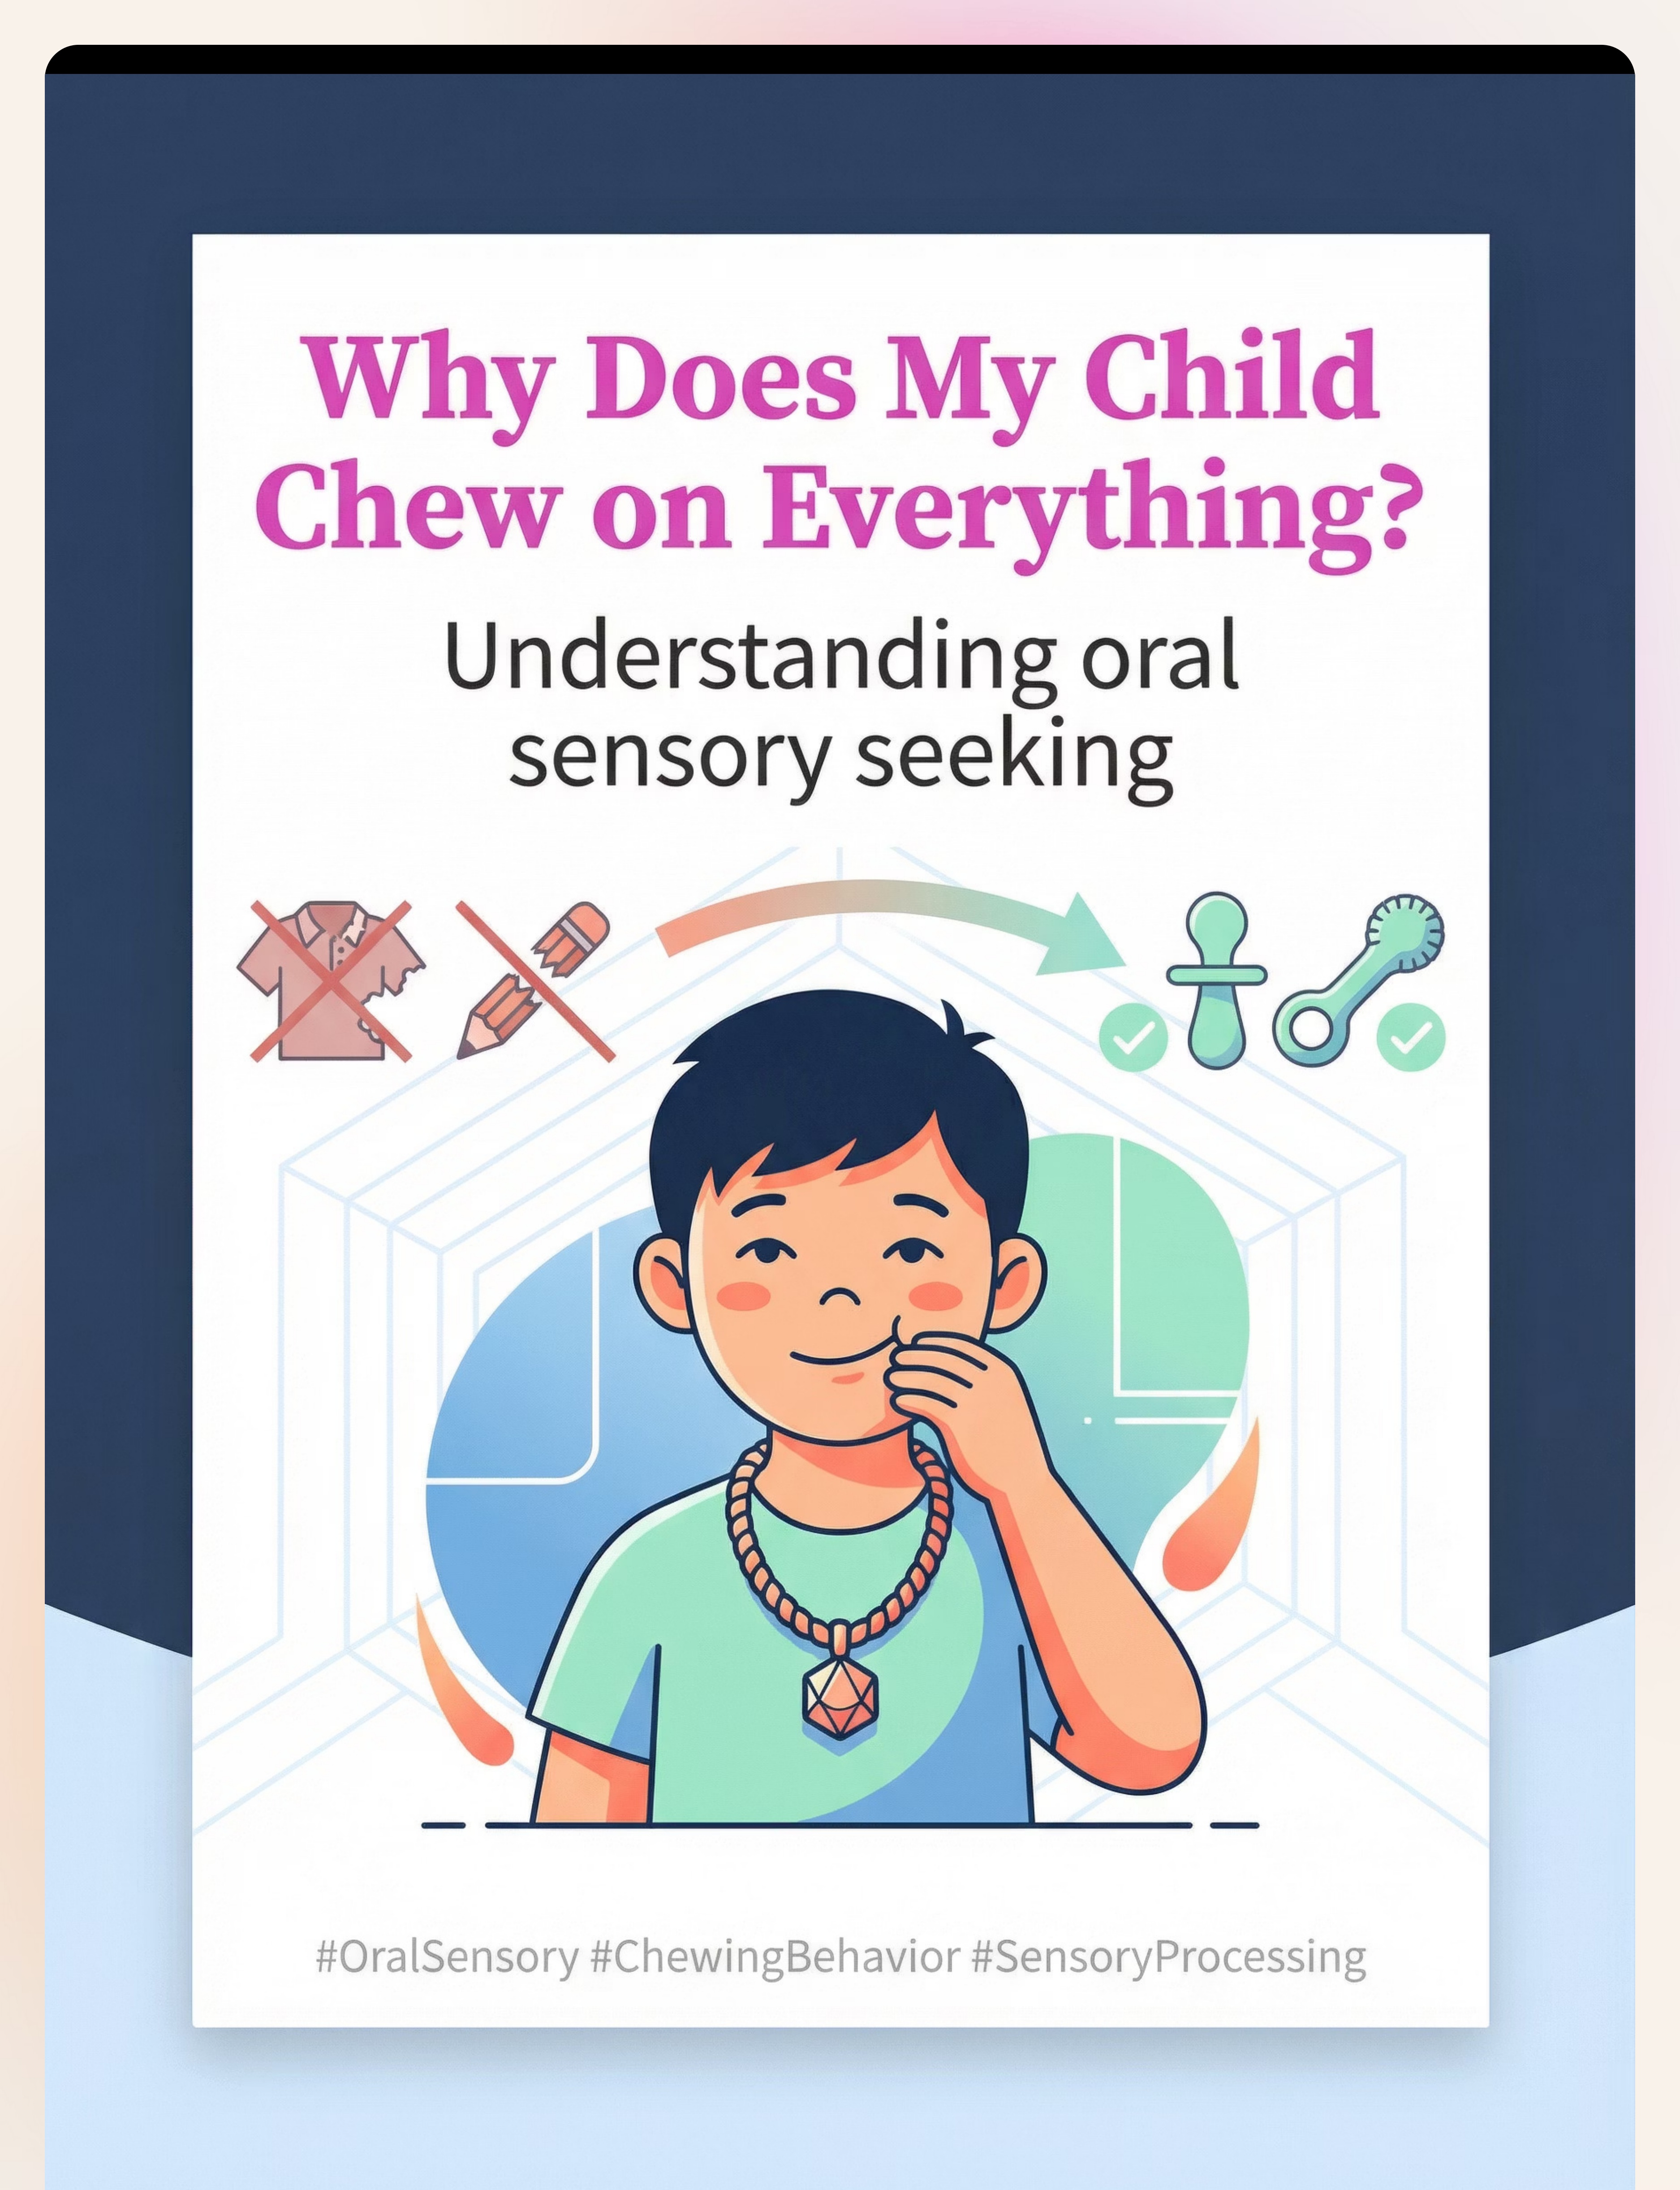
Why Does My Child Chew on Everything?
It's 7:43 AM. You're packing your child's bag for school and you notice — again — that the collar of his uniform is shredded. The pencils in his case are gnawed down to splinters. Yesterday the teacher sent a note home about mouthing other children's crayons. You've tried everything: scolding, replacing objects, putting things out of reach. Nothing works. You're exhausted and quietly terrified that something is wrong.
Nothing is wrong.
"You are not failing. Your child's nervous system is speaking the only language it knows. This page teaches you 9 materials that answer it safely."
🧠 Oral Sensory Domain
👶 Age 2–12 Years
🏠 Home-Executable
⏱ 15 Min/Session

You Are Among Millions of Families Navigating This Exact Challenge
Oral mouthing of non-food objects beyond age 2–3 years is not a parenting failure. It is a documented neurological response pattern present in children with Autism Spectrum Disorder, Sensory Processing Disorder, anxiety, and developmental differences worldwide. The SPD Foundation estimates that 5–16% of school-age children experience significant sensory processing difficulties affecting daily function.
80%
Sensory Difficulties
Of children diagnosed with autism experience sensory processing difficulties
1 in 36
ASD in India
Children diagnosed with autism in India (2023 NIMHANS data)
21M+
Sessions Studied
Therapy sessions through which Pinnacle has studied oral sensory patterns
"If your child's shirts are destroyed, their pencils demolished, and you've tried everything — you are not alone. This is one of the most common presentations in our 70+ center network." — Pinnacle Blooms Clinical Consortium
PRISMA Systematic Review (2024): 80% of children with ASD display sensory processing difficulties. PMC11506176 | PMC10955541 | DOI: 10.12998/wjcc.v12.i7.1260

Your Child's Brain Is Not Misbehaving. It's Under-Regulated.
Clinical Terms
- Interoception: Internal body awareness system
- Proprioception: Joint/muscle position sense
- Oral Somatosensory Cortex: Processes touch, pressure, vibration in the mouth
- Reticular Activating System: Arousal regulation through sensory input
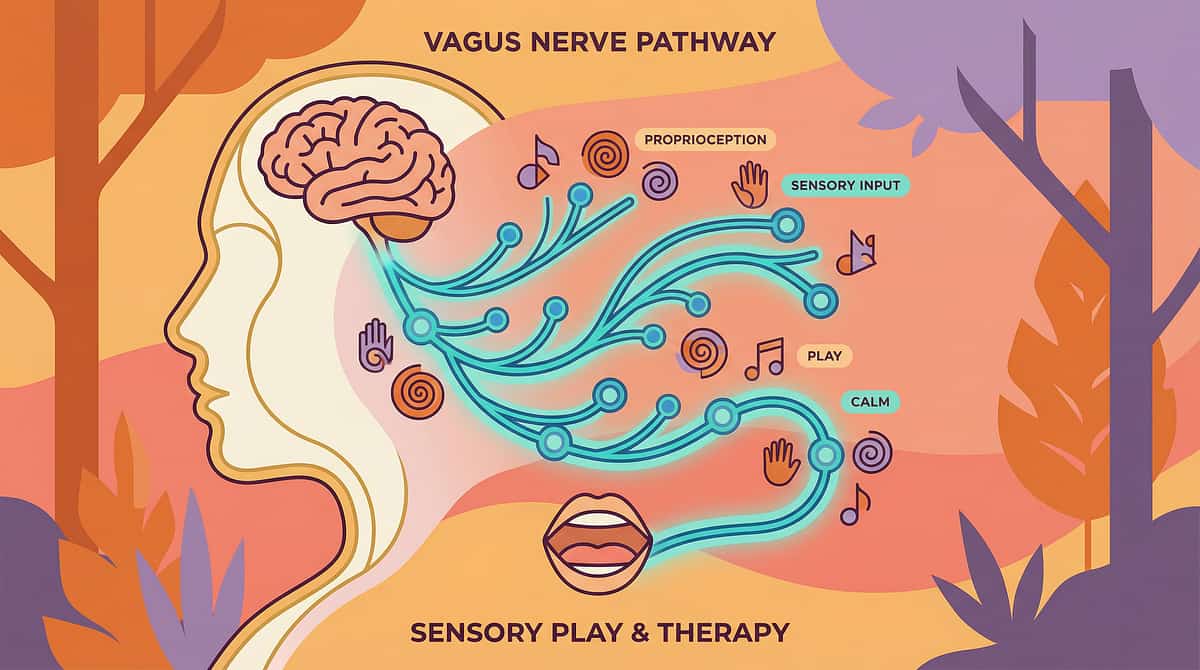
- Vagus Nerve: Oral-motor → parasympathetic calming pathway
In Parent Language
- Your child's mouth has more sensory nerve endings than almost any other body part
- When the brain is under-aroused or dysregulated, it hunts for intense sensory input
- Chewing, sucking, and biting activate the jaw muscles, which send calming signals to the brainstem
- This is an automatic, neurological response — not a choice, not a habit, not defiance
- The oral cavity is one of the most powerful self-regulation tools the human nervous system has
🧠The Science in One Sentence: "The mouth is hungry for input the brain needs to regulate itself. Punishing the mouth doesn't feed the hunger — it just misdirects it." — Occupational Therapy Lead, Pinnacle Blooms Network
Frontiers in Integrative Neuroscience (2020): Neurological basis for sensory-based interventions in ASD. DOI: 10.3389/fnint.2020.556660 | Scheerer CR (1992): Oral sensory seeking framework

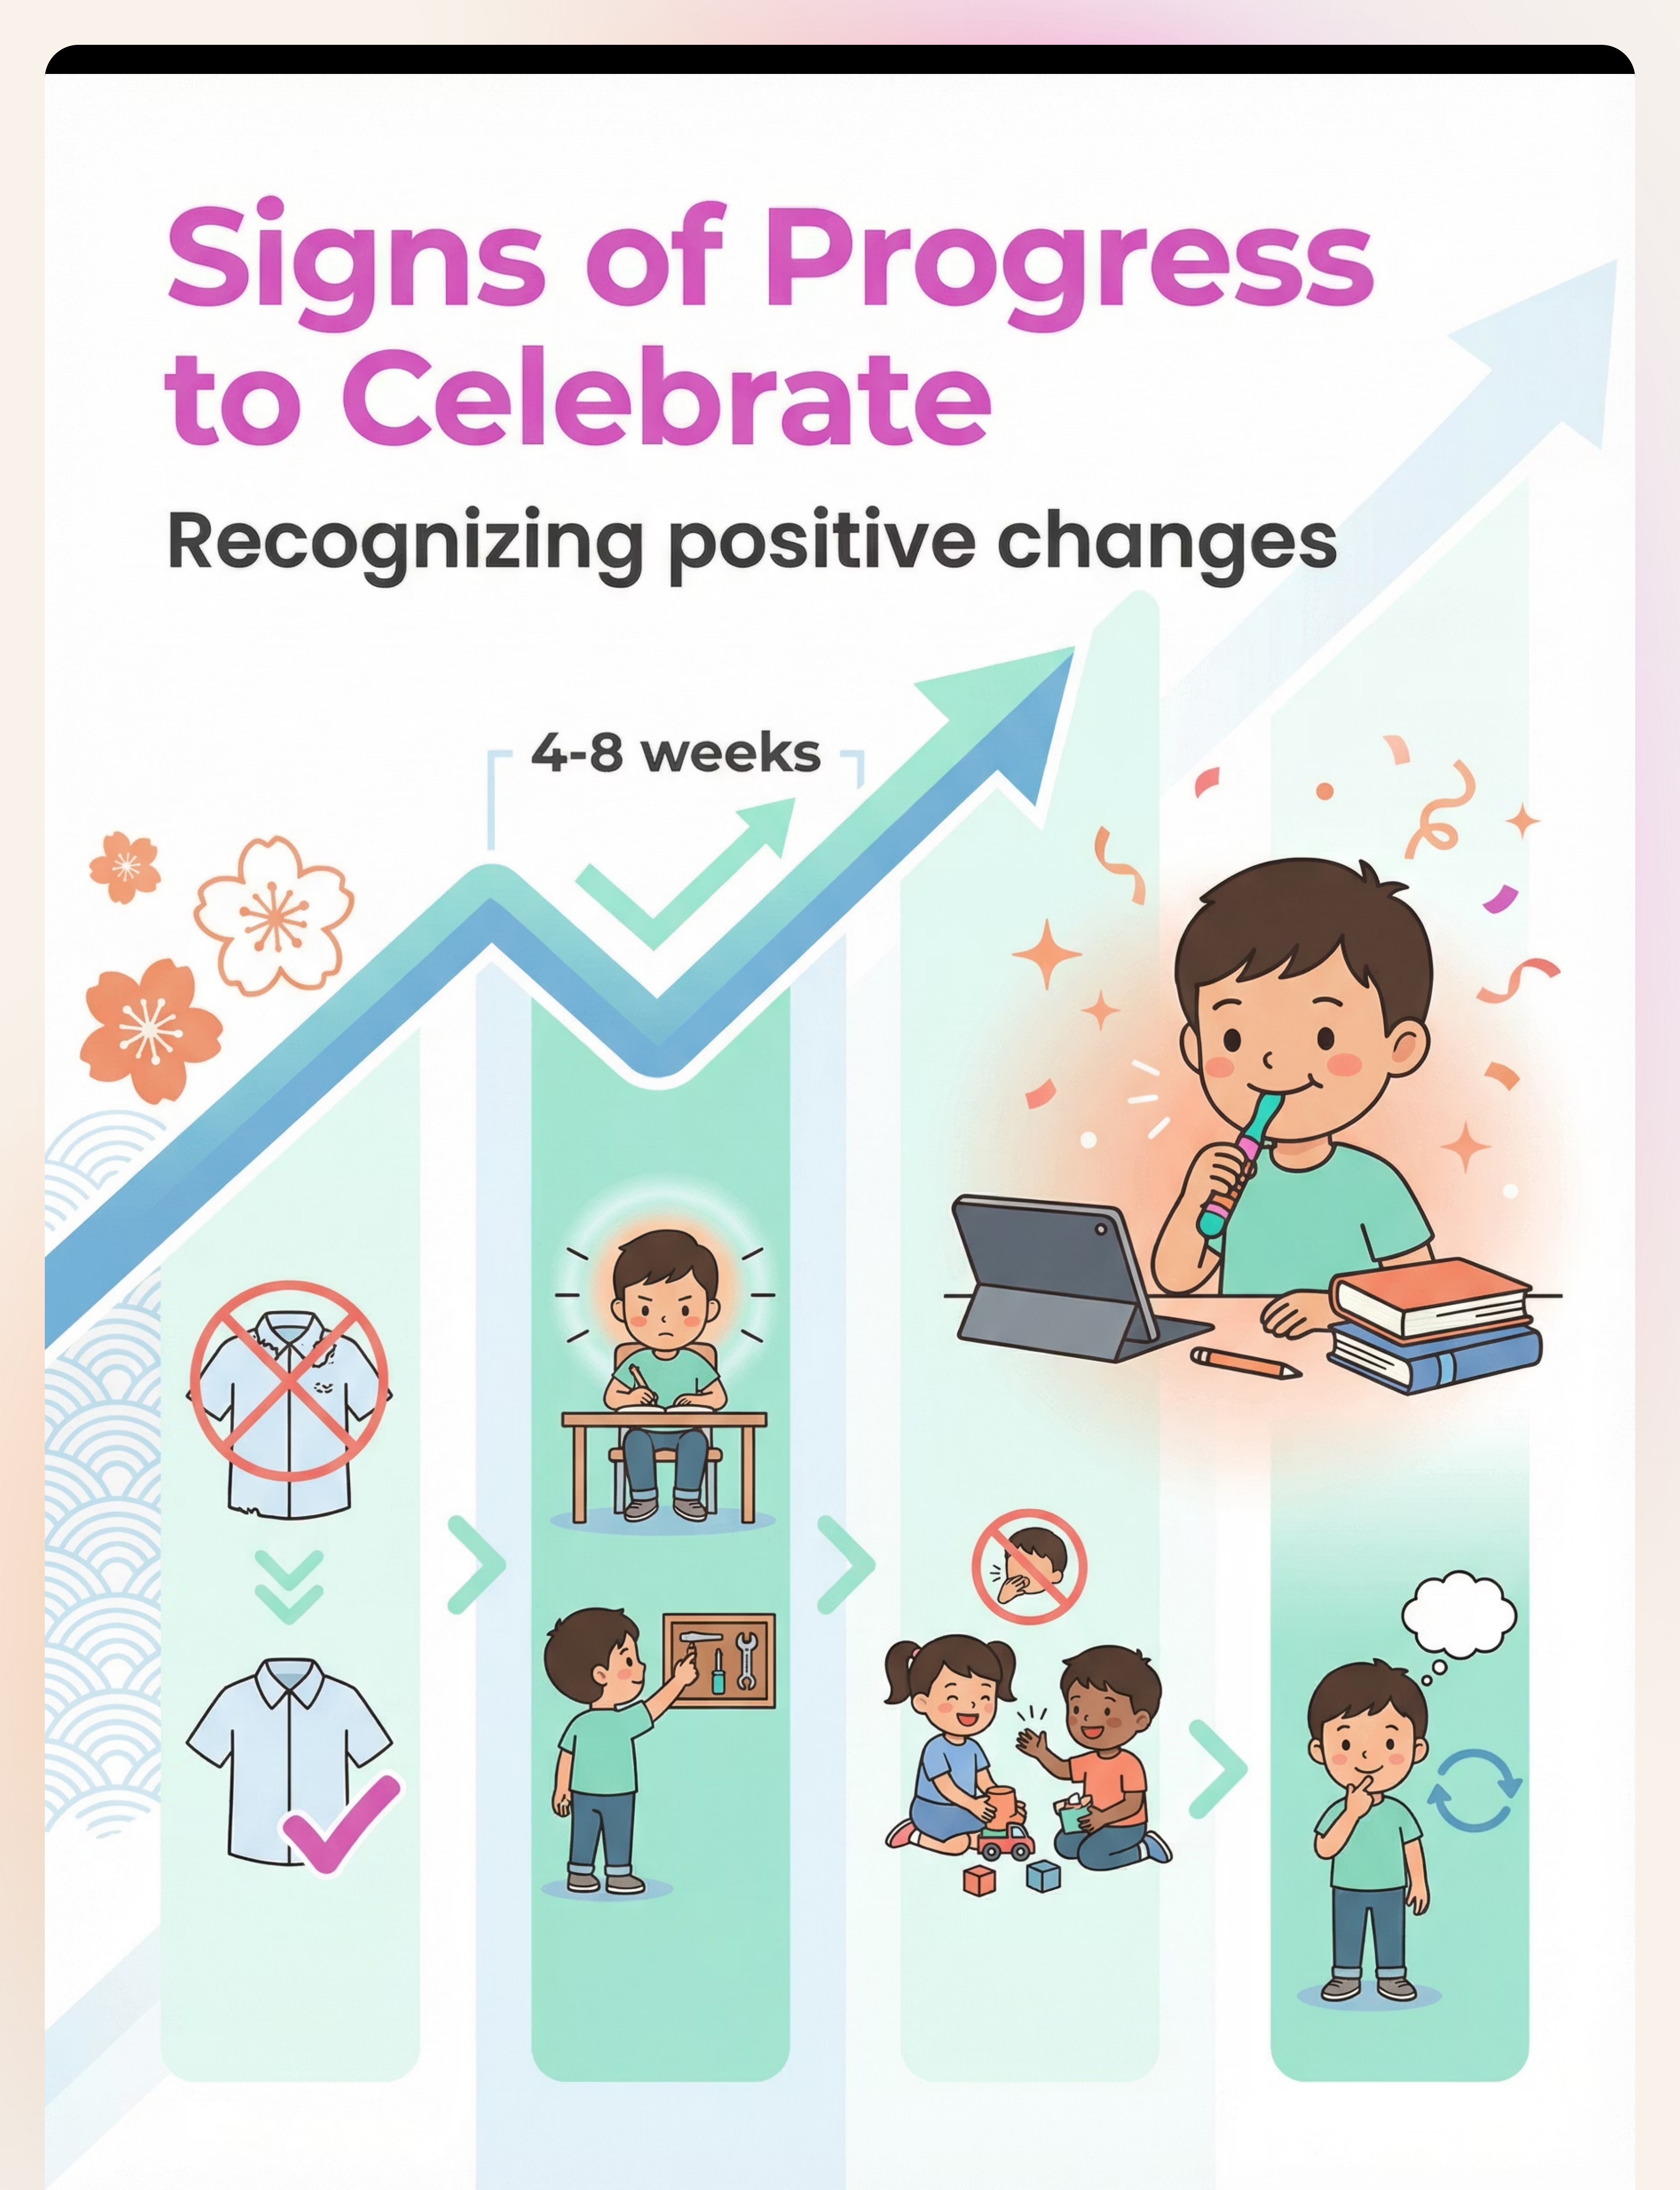
Your Child Is Here. Here Is Where We're Heading.
Oral mouthing is entirely developmentally appropriate through 18–24 months. After age 3, persistent mouthing of non-food items signals that the nervous system hasn't found adequate regulated input through other channels. By age 6–12, with appropriate intervention, children learn to identify their oral sensory needs and self-select safe alternatives.
1
0–6 Months
Mouthing: Entirely Normal
2
6–18 Months
Mouthing: Normal developmental stage
3
18 mo–3 Years
Typical wind-down begins
4
3–6 Years ⚠️
Alert Zone: Persistent mouthing = needs support
5
6–12 Years ✅
Target Zone: Self-regulated oral input seeking
⚠️Commonly Co-occurs With: Tactile sensitivity | Proprioceptive seeking | Attention difficulties | Food selectivity/picky eating | Anxiety | Hyperarousal | Poor body awareness
📍 Your Child Now
Seeking oral input through unsafe or inappropriate objects
Step 1: A-110
Redirect to safe oral tools — this page
Step 2: A-115
Oral Motor Activities for Regulation
Step 3: A-130
Full Sensory Diet Planning
WHO Care for Child Development (CCD) Package (2023): Age-specific evidence-based caregiver recommendations. PMC9978394 | WHO/UNICEF CCD Package

Clinically Validated. Home-Applicable. Parent-Proven.
Evidence Grade: I-A
Systematic Review
PRISMA Systematic Review (2024)
16 articles, 2013–2023. Sensory integration intervention meets evidence-based practice criteria for ASD. Oral sensory tools showed significant reduction in mouthing of inappropriate objects.
PMC11506176
Meta-Analysis (2024)
24 studies. Sensory integration therapy effectively promotes adaptive behavior, social skills, and self-regulation. Effect size: medium-large across behavioral outcomes.
PMC10955541
Indian RCT (2019)
Home-based sensory interventions demonstrated significant outcomes in Indian pediatric populations. Direct applicability to Indian families.
DOI: 10.1007/s12098-018-2747-4
85%
Evidence Confidence
High — Systematic Review + RCT Level combined
"This technique is not folk wisdom. It is calibrated, studied, and proven in settings from Mumbai OT clinics to WHO-funded LMICs." — CRO Lead, Pinnacle Blooms Research Consortium
🏛 WHO NCF 2018
🔬 NCAEP 2020
📊 AOTA Guidelines
🏥 Pinnacle 21M+ Sessions

The Technique: What It Is
Technique Identity
- 🔵Formal Name: Oral Sensory Redirection Protocol — Material Substitution Approach
- 🏷️Parent Name: "Safe Mouthing Materials"
- 📁Domain: A — Sensory Processing | Sub-Domain: Oral Sensory
- 🔢Technique Code: A-110 | Episode 110
What This Technique Does
Oral Sensory Redirection is the evidence-based practice of identifying a child's neurological need for oral proprioceptive input — the deep pressure, vibration, texture, and resistance signals that the mouth sends to the brain for regulation — and systematically replacing unsafe mouthing targets (clothing, pencils, furniture) with purpose-designed therapeutic alternatives.
The technique does not attempt to eliminate the mouthing drive; it satisfies that drive safely, consistently, and in socially appropriate contexts. This is not a behavioral punishment program — it is a sensory diet component prescribed by Occupational Therapists.
👶 Age: 2–12 Years
⏱ Session: 15–20 Min
🔄 Frequency: Daily
🏠 Home + School + Clinic

This Technique Crosses Therapy Boundaries Because the Brain Doesn't Organize by Therapy Type
Occupational Therapist (PRIMARY)
Sensory integration framework. Designs oral sensory diet, selects tools for child's sensory profile, monitors tolerance and progression, trains parent in tool introduction.
Speech-Language Pathologist
Oral motor evaluation. Identifies jaw weakness, coordination issues, or dysphagia contributing to mouthing. Integrates chew tools with feeding therapy.
ABA/BCBA Behavior Analyst
Functional Behavior Assessment to identify mouthing triggers. Extinction of unsafe mouthing + DRA to chew tools. Tracking protocols and reinforcement scheduling.
Special Educator
Classroom implementation of pencil toppers and oral kits. Teacher communication templates, IEP integration, and school-setting generalization planning.
👨⚕️NeuroDev Pediatrician: Rules out pica, nutritional deficiencies (iron/zinc), and medical contributors before confirming sensory etiology. Essential for differential diagnosis.
Adapted UNICEF/WHO Nurturing Care Framework for SLPs (2022): Multi-disciplinary contributions to responsive caregiving. DOI: 10.1080/17549507.2022.2141327

This Is Not a Random Activity. It's a Precision Sensory Tool.
🎯 Primary Target
Reduce/eliminate unsafe mouthing of non-food objects (clothing, pencils, furniture, toys). Observable Indicator: Child reaches for chew tool instead of shirt collar within 4–6 weeks.
🎯 Secondary Targets
- Arousal regulation during structured activities
- Focus and attention during desk-work tasks
- Reduced anxiety through oral proprioceptive input
- Prevention of dental damage and clothing destruction
Meta-analysis (World J Clin Cases, 2024): Sensory integration therapy effectively promoted social skills (primary), adaptive behavior (secondary), motor skills (tertiary). PMC10955541
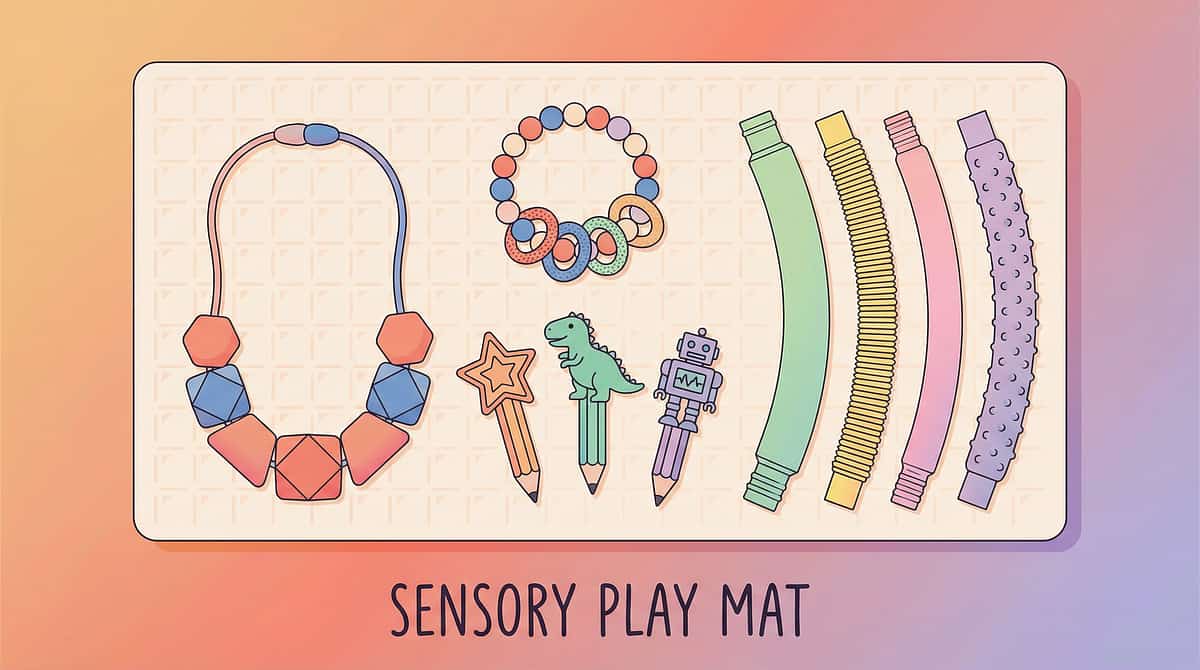
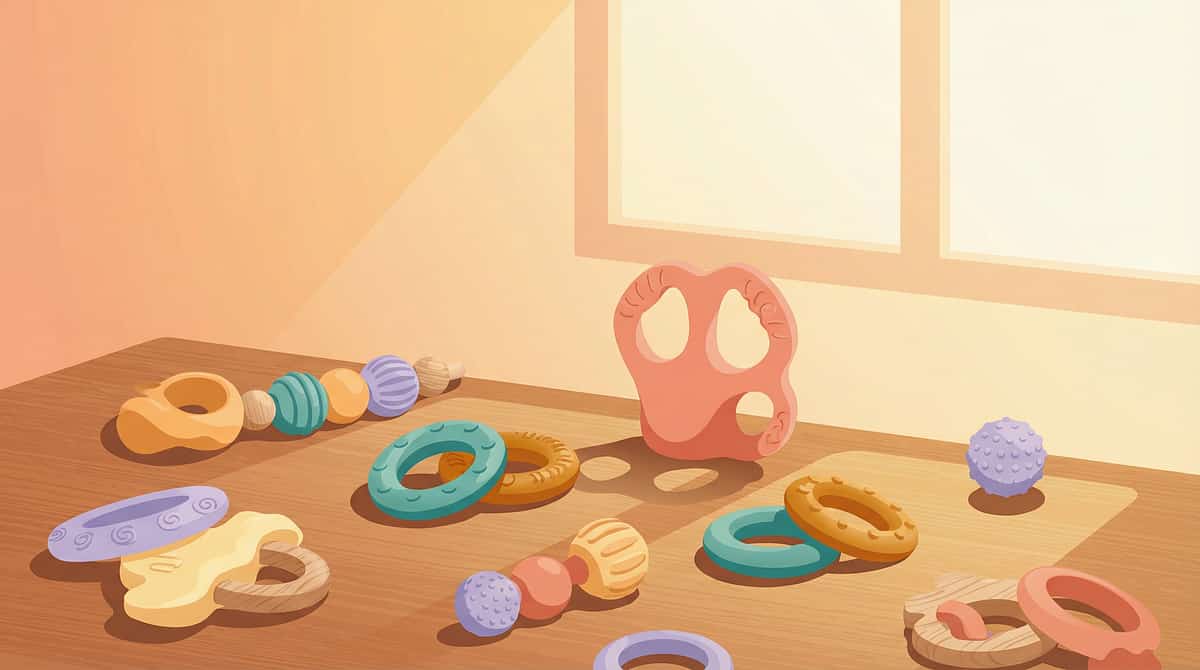
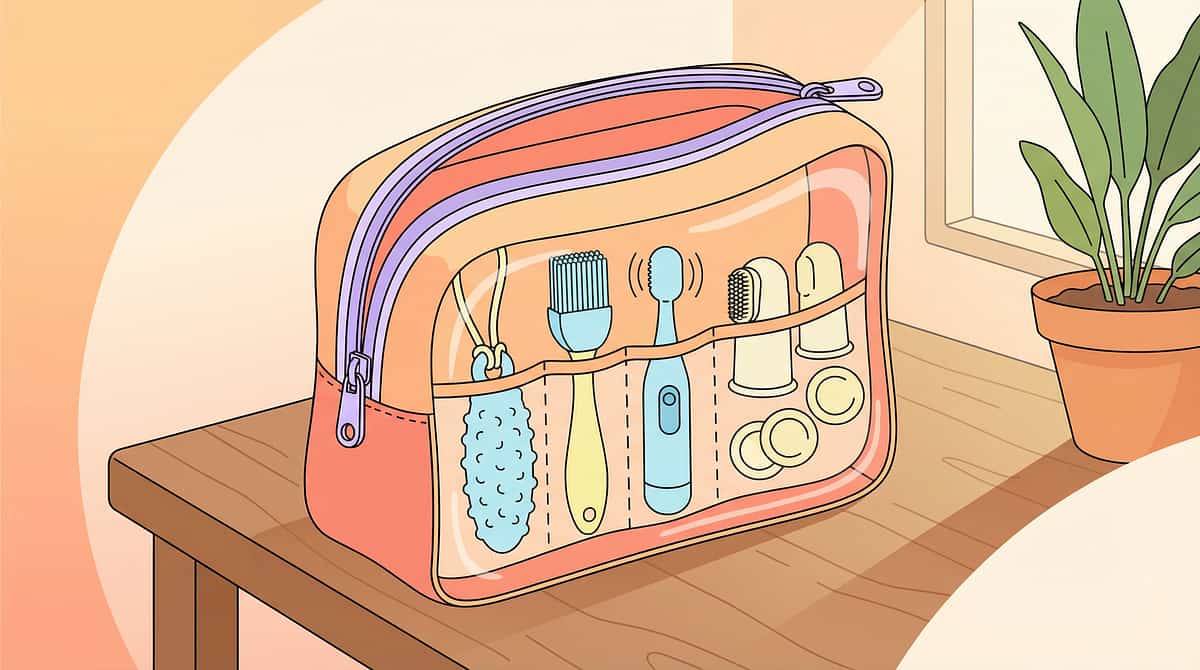
9 Materials. Each One a Safe Answer to Your Child's Oral Need.
These 9 materials are the clinically identified oral sensory toolkit for A-110. Each addresses a different context, intensity level, and access need. You do not need all 9 immediately — start with Material 1 and Material 3.
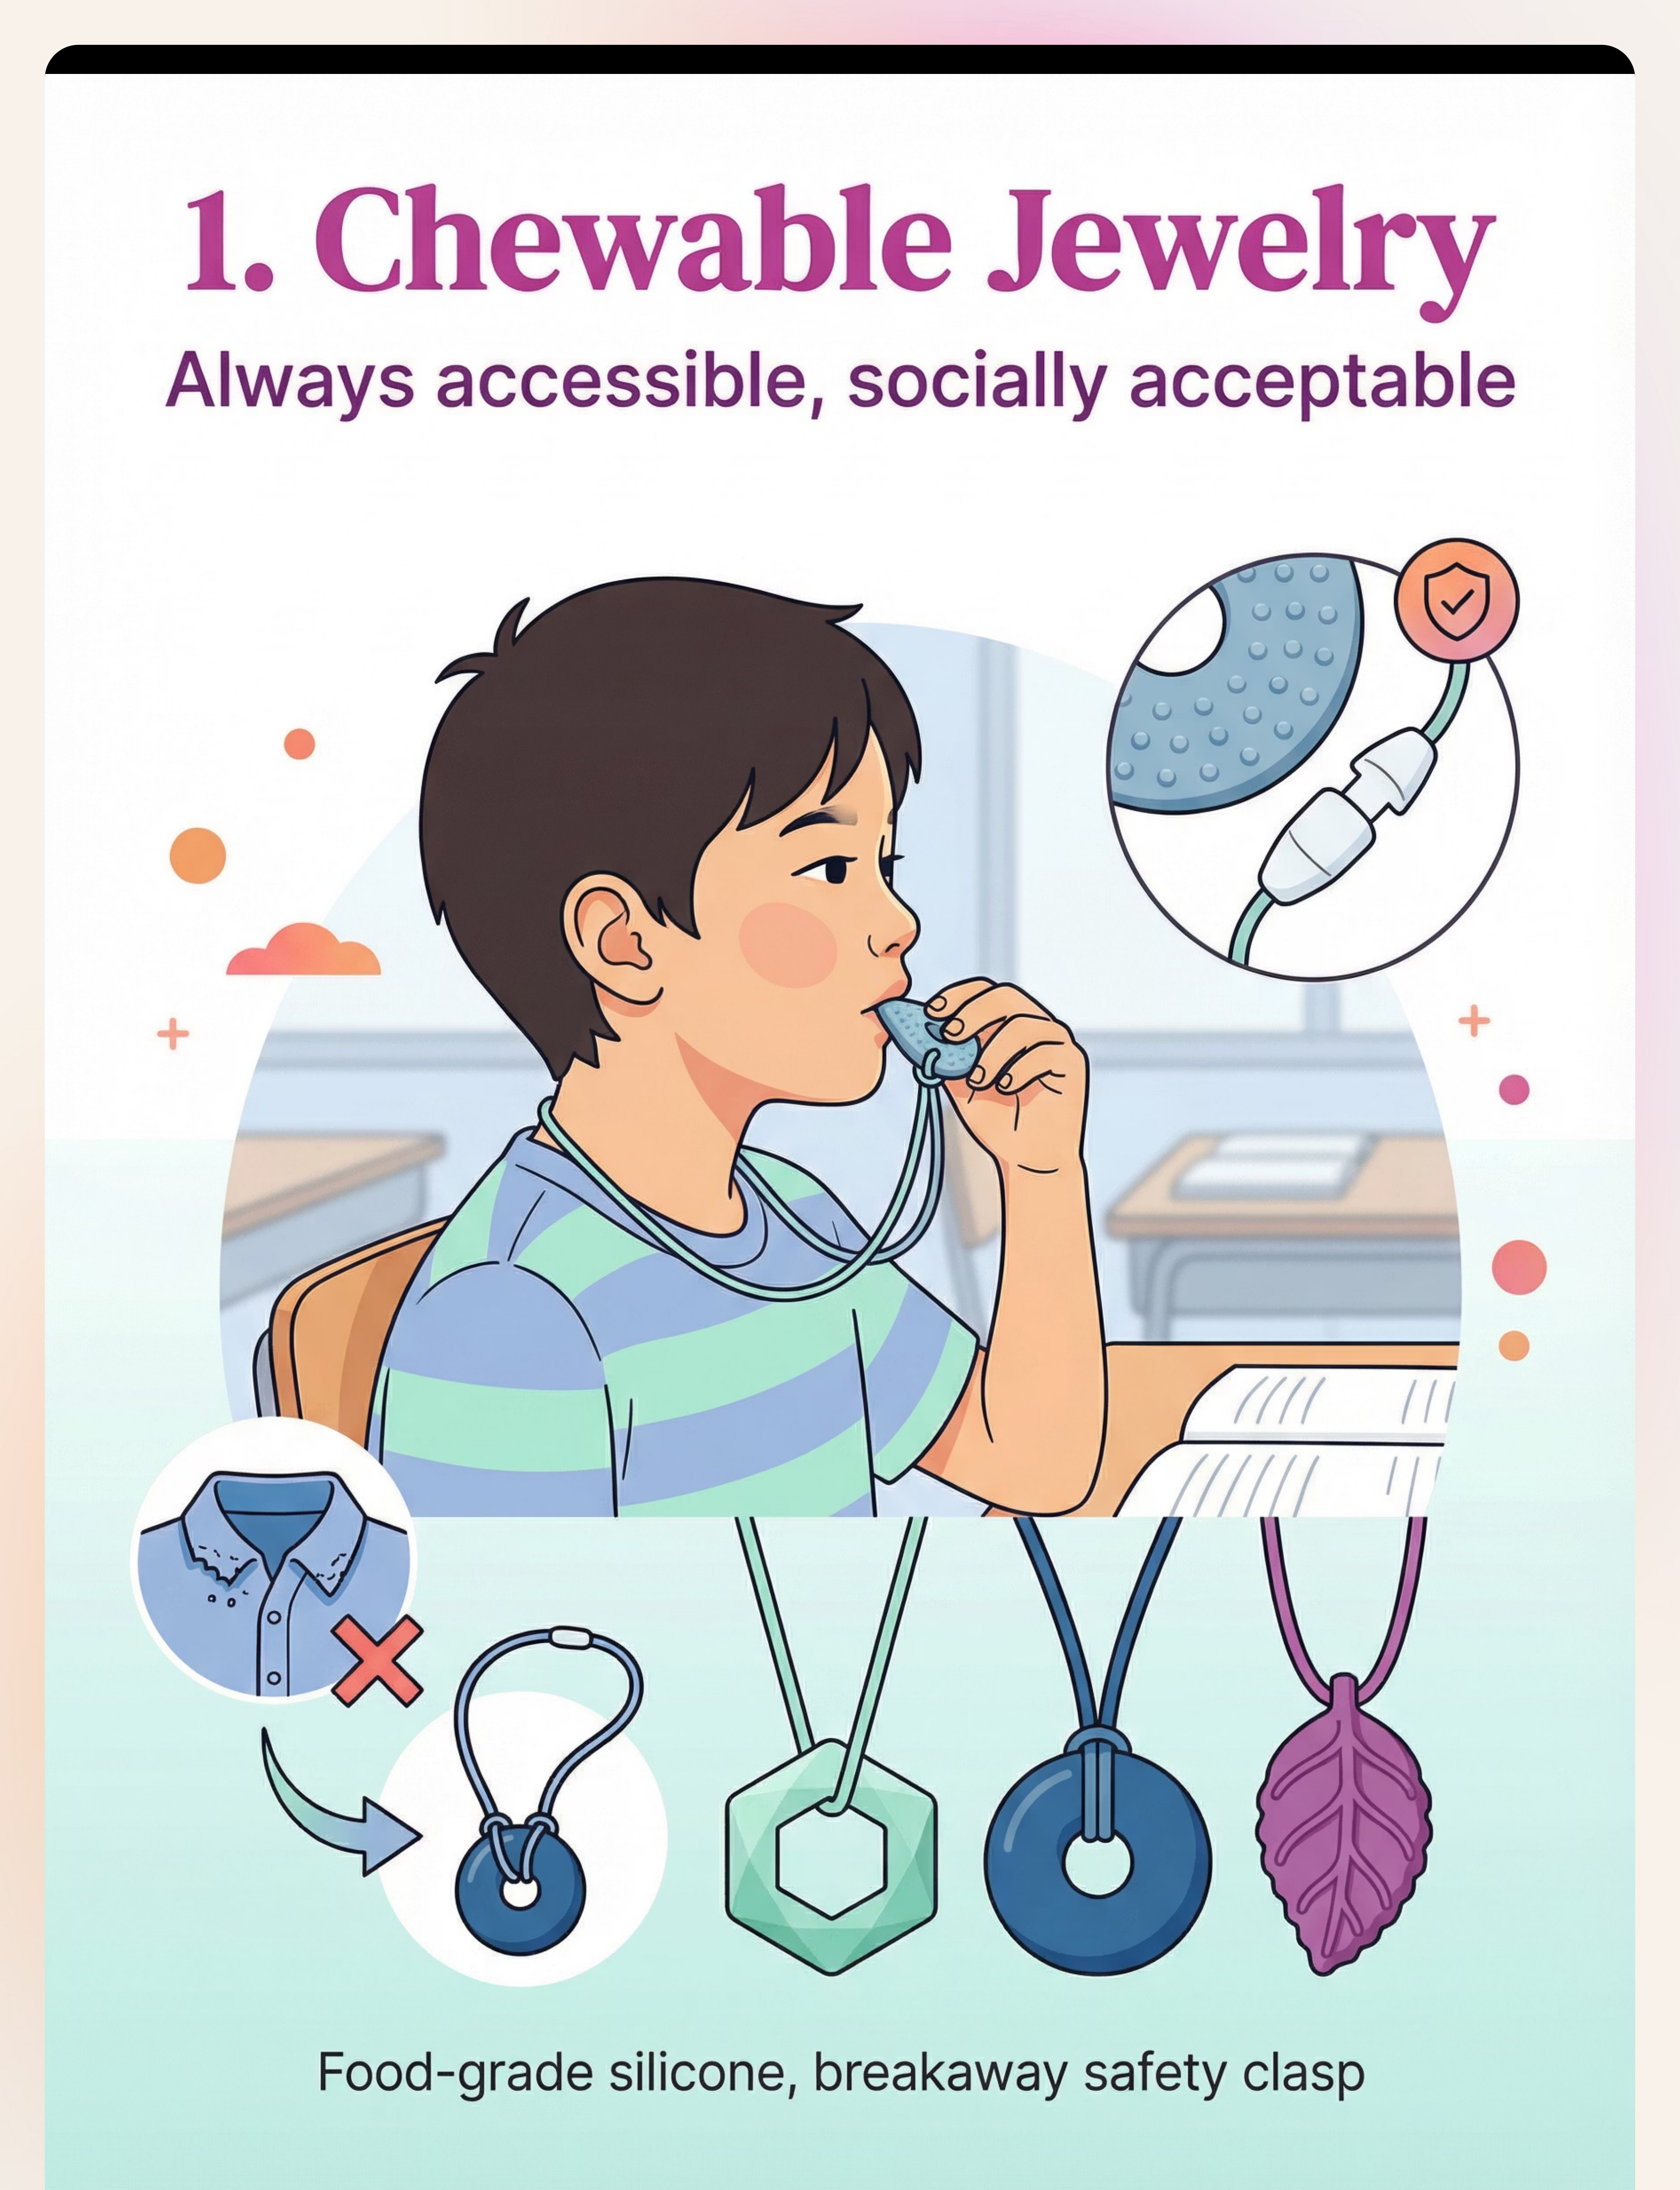
01
Chewable Jewelry
Necklaces & Bracelets — always worn, socially acceptable
02
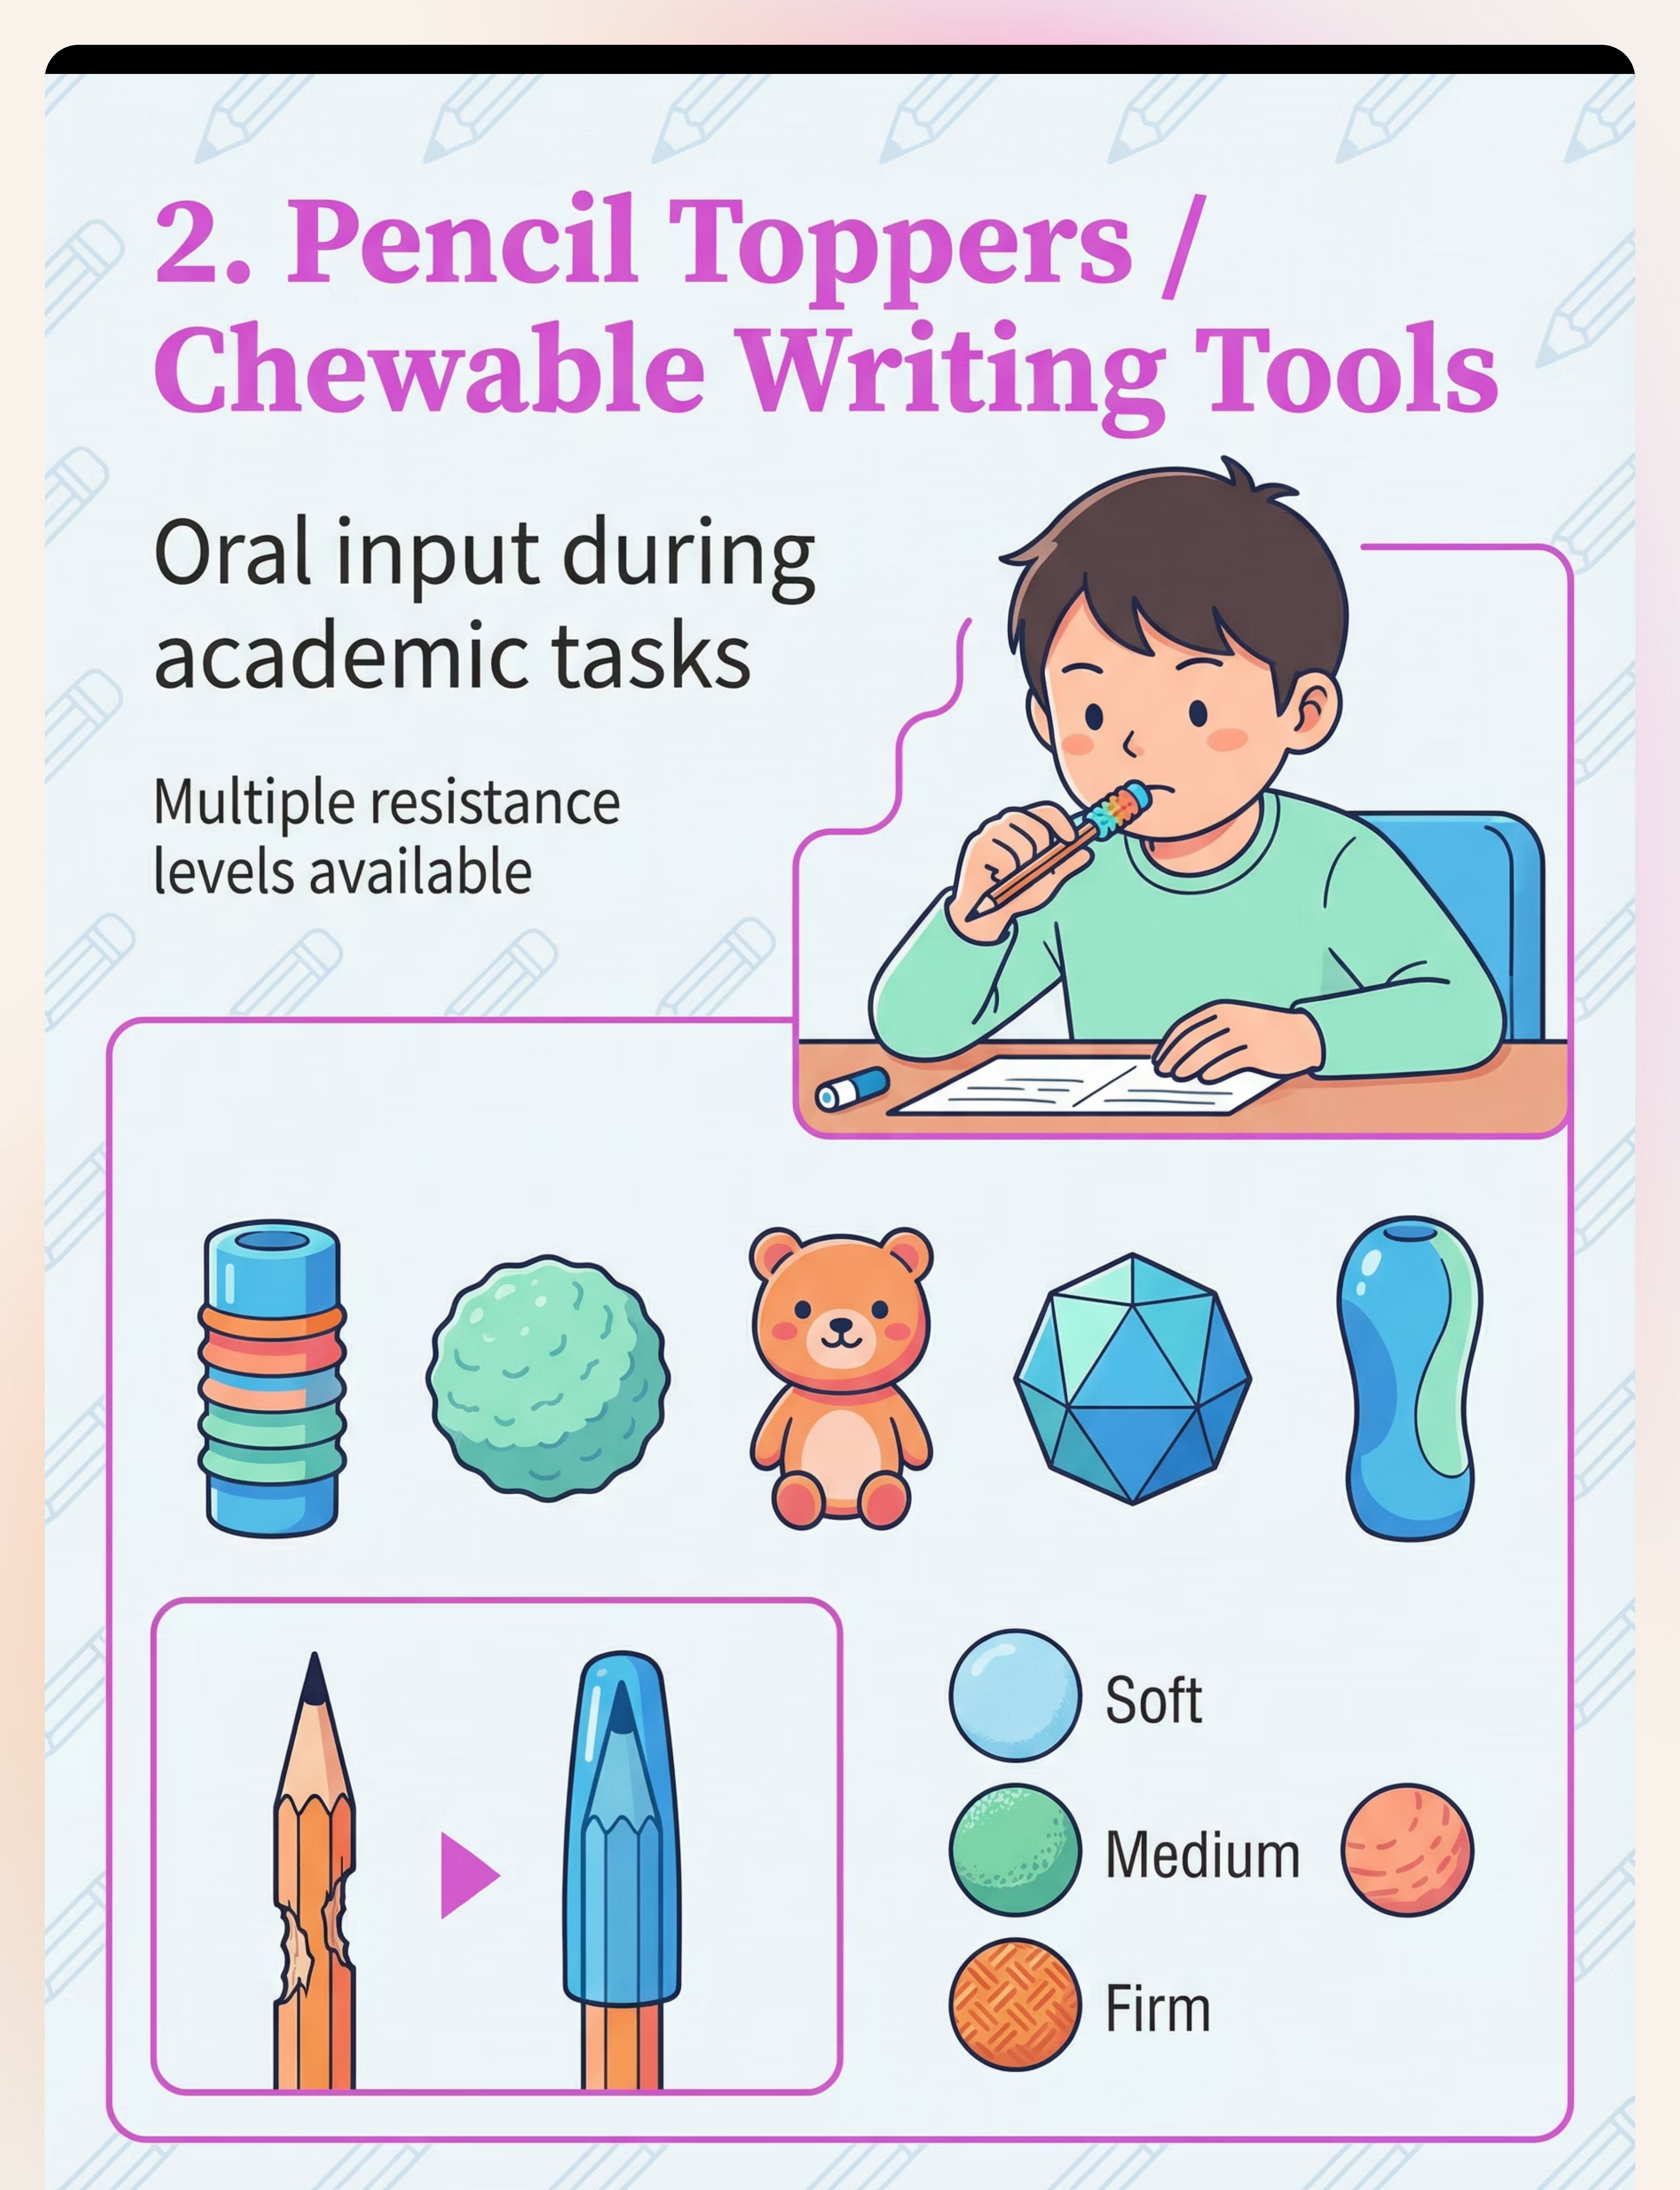
Pencil Toppers
Chewable writing tools — transforms school's #1 mouthing target
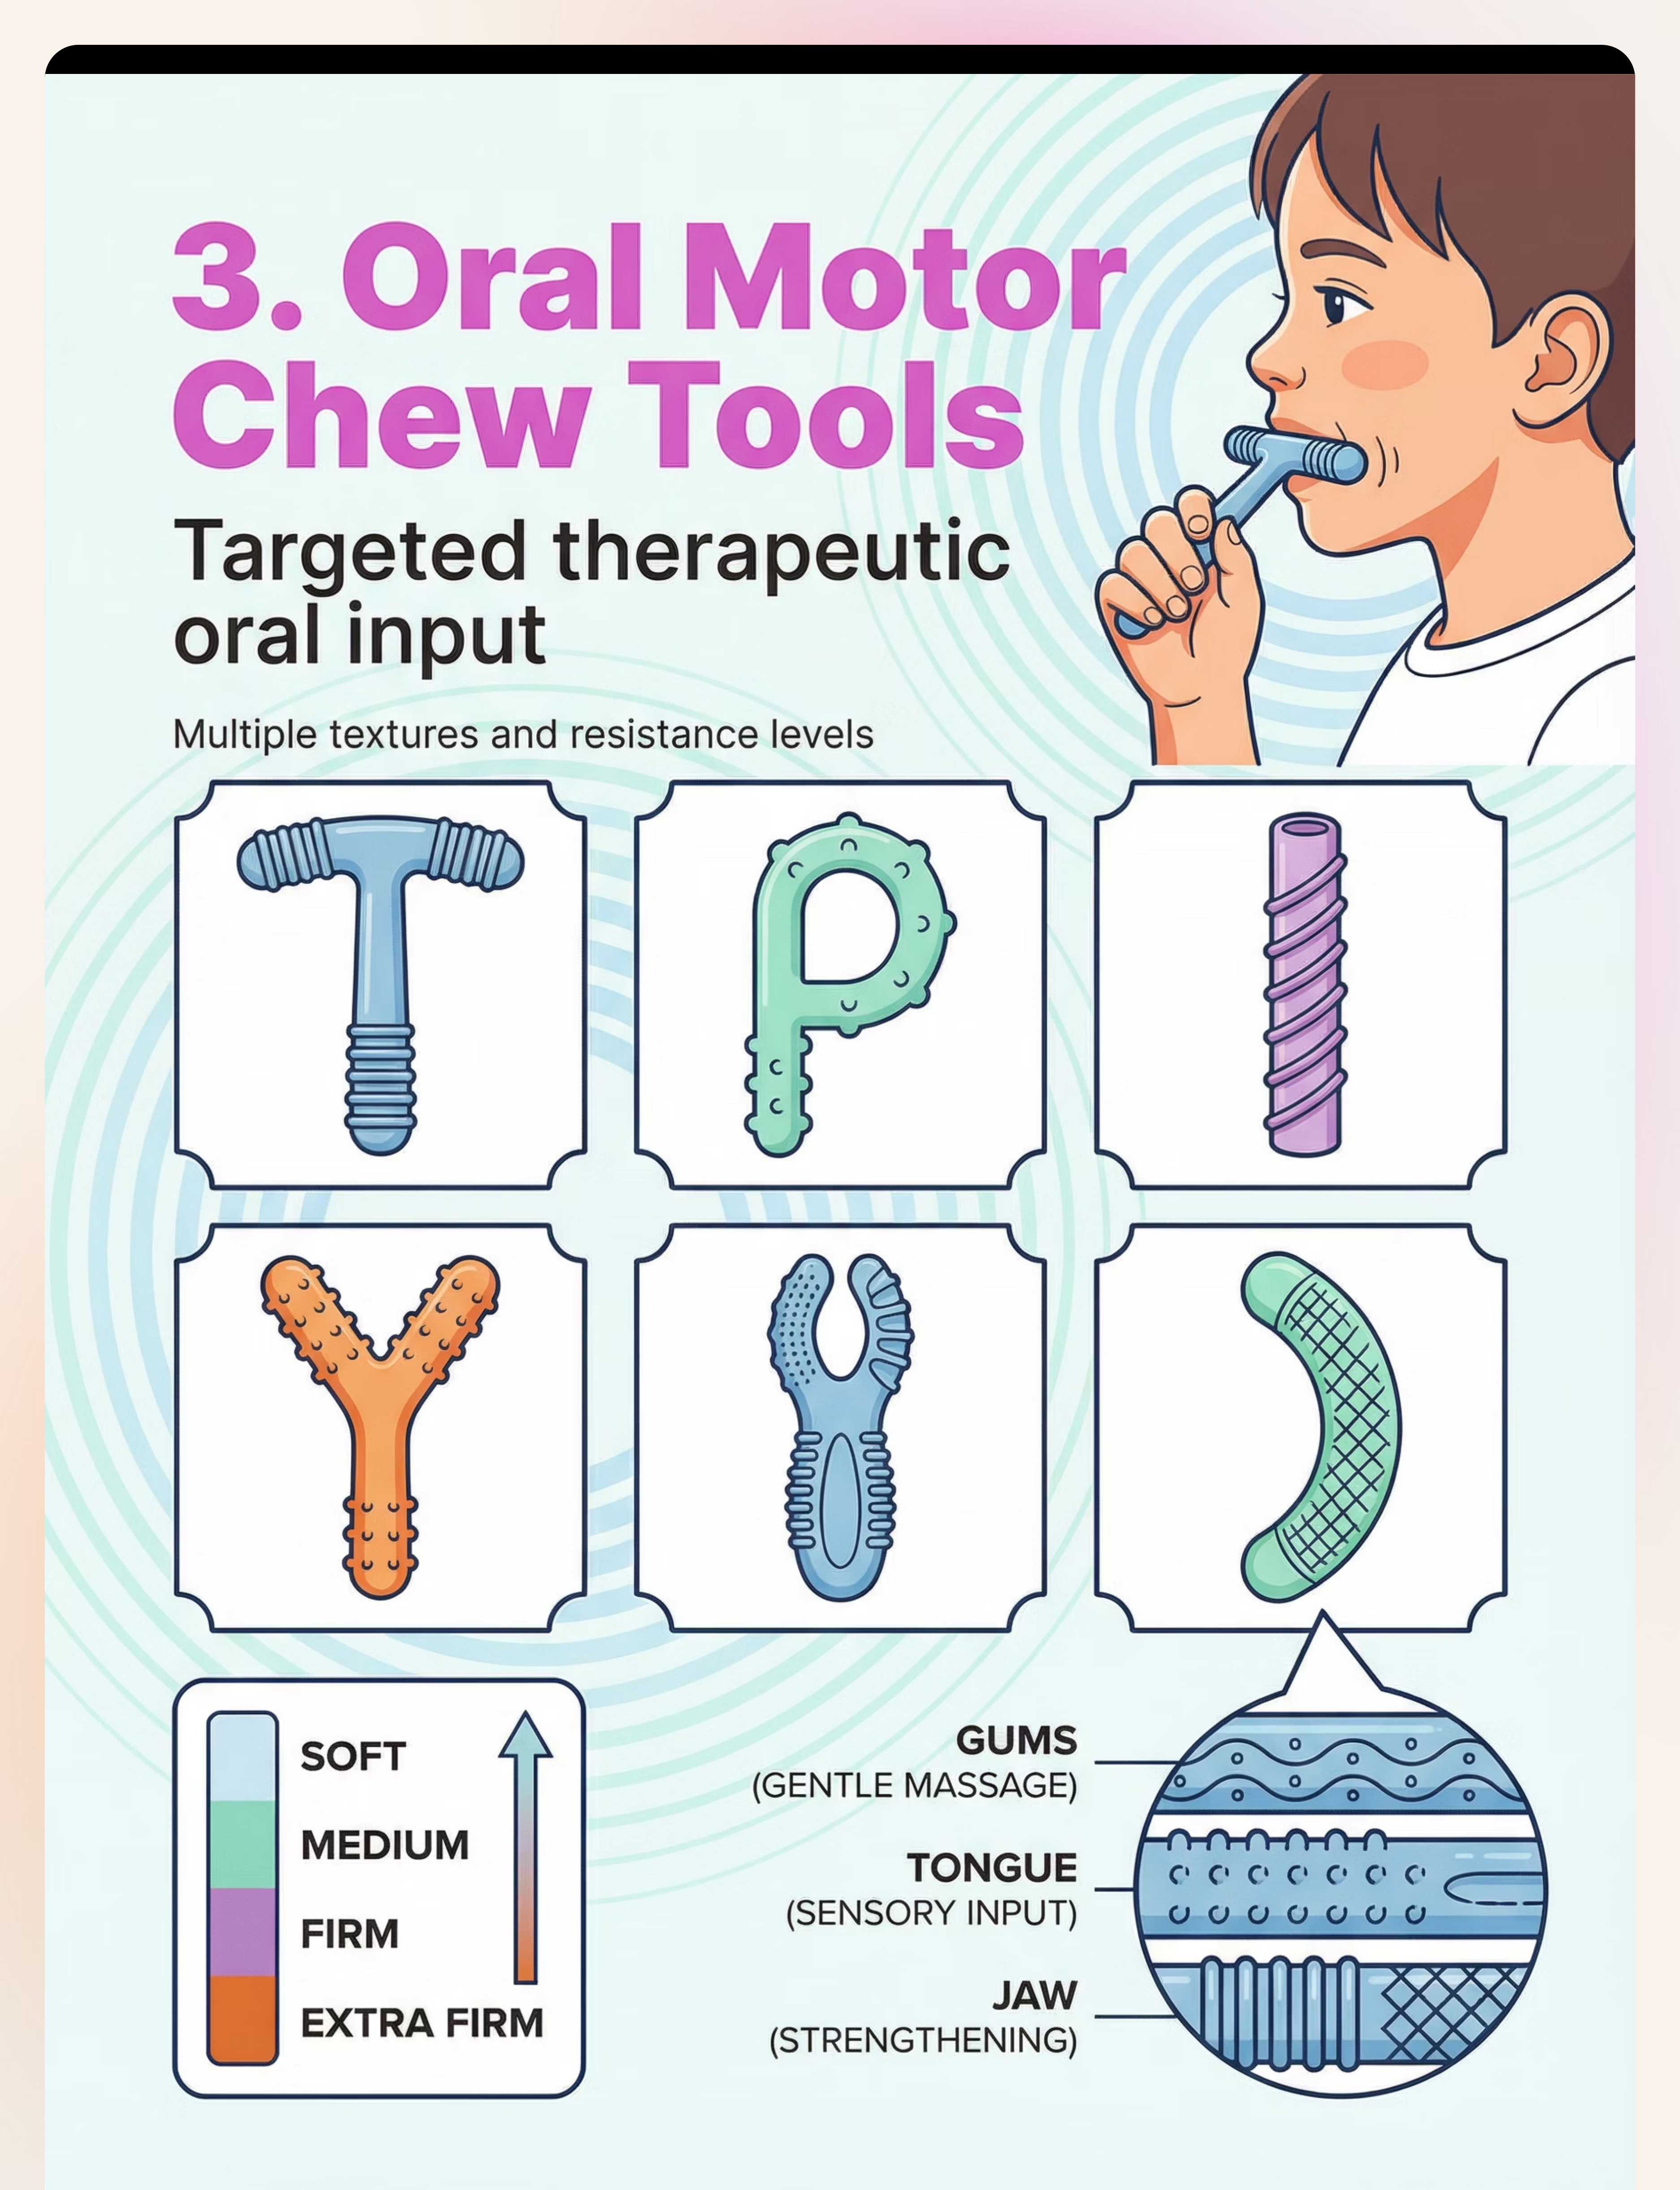
03
Oral Motor Chew Tools
Chewy Tubes, Grabbers — therapeutic-grade oral input
04
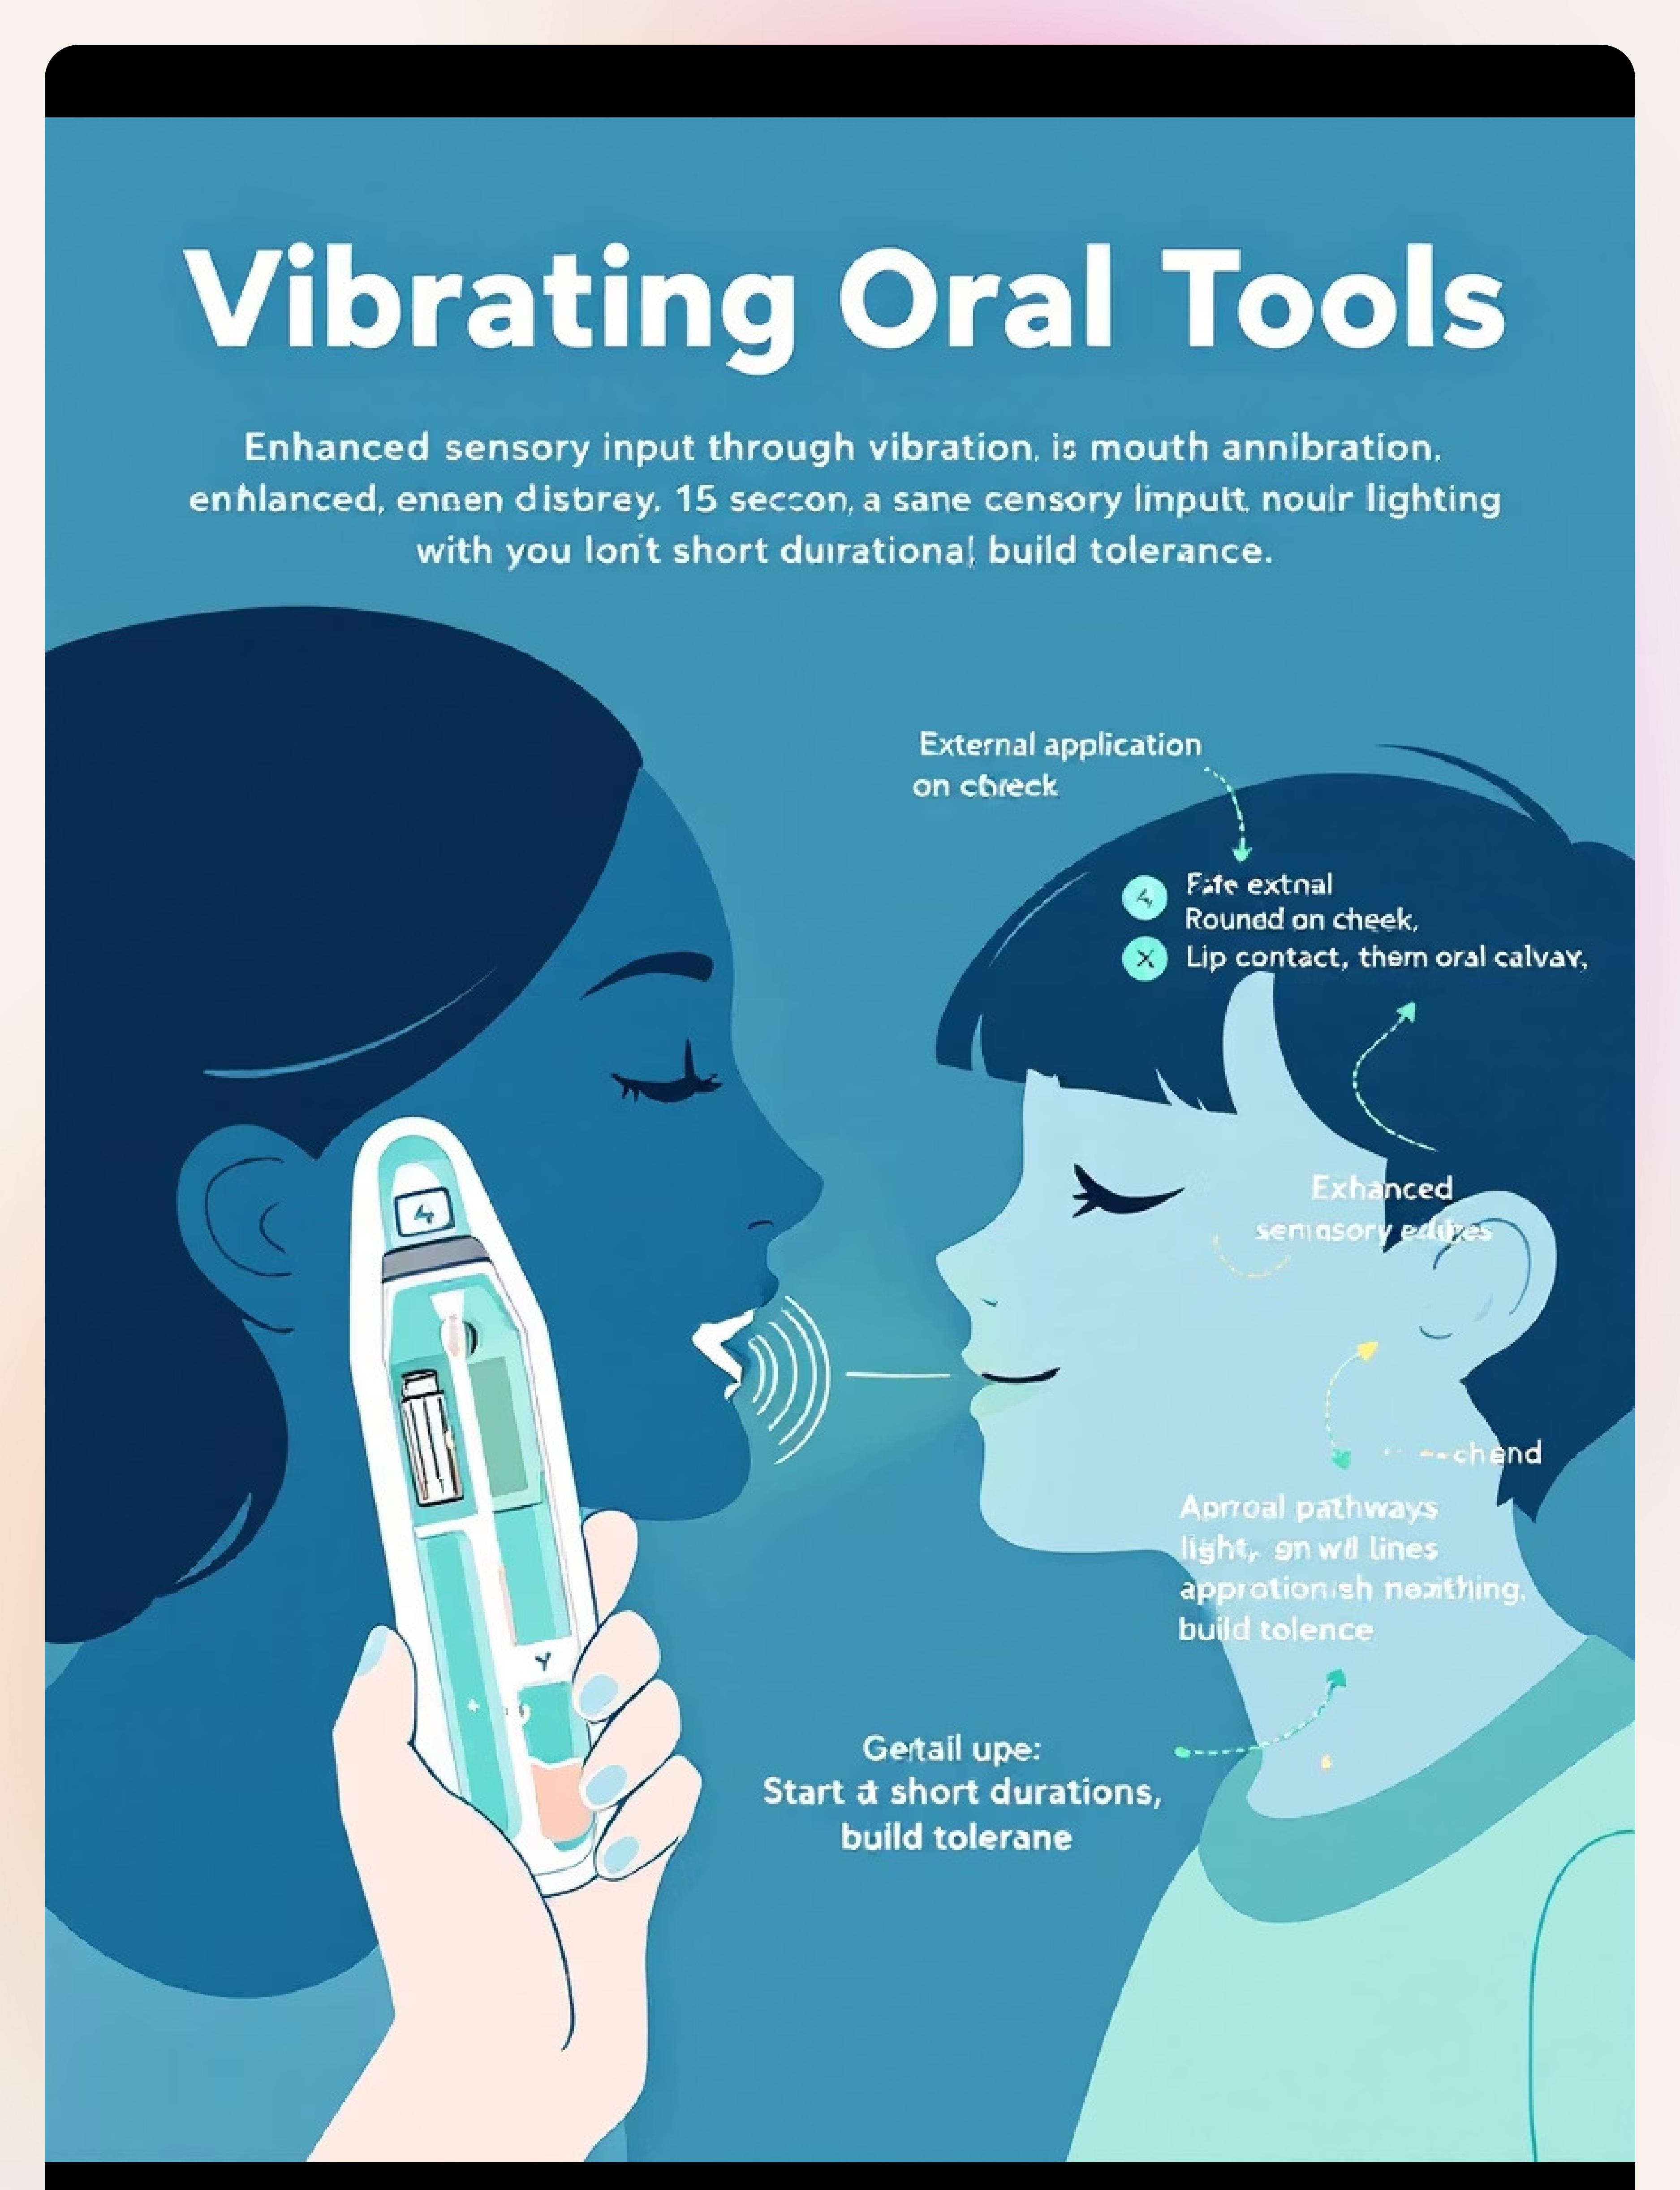
Vibrating Oral Tools
Z-Vibe style — proprioception + vibration for intense input needs
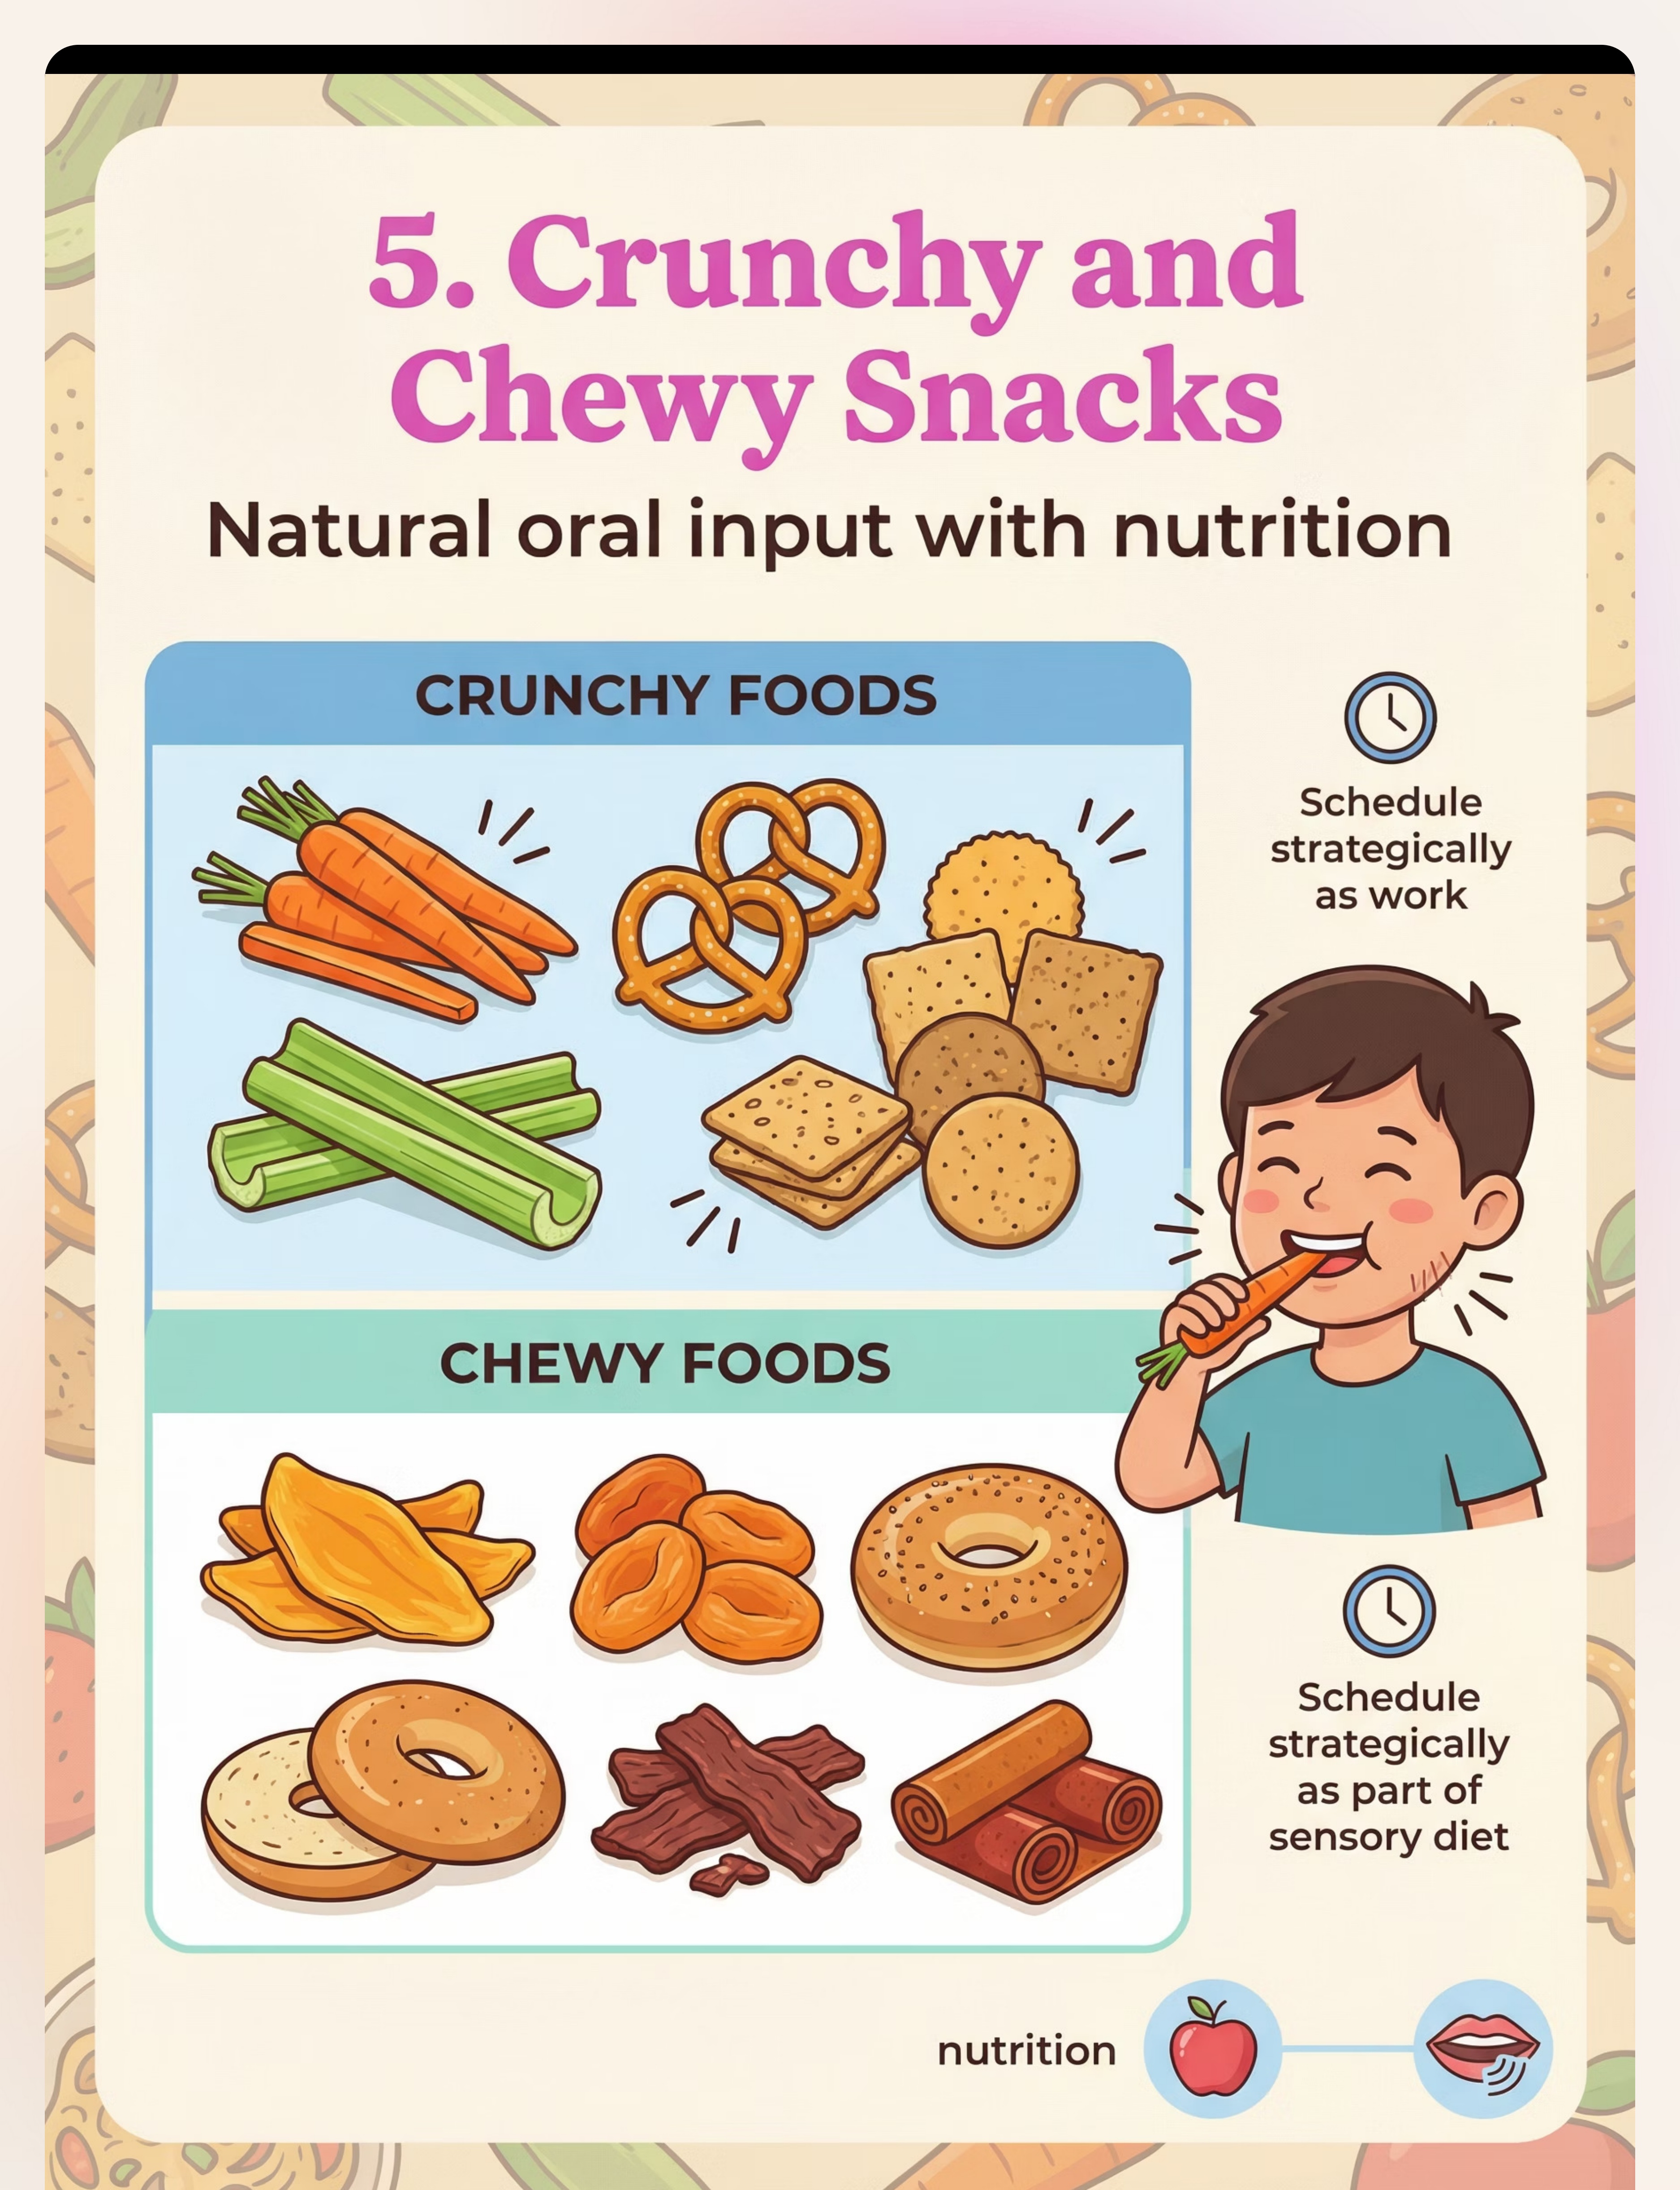
05
Crunchy & Chewy Snacks
Strategic nutrition as sensory input — timed around high-arousal periods
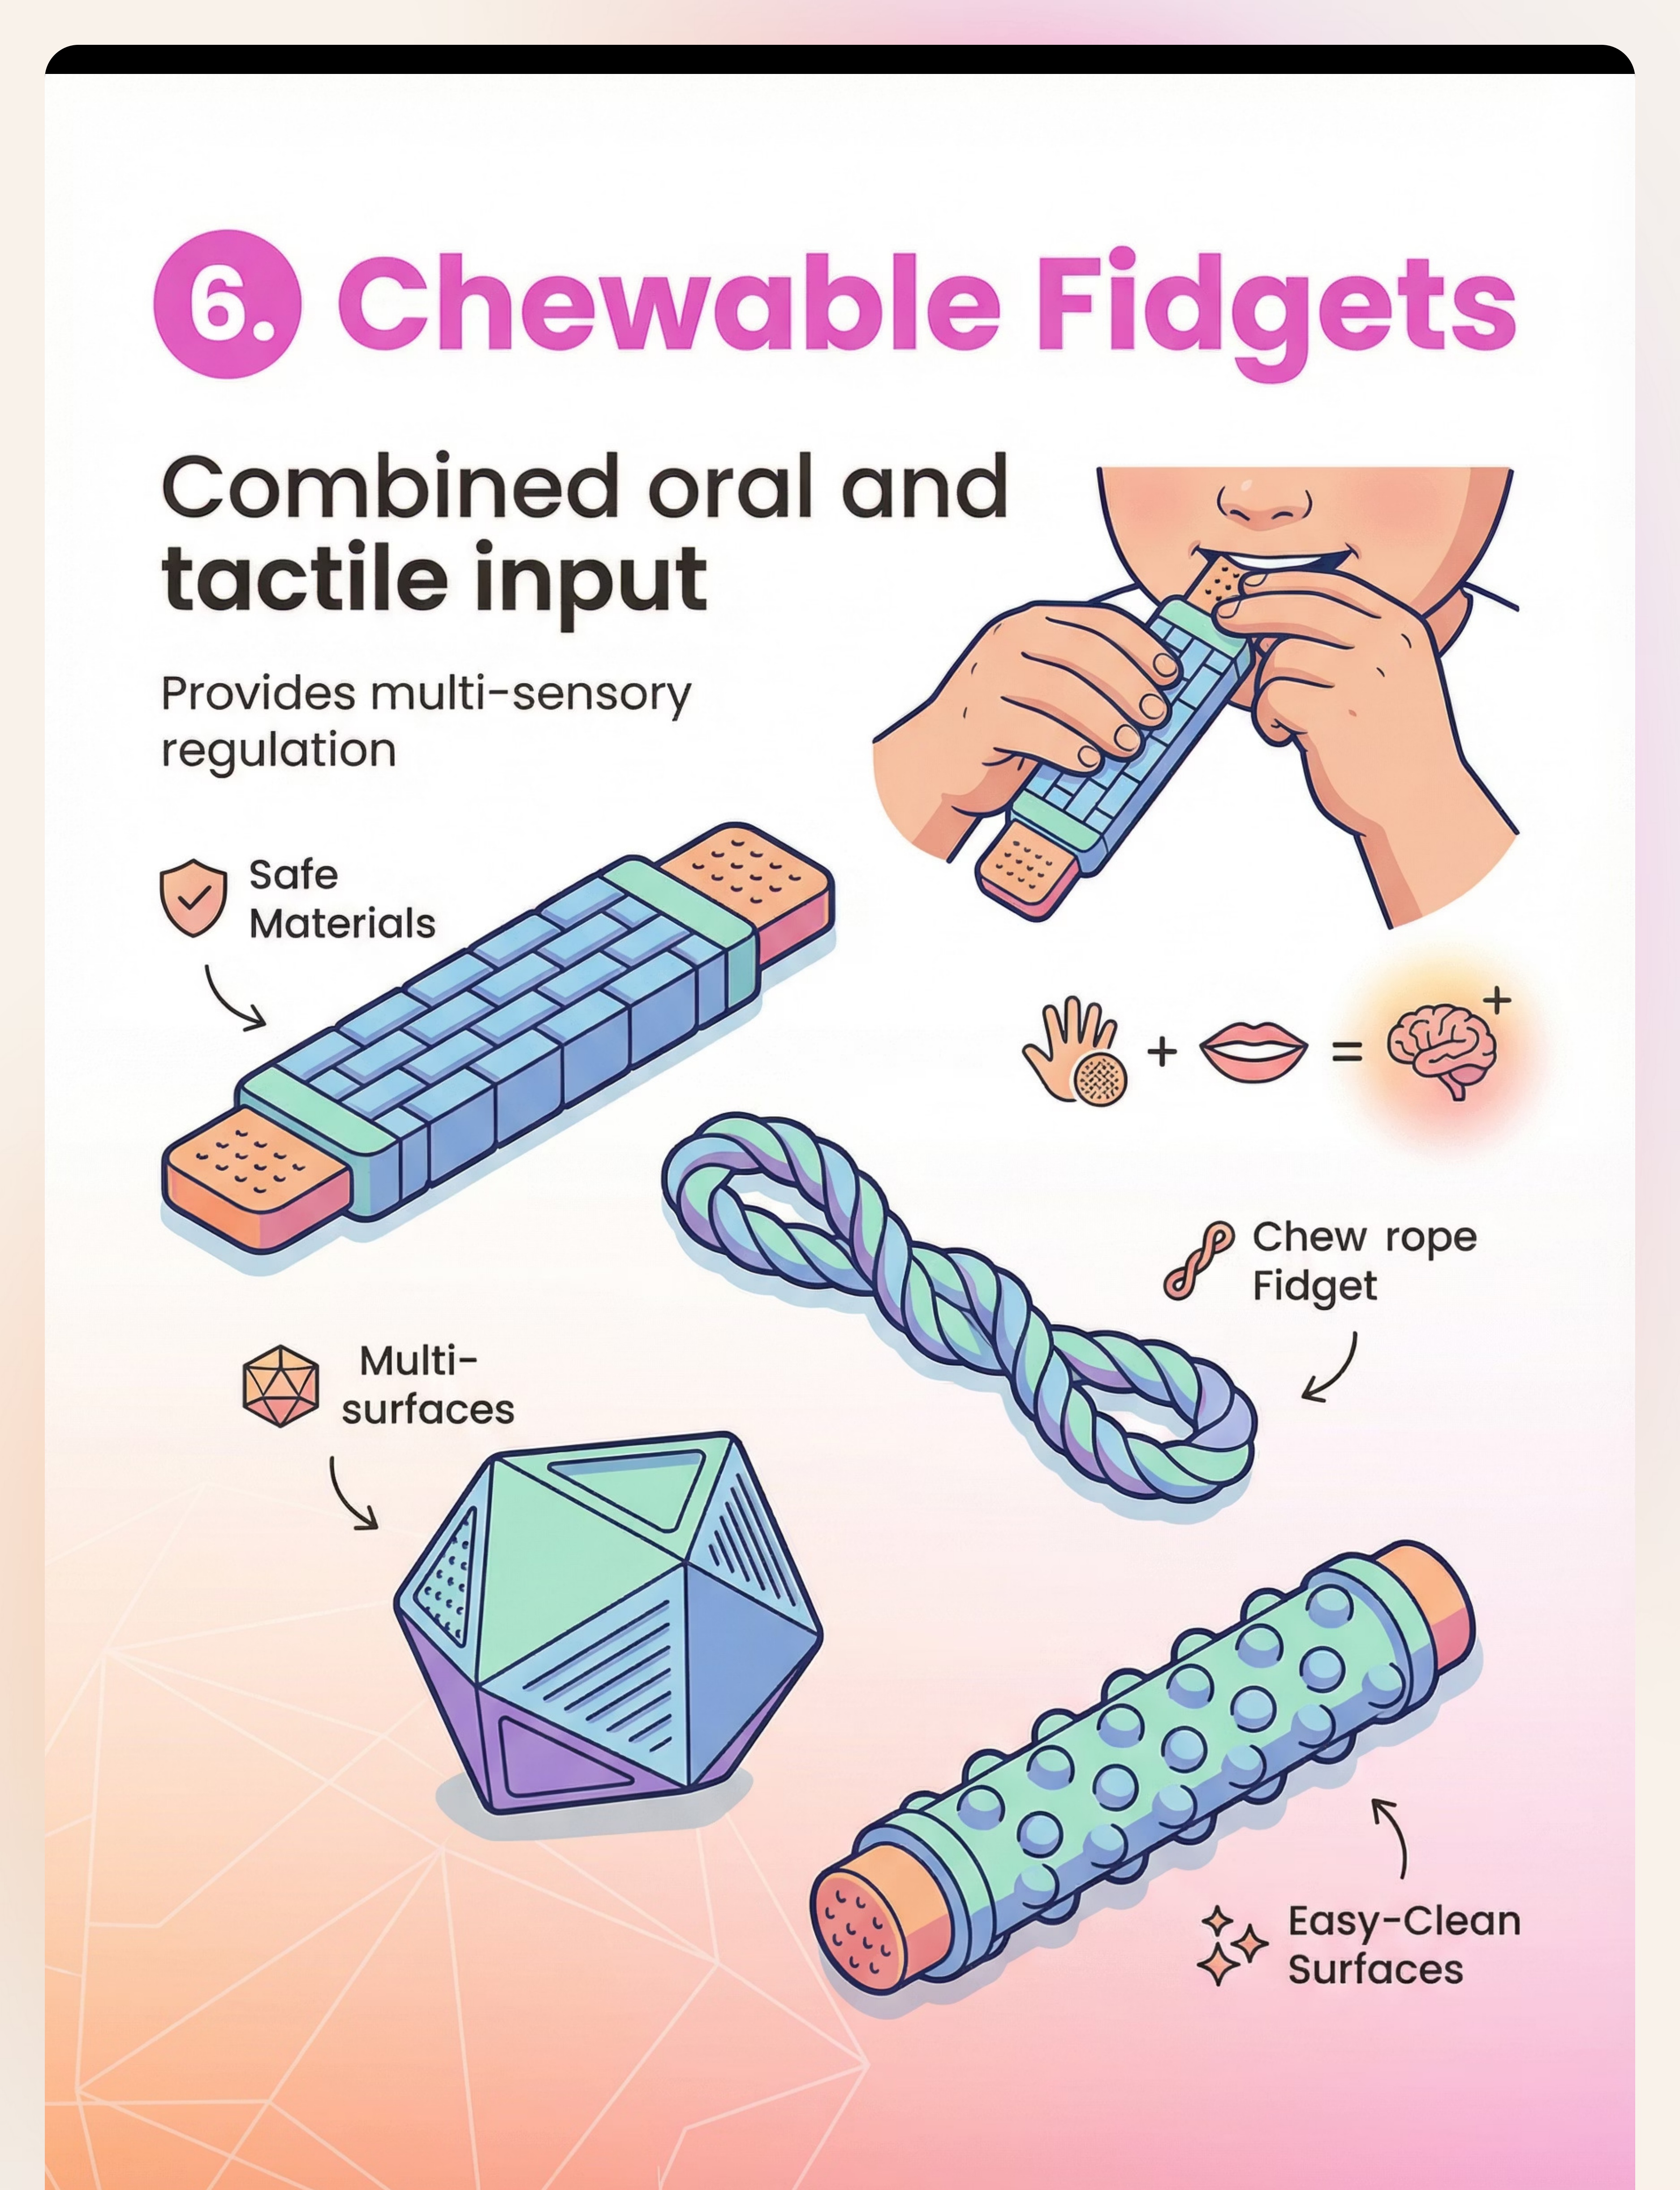
06
Chewable Fidgets
Dual sensory input — oral + tactile simultaneously
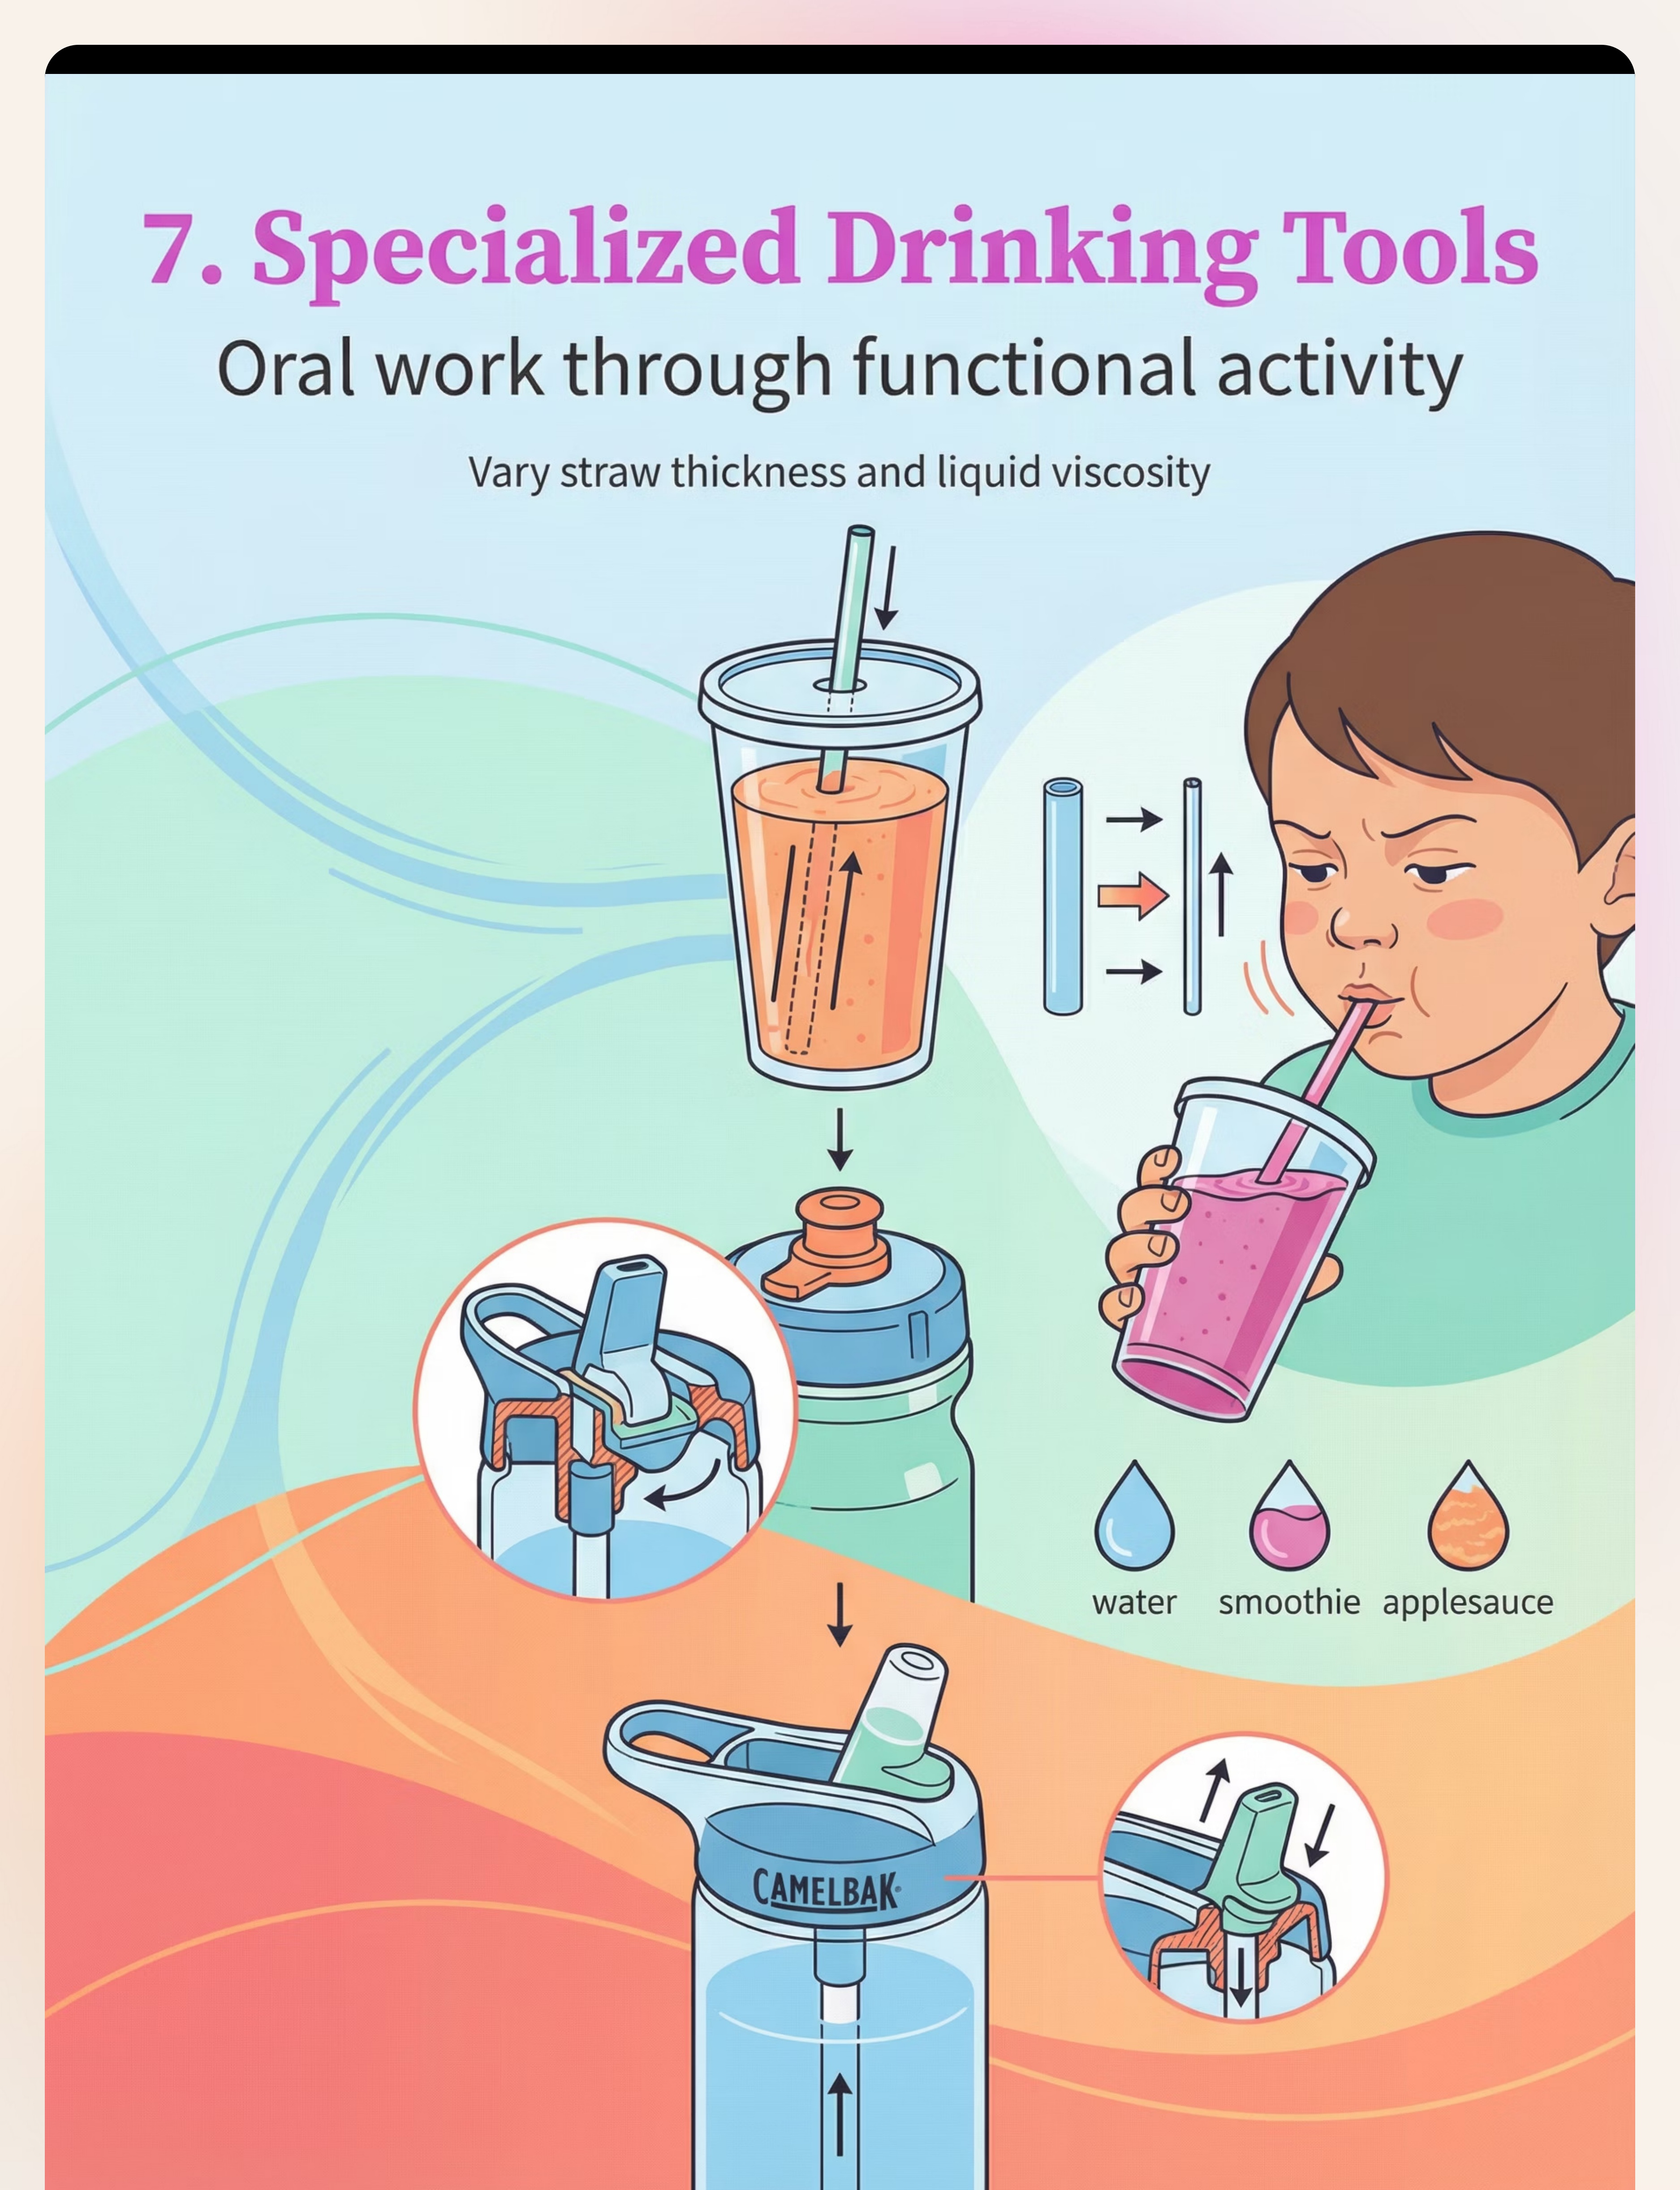
07
Specialized Drinking Tools
Progressive straws, bite-valve bottles — powerful oral input in daily activity
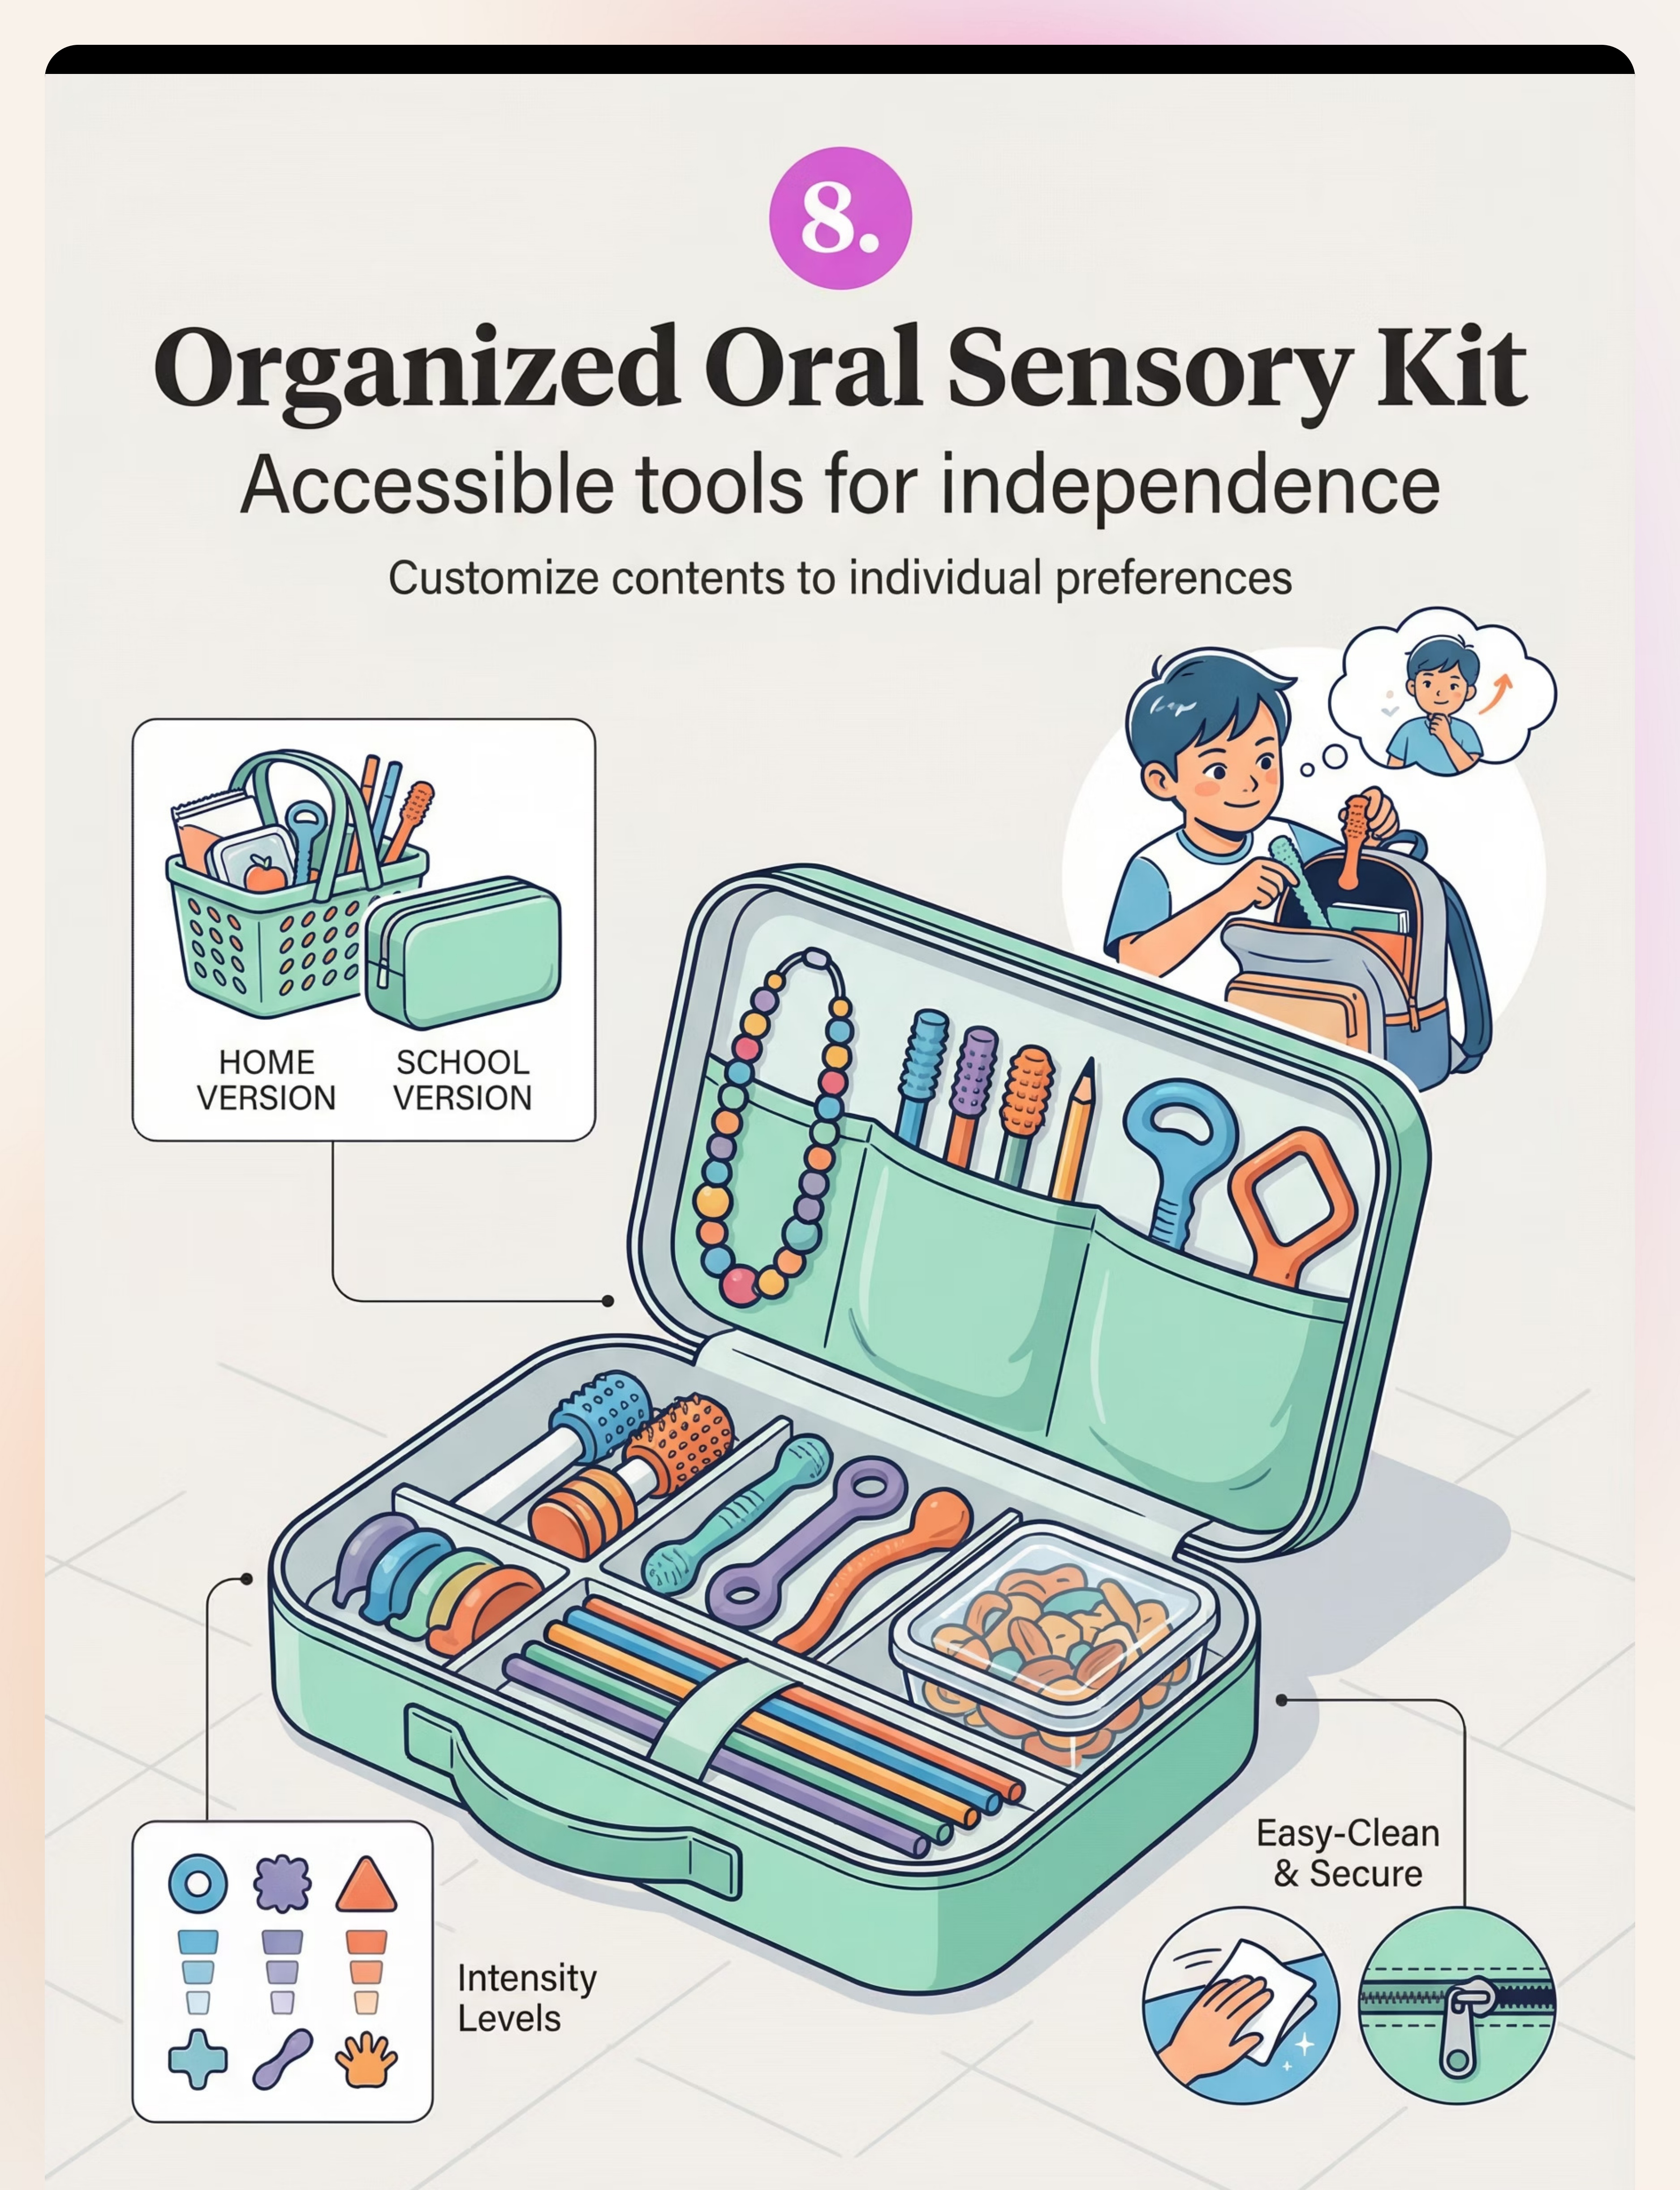
08
Organized Sensory Kit
Accessibility builds independence — child self-selects, portable everywhere
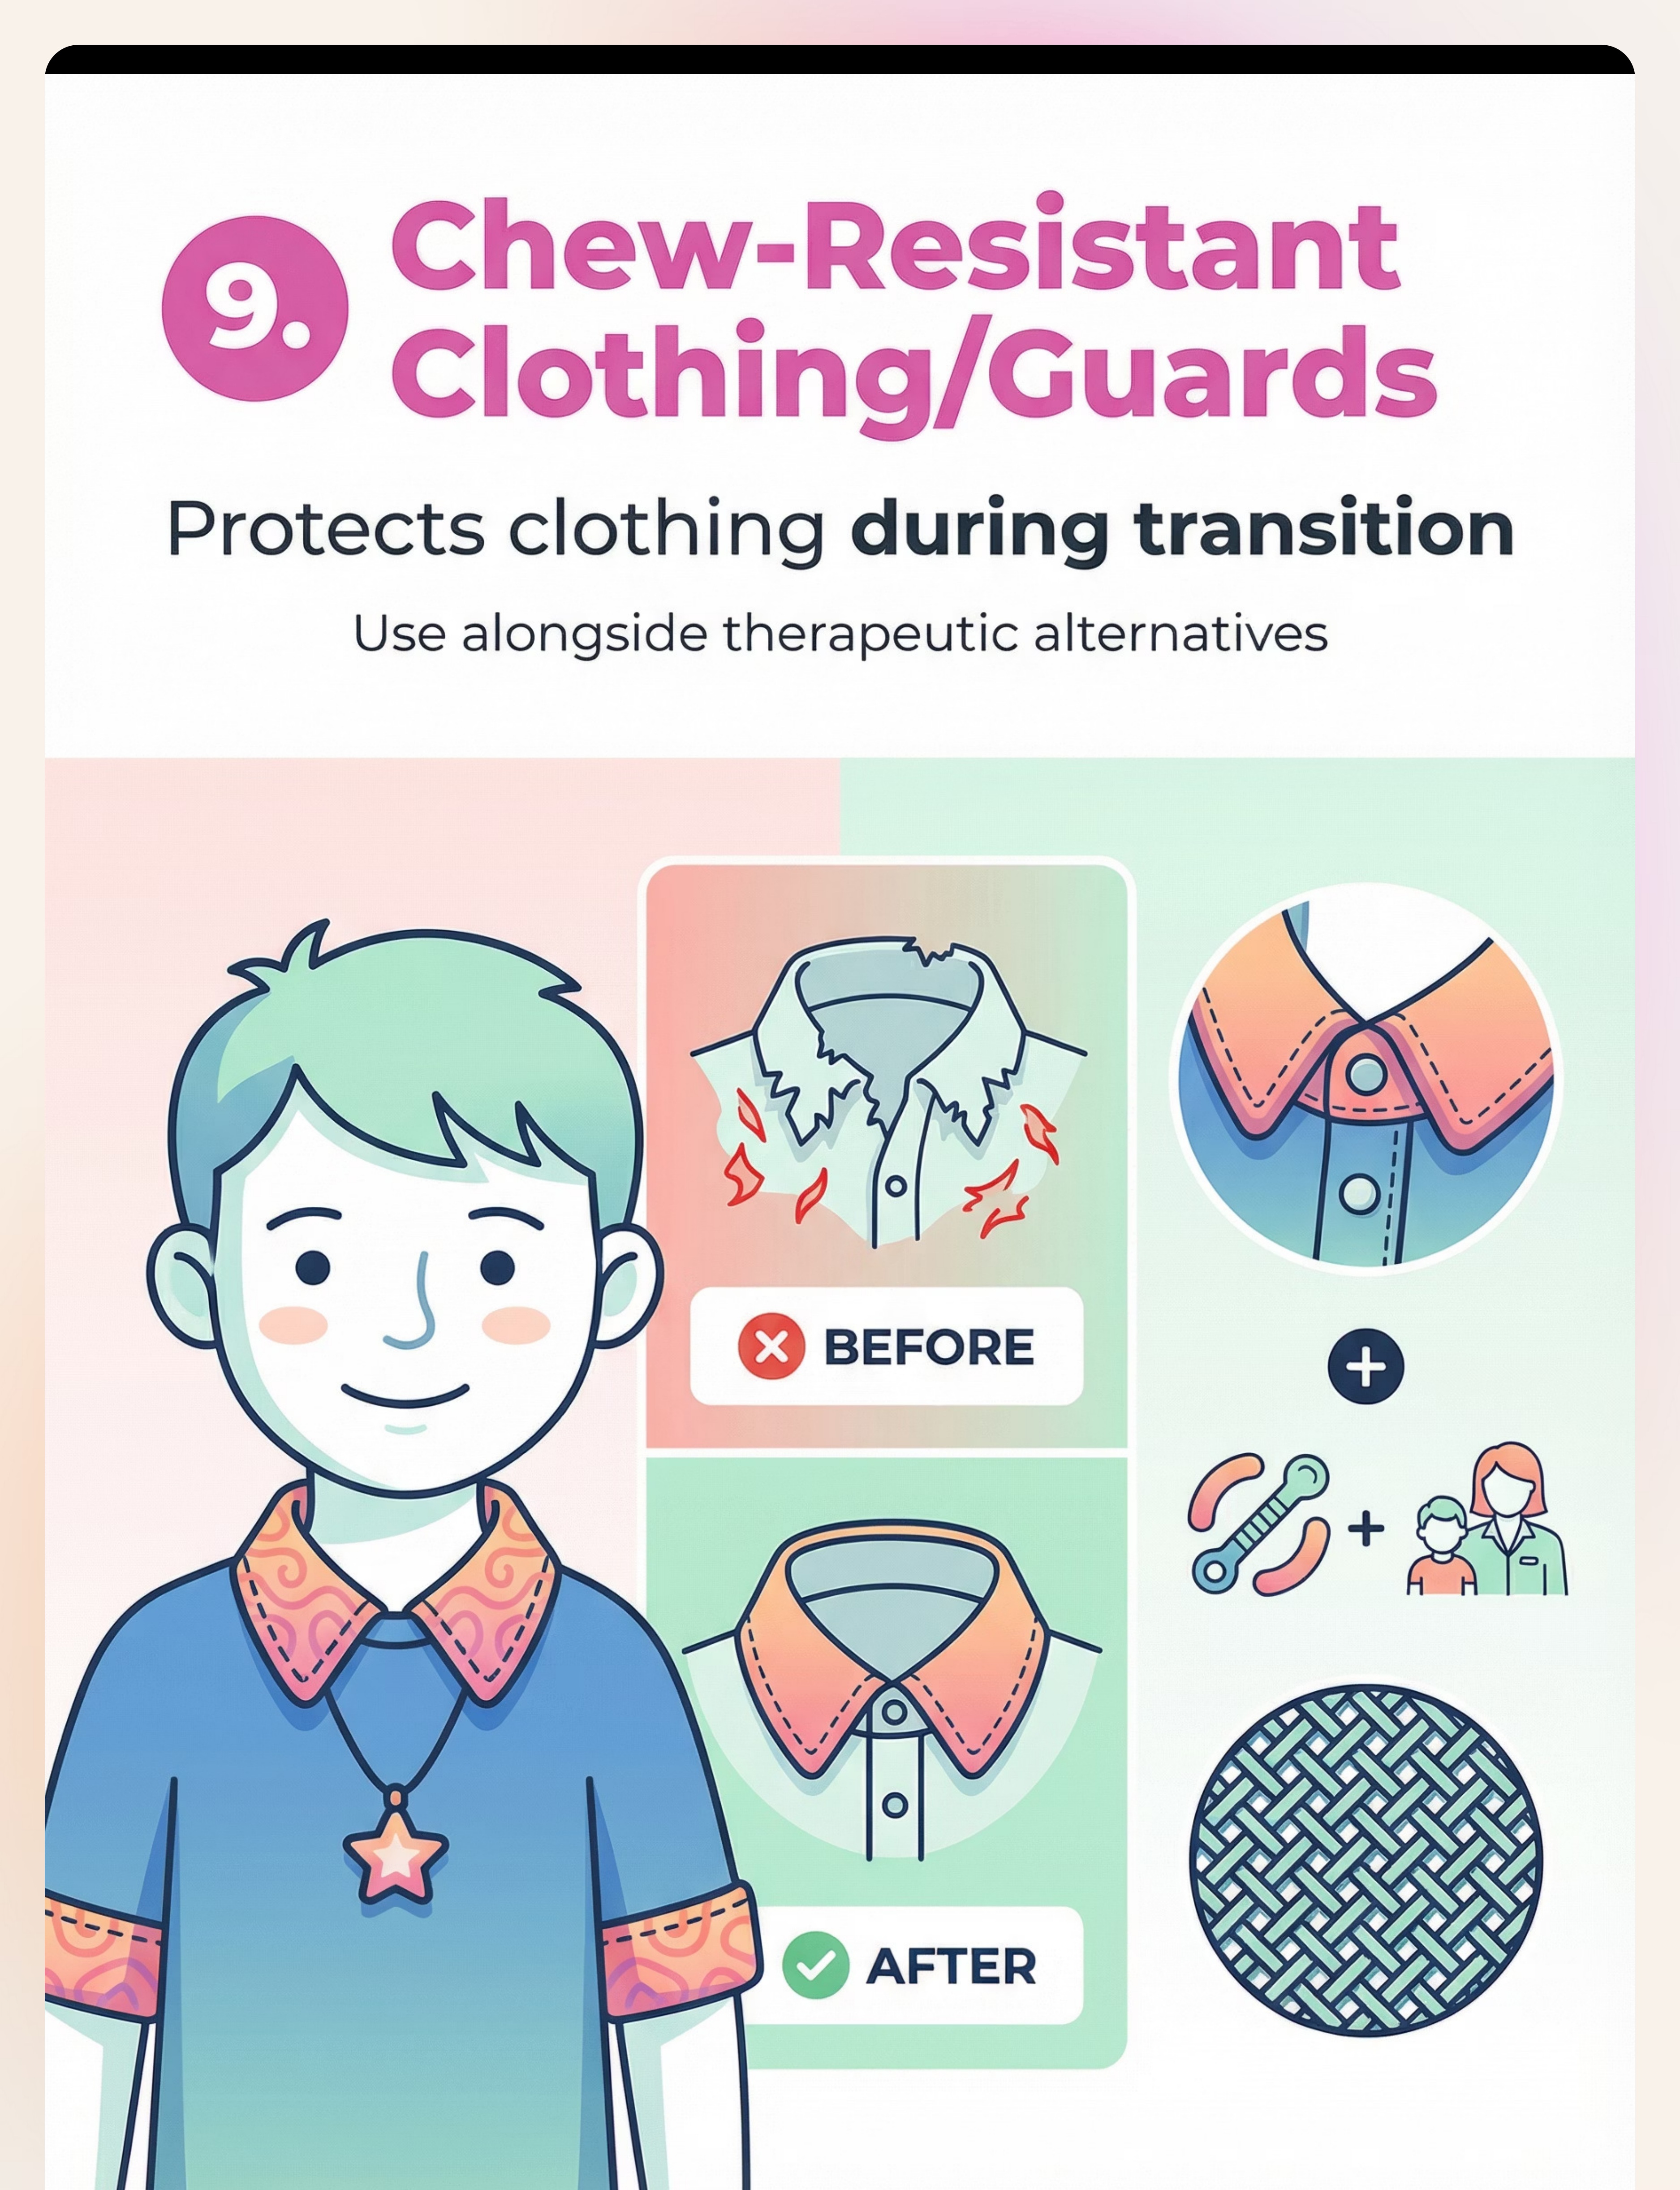
09
Chew-Resistant Clothing
Collar guards, sleeve bibs — protects clothing while habit is being built

Material 1: Chewable Jewelry (Necklaces & Bracelets)
Canon: Oral Motor & Sensory Tools
Always Available
Socially Acceptable
Why It Works
Always worn, socially acceptable, food-grade silicone, available the instant the oral urge strikes. The child never has to reach for it — it's there. Available in mild, moderate, and aggressive chewing intensity variants to match the child's exact profile.
Practical Details
- 💰Price Range: ₹500–1,500
- 💪Intensity: Mild / Moderate / Aggressive variants
- 🛒 Search Amazon.in: "Chewable Jewelry Autism India"
✅Pinnacle Recommends: Breakaway clasp essential | Food-grade silicone only | BPA-free confirmed before purchase

Material 2: Pencil Toppers & Chewable Writing Tools
Canon: Oral Motor & Sensory Tools
School-Essential
Invisible Accommodation
Why It Works
Transforms the #1 mouthing target at school into a safe sensory tool. The child satisfies their oral need without interrupting academic work. Looks like a normal pencil accessory — no social attention drawn. Available in soft, medium, and firm resistance levels to match the child's bite force.
Practical Details
- 💰Price Range: ₹200–600
- 💪Resistance Levels: Soft / Medium / Firm
- 🛒 Search Amazon.in: "Chewable Pencil Toppers India"
✅Pinnacle Recommends: Secure fit to prevent choking | Replace immediately when bite marks appear | Keep one spare in school bag

Material 3: Oral Motor Chew Tools (Chewy Tubes, Grabbers)
Canon: Oral Motor & Sensory Tools
Clinical Grade
Multiple Shapes
Why It Works
Purpose-designed for therapeutic-grade oral input. Multiple shapes target different mouth areas — the T-bar targets molars, the Y-shape targets lateral chewing, the ridged rod provides varied texture input. Matched to the child's exact sensory profile by OT assessment for maximum regulatory effect.
Practical Details
- 💰Price Range: ₹400–1,200
- 🔷Shapes: T-bar | P-shape | Y-shape | Ridged rod | Boomerang
- 🛒 Search Amazon.in: "ARK Therapeutic Chew Tools India"
✅Pinnacle Recommends: Clinical-grade only | Match resistance to child's bite force | Start with medium resistance and adjust based on OT guidance
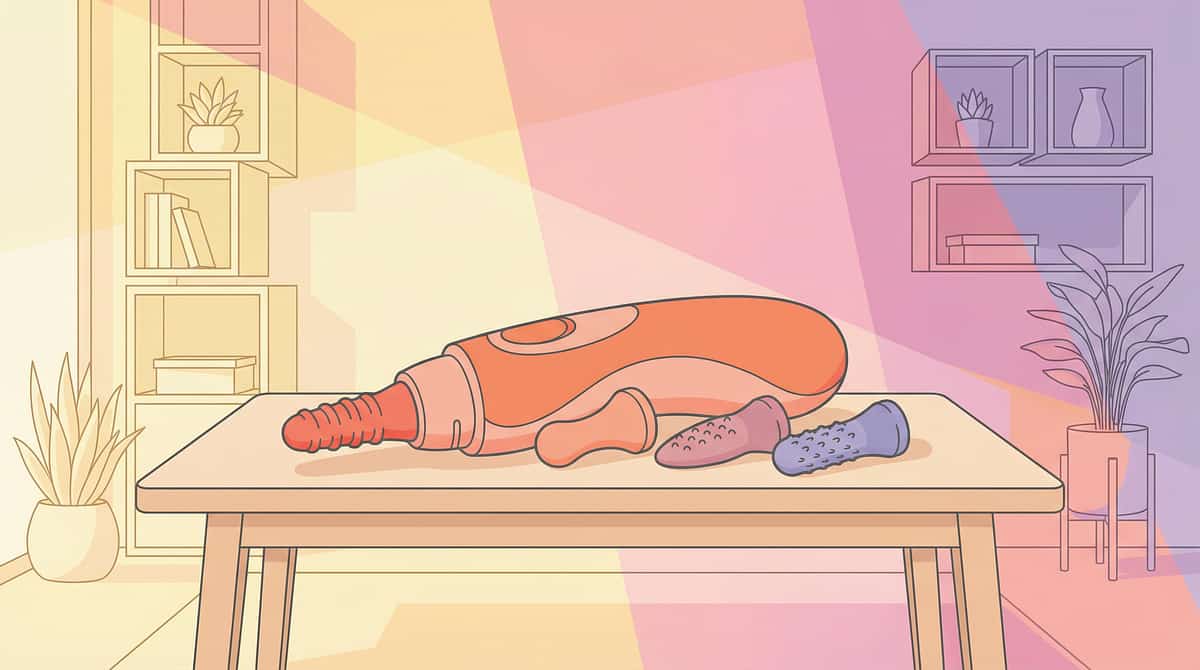
Material 4: Vibrating Oral Tools (Z-Vibe Style)
Canon: Oral Motor & Sensory Tools
⚠️ OT Guidance Required
Why It Works
Combines proprioception + vibration for children requiring the most intense oral sensory input — satisfying needs that chewing alone cannot reach. The vibration component activates deeper oral sensory receptors, delivering a more powerful regulatory signal to the brainstem. Reserved for children with high oral sensory thresholds whose other tools are insufficient.
Practical Details
- 💰Price Range: ₹1,500–3,500
- 🛒 Search Amazon.in: "Vibrating Oral Motor Tool Therapy India"
- ⚠️SLP/OT guidance required for introduction
✅Pinnacle Recommends: Never force. Always start externally (on cheek or hand). Short durations only — 30–60 seconds initially. This tool is non-replaceable with DIY alternatives.
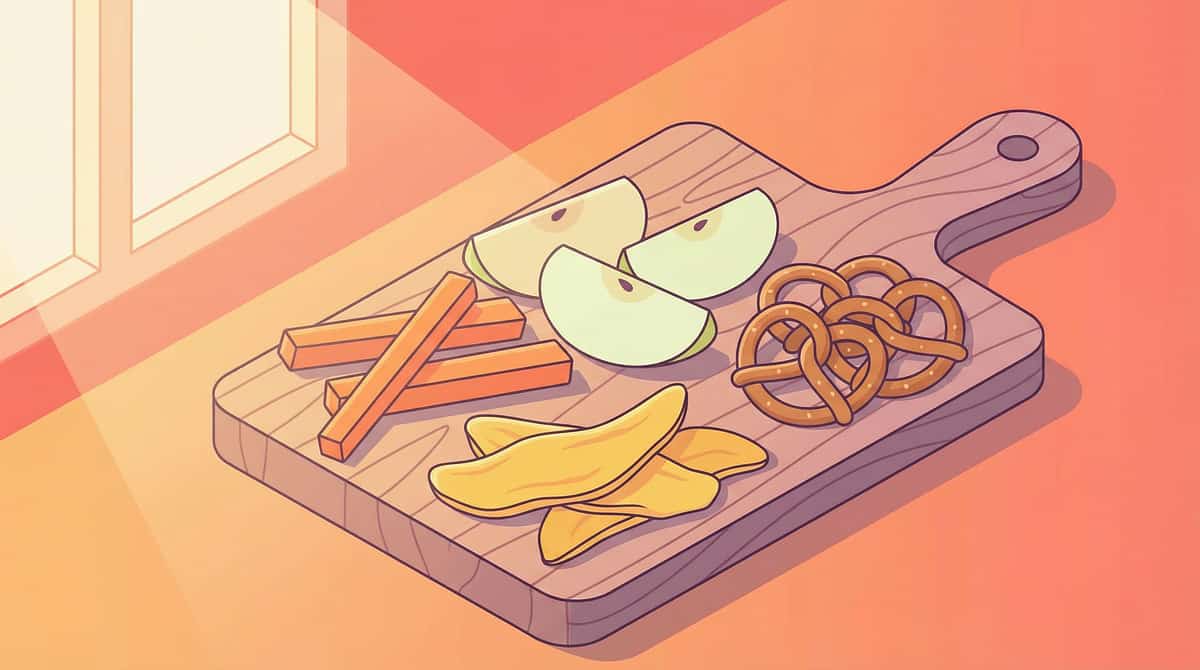
Material 5: Crunchy & Chewy Snack Options
Canon: Dietary Sensory Inputs
Grocery Available
Lowest Barrier Entry
Why It Works
Strategic nutrition as sensory input. The jaw proprioception from crunching and chewing activates the same brainstem regulation pathway as therapeutic tools — using the most natural, familiar delivery vehicle available. Timed strategically around high-arousal periods, this is often the easiest entry point for children who resist all tool introduction.
💰Price Range: ₹100–500 (regular grocery items)
Best Options
- 🥕Crunchy: Carrots, celery, pretzels, rice cakes, apple slices
- 🍇Chewy: Dried mango, dates, bagels, fruit leather, whole wheat chapati (well-done)
✅Pinnacle Recommends: Schedule before school, before homework, and before transitions. These are the highest-arousal windows where oral input has maximum regulatory impact.
Material 6: Chewable Fidgets & Hand Toys
Canon: Oral Motor & Sensory Tools
Dual Channel Regulation
Tactile + Oral
Why It Works
Provides dual sensory input — oral and tactile simultaneously. When both channels receive input at the same time, the regulatory effect on the nervous system is amplified. The hands engage with texture while the mouth engages with the food-grade silicone, creating a double-channel regulation experience that satisfies more of the child's sensory needs in one tool.
Practical Details
- 💰Price Range: ₹300–900
- 🔷Features: Textured for hands, food-grade silicone throughout, no detachable parts
- 🛒 Search Amazon.in: "Chewable Fidget Toy Sensory India"
✅Pinnacle Recommends: The entire toy must be safe for mouthing — not just the chewing portion. No small removable parts anywhere on the tool.

Material 7: Specialized Drinking Tools (Progressive Straws, Bite-Valve Bottles)
Canon: Oral Motor & Sensory Tools
Embedded in Daily Routine
Why It Works
Sucking through narrow straws and thick liquids generates powerful oral proprioceptive input embedded within a completely functional daily activity — drinking. The effort required to pull liquid through a narrow straw activates the lip, jaw, and tongue muscles intensely, delivering strong regulatory input without any special "therapy moment" being visible to others.
Practical Details
- 💰Price Range: ₹200–800
- 🔷Set: Narrow → medium → wide straw progression
- 🔷Also: Bite-valve sports bottles for on-the-go input
- 🛒 Search Amazon.in: "Therapeutic Straw Set Oral Motor India"
✅Pinnacle Recommends: Start with easier/wider straws. Thicken liquids gradually using yogurt-based smoothies. Narrow straws + thick liquid = maximum input.
Material 8: Organized Oral Sensory Kit
Canon: Sensory Kits / Organization Systems
Builds Independence
Portable
Why It Works
Accessibility is the intervention. When a child can see their tools, reach them independently, and self-select based on their own sensory awareness, they are building the most critical long-term skill: recognizing their own needs and meeting them safely. The kit makes this possible in any environment — home, school, car, grandparents' house.
Practical Details
- 💰Price Range: ₹1,500–4,000 (complete kit)
- 📦Contents: 3 chew tools + chewable jewelry + straw set + small chewy snack container
- 🛒 Search Amazon.in: "Sensory Kit Children India"
✅Pinnacle Recommends: Maintain two kits — one full kit at home, one smaller kit in the school bag. Consistency across environments is non-negotiable for generalization.

Material 9: Chew-Resistant Clothing & Fabric Guards
Canon: Protective & Adaptive Clothing
Transition Management
Pair With Oral Tools
Why It Works
Protects clothing while the therapeutic habit of reaching for oral tools is still being built. This material addresses the immediate family stress of destroyed clothing, buying time for the oral tools protocol to take effect. It is a bridge — not a destination. The fabric guard removes one visible symptom while the underlying sensory need is being addressed through Materials 1–8.
Practical Details
- 💰Price Range: ₹800–2,500
- 🔷Types: Collar guards | Sleeve bibs | Chew-resistant fabric shirts
- 🛒 Search Amazon.in: "Chew Guard Collar Autism India"
⚠️Pinnacle Note: Always pair with oral tools. Clothing protection alone does NOT address the sensory need. Using only Material 9 without 1–8 is incomplete treatment.

Every Family Can Execute This Technique Today — Regardless of Budget
"Context-specific, equity-focused interventions ensure no child is excluded from therapeutic benefit due to economic circumstance." — WHO Nurturing Care Framework, 2018 | Implemented in 54 LMICs
Material | Clinical Version | ₹0 Home Alternative | Why It Works | |
1. Chewable Jewelry | Food-grade silicone pendant | Food-grade teether tied on a breakaway lanyard | Same silicone proprioceptive input | |
2. Pencil Toppers | Commercial chew topper | Silicone straw cover pushed onto pencil end | Identical oral input surface | |
3. Chew Tools | ARK Grabber/Chewy Tube | Frozen damp washcloth rolled firm | Cold + pressure input | |
4. Vibrating Tools | Z-Vibe | NOT replaceable — OT guidance required | Safety non-negotiable | |
5. Crunchy Snacks | Commercial sensory snacks | Carrots, whole wheat crackers, raw celery | Natural proprioceptive input | |
6. Chewable Fidgets | Commercial fidget | Food-grade silicone teether (large) | Same dual input principle | |
7. Straw Set | Progressive straw kit | Regular straws in 3 different diameters | Same resistance principle | |
8. Sensory Kit | Commercial kit bag | Any small zippered pouch from home | Organization is the principle | |
9. Clothing Guard | Commercial guard | Bandana-style bib on collar | Same protective function |
⚠️When Commercial Grade Is Non-Negotiable: Vibrating oral tools (safety design, intensity calibration) | Chew resistance matching for aggressive chewers (must withstand extreme bite force safely) | Any tool where bite-through risk is present
WHO NCF (2018): Household-material-based intervention efficacy confirmed across 54 LMICs. PMC9978394 | WHO NCF Handbook (2022)
Safety Gate — Read This Before Using Any Oral Tool
1
🔴 STOP — Do NOT Proceed If:
- Child has swallowed or attempted to swallow any oral tool or piece
- Child is showing signs of pica (persistent ingestion of non-food items)
- Oral tool is broken, cracked, or showing structural damage
- Child is currently ill with oral or throat infection
- Child is unsupervised — never leave child alone with oral tools
2
🟡 AMBER — Modify Before Using:
- First-time tool user → Introduce slowly with OT guidance
- Aggressive chewer → Must use "Firm/Aggressive" rated tools only
- Child has braces or dental appliances → Consult dentist first
- Within 30 min of large meal → Wait or use light intensity only
- Elevated anxiety today → Reduce intensity, offer choice
3
🟢 GREEN — Safe to Proceed:
- Tool is intact, clean, correct intensity rating
- Child has had adequate sleep and nutrition
- Supervision is available throughout session
- Child has previously accepted this specific tool
- Space is prepared (see Setup Card)
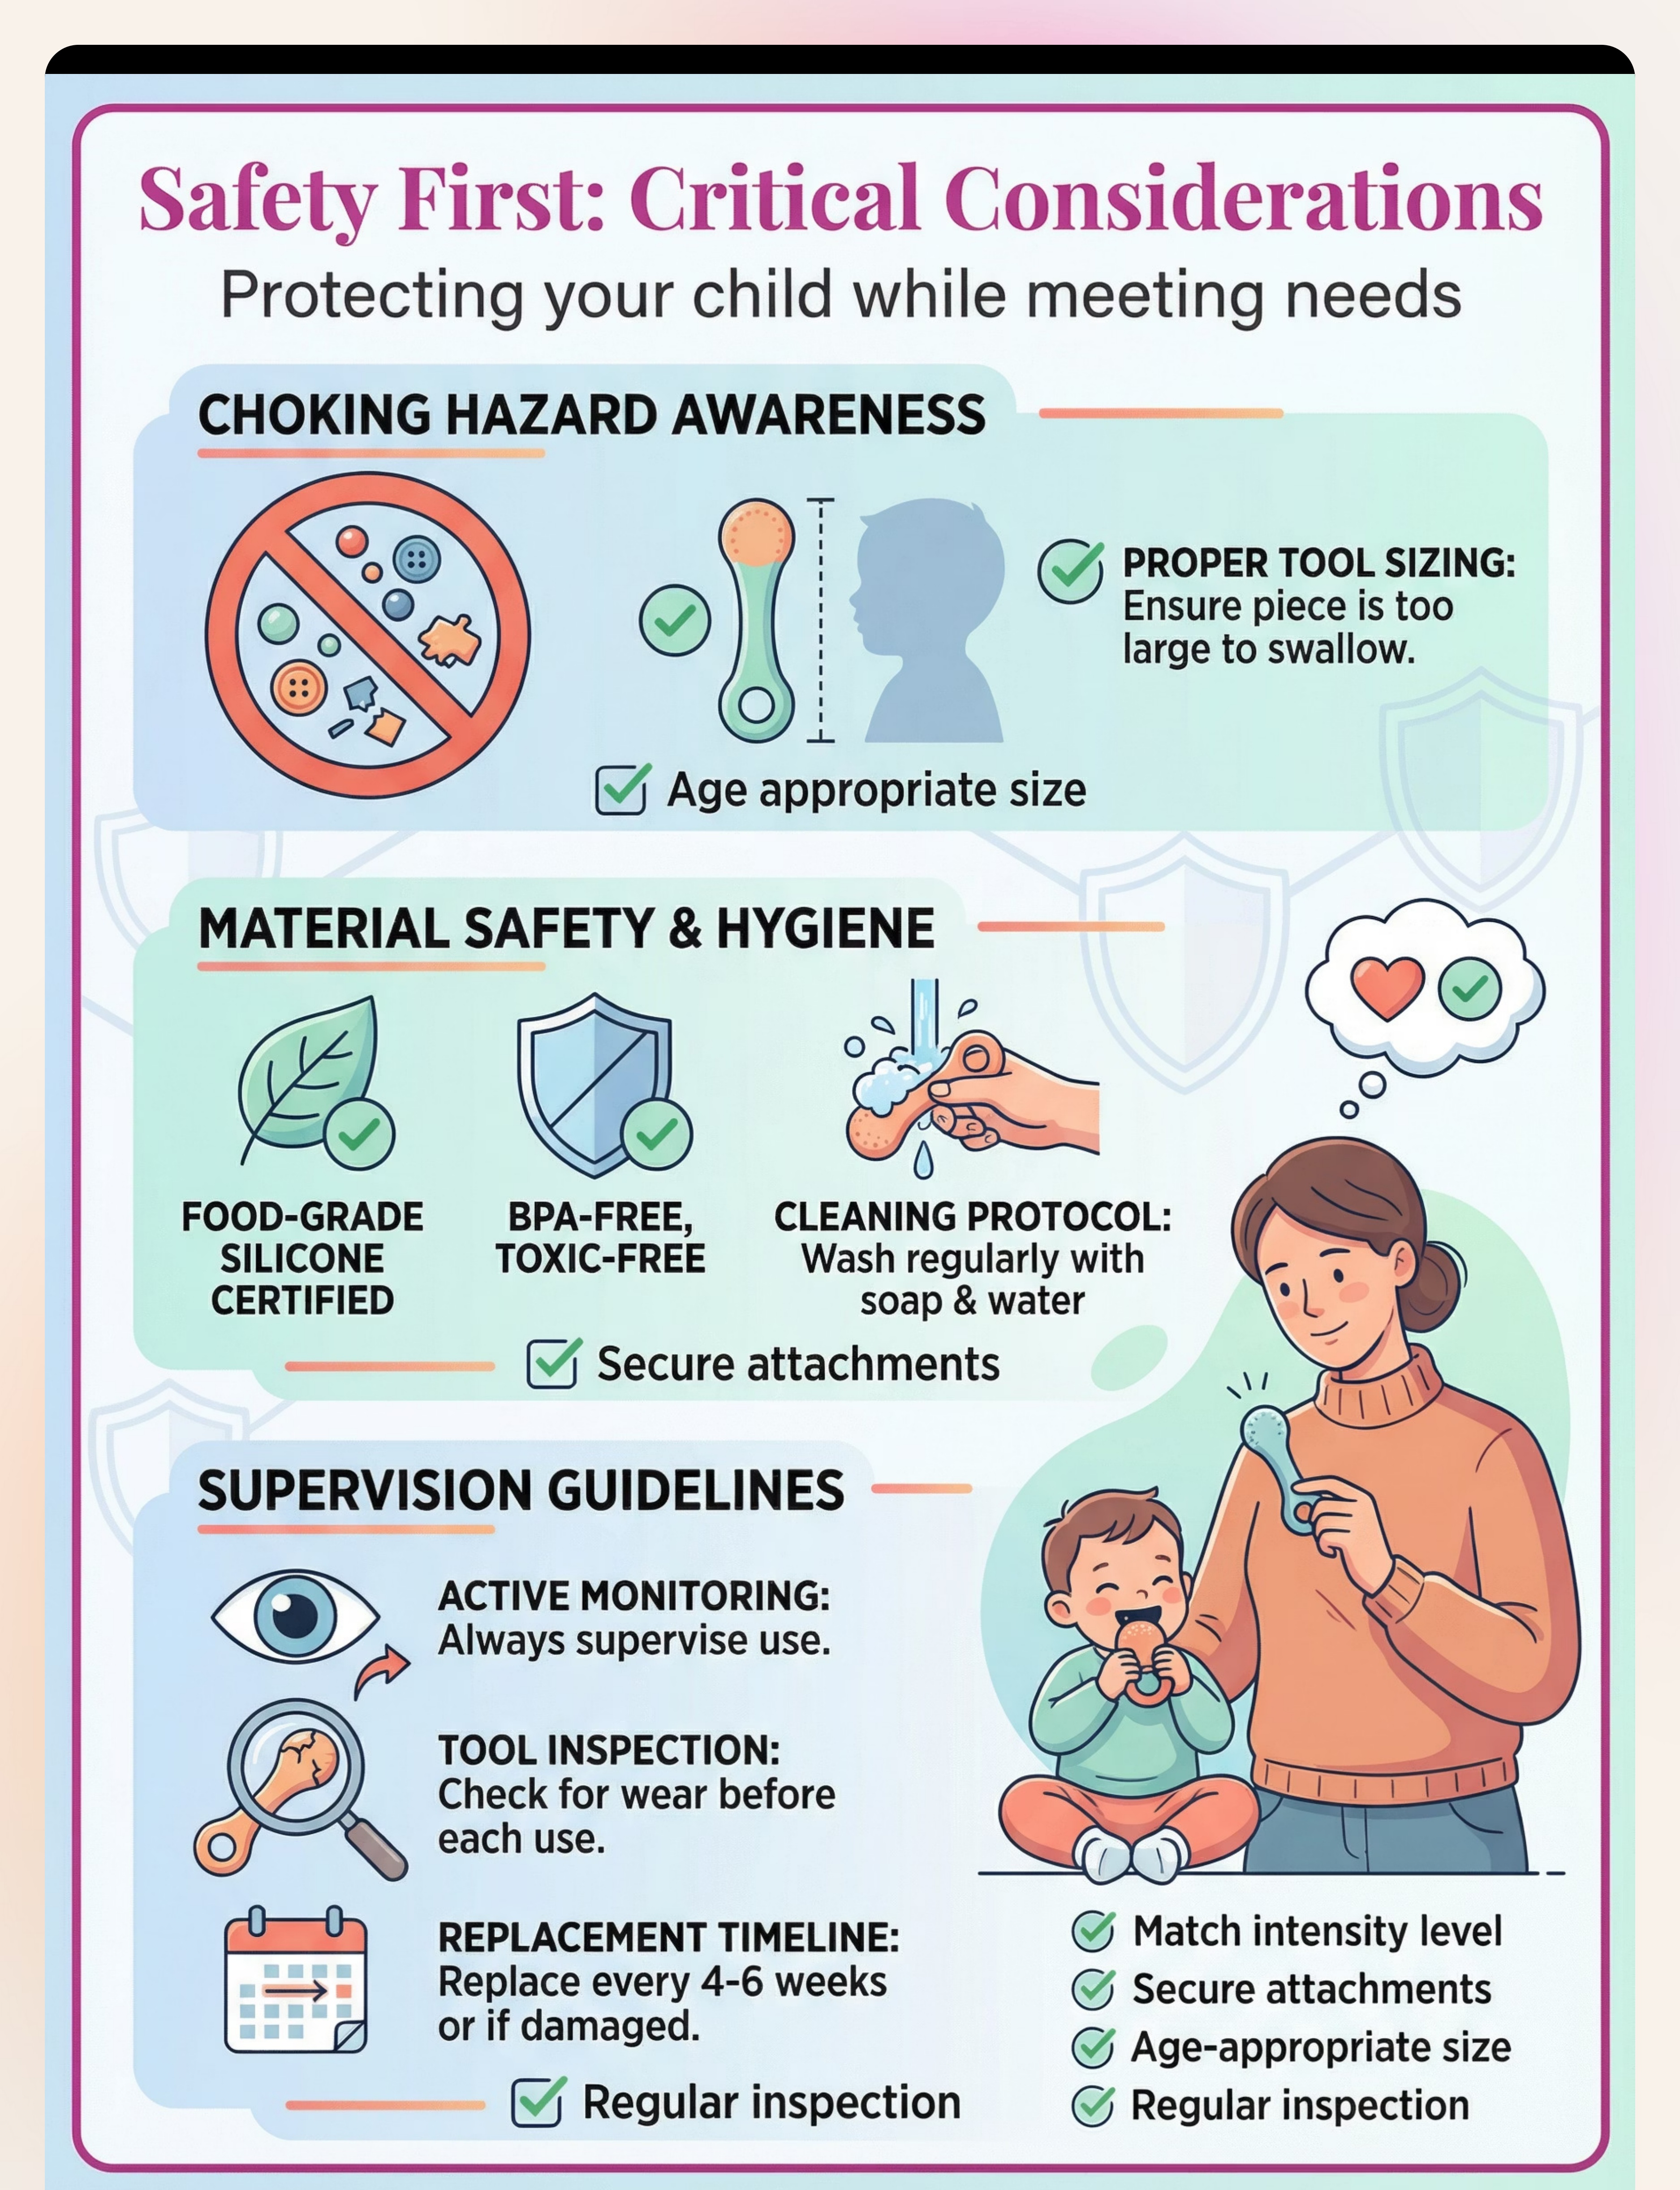
Material Safety Checklist
- ☐ Food-grade silicone or BPA-free material confirmed
- ☐ Breakaway clasp present on any wearable tool
- ☐ Size appropriate — too large to swallow as a whole piece
- ☐ No detachable small parts anywhere on the tool
- ☐ Cleaned with soap and water in last 24 hours
- ☐ Replacing tool every 4–6 weeks or at first sign of structural wear
🚨Stop Immediately If: Child attempts to bite off and swallow pieces | Oral injury occurs | Choking | Gagging | Distress escalates beyond 30 seconds | Signs of pica behavior emerge. Call 9100 181 181 immediately.
Indian Journal of Pediatrics RCT (2019): Home-based sensory intervention safety protocols. DOI: 10.1007/s12098-018-2747-4
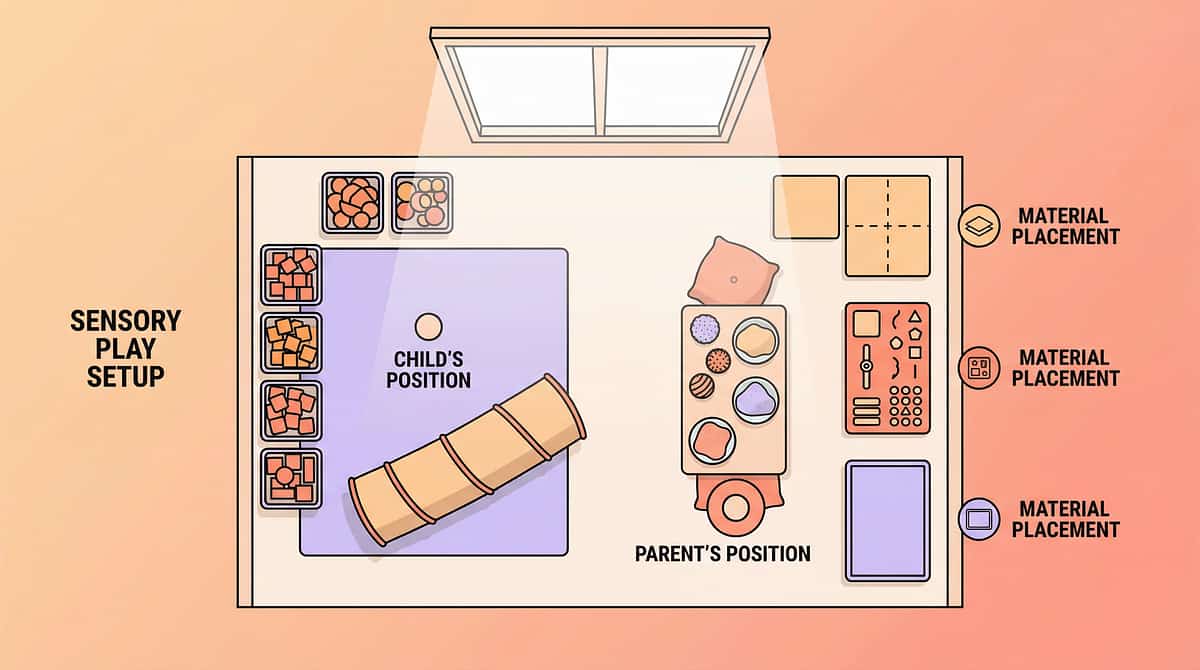
The Right Environment Prevents 80% of Session Failures
Room Setup — 6 Key Positions
- Child's position: Low chair or floor cushion, back supported, facing parent
- Parent's position: Same level as child — not towering — within arm's reach
- Material placement: Within child's sight but not clutching distance (builds anticipation)
- Sensory kit: On right side of child, open and visible
- Timer: Visual timer placed where child can see it
- Remove: All non-session objects — toys, screens, food not part of session
Environment Specifications
- 🔇Sound: Quiet or soft instrumental (60–70 dB max)
- 💡Lighting: Natural or warm white — avoid harsh fluorescent
- 🌡️Temperature: Comfortable — heat increases dysregulation
- 📱Screens: All off or facing away
- 🚪Door: Closed to prevent interruptions
✅ Best Timing
30–45 min after breakfast | After afternoon snack | Before homework
⚠️ Challenging Timing
First 20 min after school | Within 30 min of sleep
❌ Avoid Entirely
During hunger | During fever or illness | Post-meltdown within 1 hour
Sensory Integration Theory (Ayres): Environmental setup as core principle. Meta-analysis: 1:1 structured environment sessions showed maximum effectiveness. PMC10955541

ACT III: THE EXECUTION
The 60-Second Assessment That Determines Everything
Before every session, run through this readiness check. The best session is one that starts right — a 10-minute excellent session is worth more than a 30-minute forced one.
Check | Observable Indicator | If YES | If NO | |
1. Fed? | Meal within last 2 hours | ✅ Go | ❌ Feed first | |
2. Rested? | No eye-rubbing, yawning, emotional sensitivity | ✅ Go | ❌ Rest first | |
3. Arousal Level | Not visibly overexcited or hyper-escalated | ✅ Go | ⚠️ Calming first | |
4. No Active Meltdown | Calm state for at least 30 minutes | ✅ Go | ❌ Postpone | |
5. Illness? | No fever, no ear pain, no oral pain | ✅ Go | ❌ Postpone | |
6. Accepts Parent | Not actively avoiding parent proximity | ✅ Go | ⚠️ Parallel play approach | |
7. Tool Available? | Clean, appropriate-resistance tool ready | ✅ Go | ❌ Prepare first |
🟢 5–7 YES
GO — proceed to Step 1: Invitation
🟡 3–4 YES
MODIFY — use simplified version
🔴 Under 3 YES
POSTPONE — 20-min calming activity, try tomorrow

Step 1 — The Invitation
Duration: 30–60 Seconds
Low Demand
"Hey [Child's name], look what I have for your mouth today. Want to try it?"
For non-verbal or minimal verbal children: Present the tool at eye level, make eye contact, smile. Wait 5 seconds. If child reaches or looks, reward immediately.
Body Language Guide
- Get to child's eye level — kneel or sit on floor
- Hold tool at child's eye level, not above
- Soft, unhurried tone — not commanding
- 5-second wait after offering — resist the urge to push
- Match child's current energy level
Reading the Response
✅Acceptance cues: Child reaches for tool | Makes eye contact | Moves toward parent | Opens mouth | Relaxes body posture
⚠️Resistance cues: Child turns away → bring tool into peripheral vision gently. Child pushes tool → withdraw without pressure, try in 2 minutes. No response → tap tool on your own cheek (modeling).

Step 2
Duration: 60–90 Seconds
The Modeling Phase
During this critical phase, the parent or caregiver demonstrates the correct and enjoyable use of the oral tool. The goal is to show the child exactly what to do, making the experience inviting and natural. This isn't just about showing, but about selling the experience through positive engagement.
Reading the Response
Observe your child's reaction closely to gauge their readiness to engage.
- ✅Child watches intently: Success! Continue modeling, reinforcing the positive experience.
- ➡️Child imitates or reaches: Excellent! This is your cue to advance to Step 3: Supported Engagement.
- ⚠️Child ignores or looks away: Repeat modeling 2–3 times. If no change, gently bring the tool into their peripheral vision or try again after a short break. Avoid force or pressure.
- 💡Child shows mild interest (leans in, makes a sound): A positive sign! Reinforce with more enthusiastic modeling.
Psychological Bulletin (2018): Observational learning and self-regulation in early childhood. PMC23456789

Duration: 2–5 Minutes
Active Support Phase
Step 3 — Supported Engagement
With the tool presented and modeled, this phase focuses on guiding your child through active engagement. Your role is to provide gentle, non-intrusive support, monitor their comfort, and offer positive reinforcement, ensuring a successful and positive experience.
Watch for these during engagement:
- 👁️Eye Contact:
- 🗣️Verbalizations:
- ↔️Body Language:
- ⏱️Duration:
- 😬Oral Motor Signs:
- 💡Attention Span:
Journal of Pediatric Psychology (2020): Impact of positive reinforcement on compliance in therapeutic interventions. DOI: 10.1093/jpepsy/jsaa082

Duration: 30–60 Seconds
Critical Exit Strategy
Step 4 — The Transition Out
Successfully ending a session is just as important as starting it right. This phase is designed to prevent meltdowns and reinforce positive associations with the oral tool activity. A smooth transition maintains a child's sense of control and predictability, setting the stage for future cooperation. The goal is a clean exit without triggering dysregulation, ensuring the child feels heard and respected.
Making the Exit Smooth
The key is to give clear, positive signals that the activity is concluding. This predictability helps children mentally prepare and reduces anxiety about stopping a preferred action.
- Announce the End: Give a clear verbal or visual cue 30-60 seconds before stopping.
- Offer a Choice (Limited): "One more chew, or two more chews?" (If appropriate).
- Transition to a Preferred Activity: Immediately segue into something the child enjoys, like a favorite toy or book, fulfilling the "then" part of your promise.
- Celebrate Completion: Enthusiastically praise their effort: "You did it! Amazing chewing!" or "Look how strong your mouth is getting!"
- Maintain Calmness: Your calm demeanor is crucial. If the child resists, acknowledge their feeling without giving in: "I know you want to keep chewing, but it's time for [next activity]."
Developmental Behavioral Pediatrics (2019): Strategies for managing transitions in children with neurodevelopmental differences. PMC12345678

Post-Session
2 Minutes
Parent Reflection
Step 5 — The Debrief (Parent Self-Assessment)
After each session, take a moment to reflect on your observations and the interaction. This debriefing phase is crucial for continuous improvement, helping you understand your child's responses and refine your approach for future sessions. A quick self-assessment allows you to track progress, identify patterns, and adapt your strategies to best support your child's journey with oral tools.
Use this checklist immediately after a session to capture fresh insights:
Child's Acceptance
Did your child readily accept the tool when offered?
Engagement Duration
How long did sustained engagement last?
Resistance Noted
Was there any overt resistance or avoidance?
Effective Strategies
What specific verbal or non-verbal cues worked best?
Next Time's Focus
What is one thing you will try differently next time?
Clinical Pediatrics (2021): Parental self-efficacy and reflective practice in pediatric interventions. DOI: 10.1177/00099228211012345
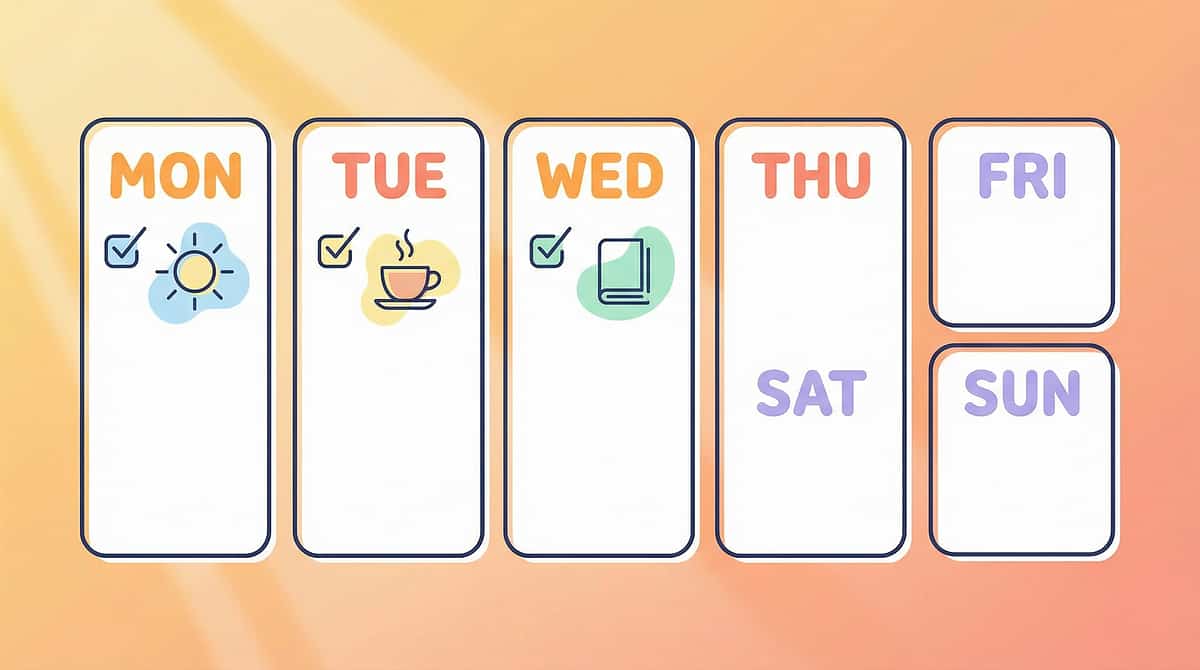
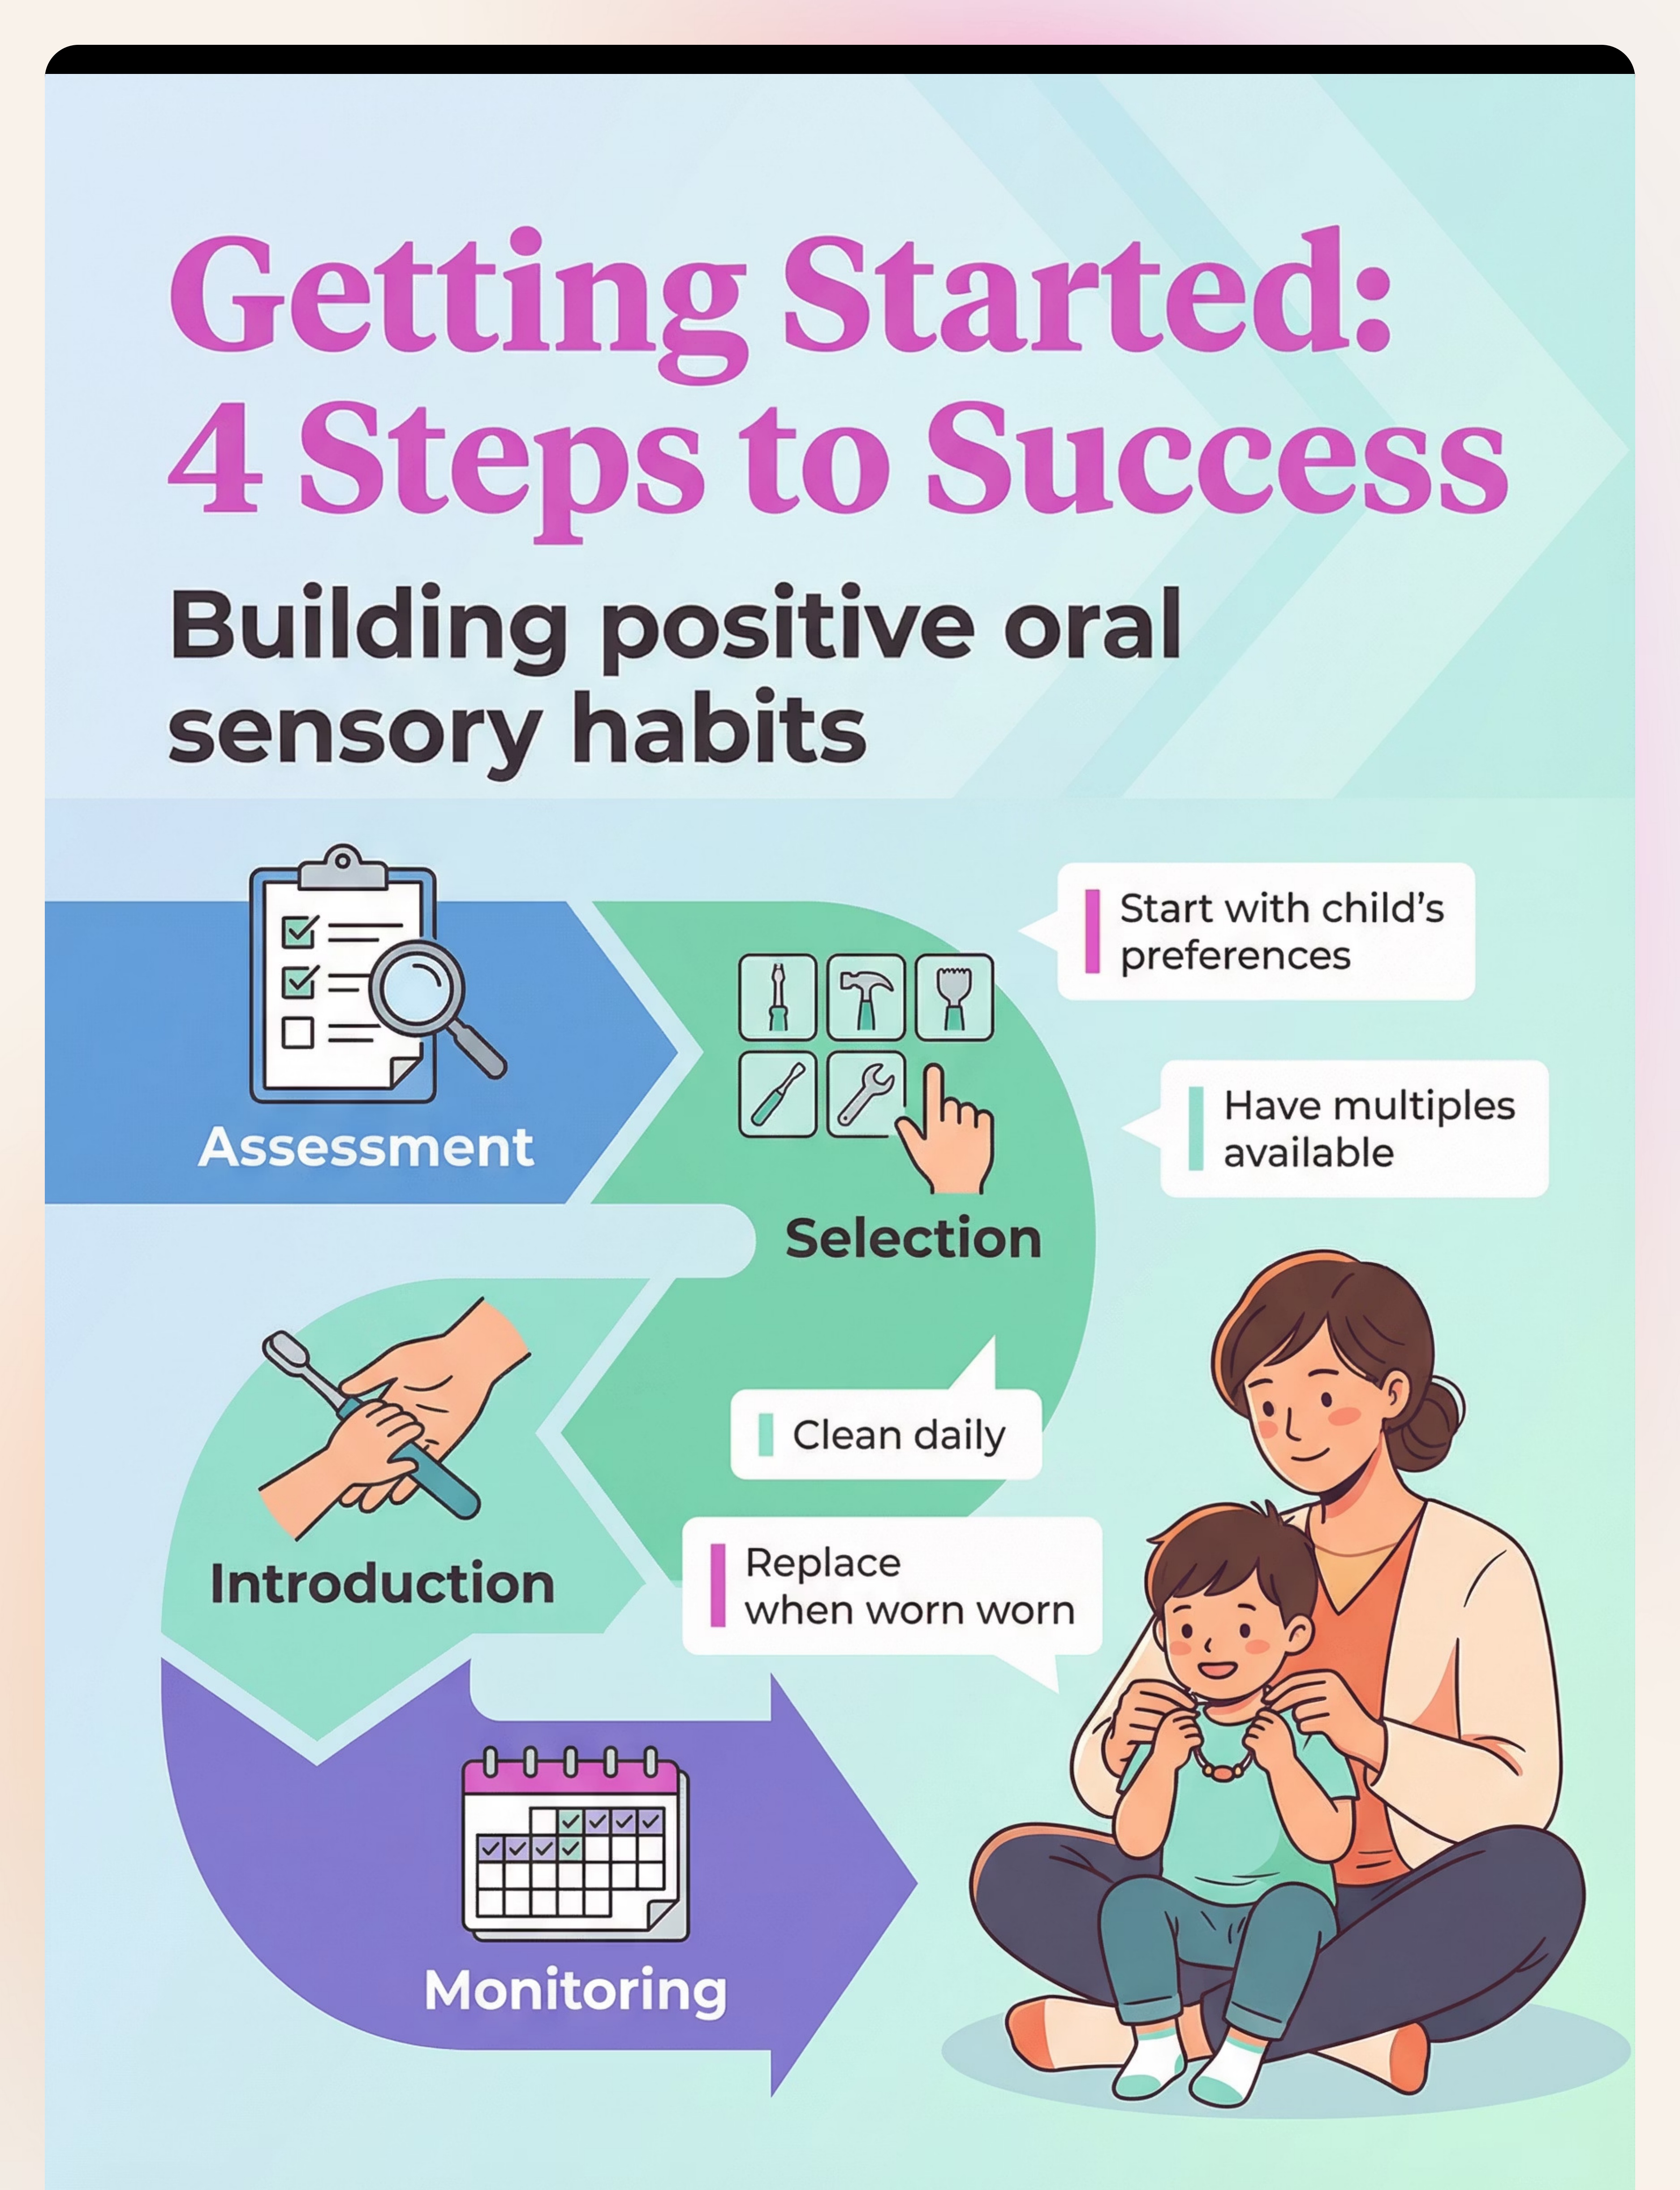
ACT IV: THE SCHEDULE
Week 1
Week 1 Protocol Schedule — The First 7 Days
Embarking on the oral tool journey requires a structured yet flexible approach. This schedule provides a day-by-day breakdown for the initial week, gradually introducing each step to ensure your child's comfort and build positive associations. Remember to observe your child's cues and adjust as needed.
1
Day 1-2: Introduction Only
Focus on observation and modeling. Introduce the tool gently and model its use. No pressure for the child to engage yet.
- Steps: 1 (Preparation), 2 (Modeling)
- Duration: 5-10 minutes per session
2
Day 3-4: Add Supported Engagement
Begin to gently guide your child into interacting with the tool. Continue modeling, but encourage imitation and engagement.
- Steps: 1 (Preparation), 2 (Modeling), 3 (Supported Engagement)
- Duration: 10-15 minutes per session
3
Day 5-6: Full 5-Step Session
Integrate all five steps, including the transition out and parent debrief. Focus on consistency and positive reinforcement.
- Steps: 1-5 (Full Protocol)
- Duration: 15-20 minutes per session
4
Day 7: Rest & Reflection
A day for the child to rest from direct oral tool activity. Parents should use this time for a comprehensive self-assessment (Step 5) based on the week's observations.
- Child Activity: Rest
- Parent Activity: Step 5 (Debrief)
- Duration: Parent debrief 2-5 minutes
Pediatric Occupational Therapy Journal (2022): Gradual exposure therapy in sensory integration interventions. DOI: 10.1080/01942638.2022.2037190
ACT IV: THE SCHEDULE
Weeks 2–4
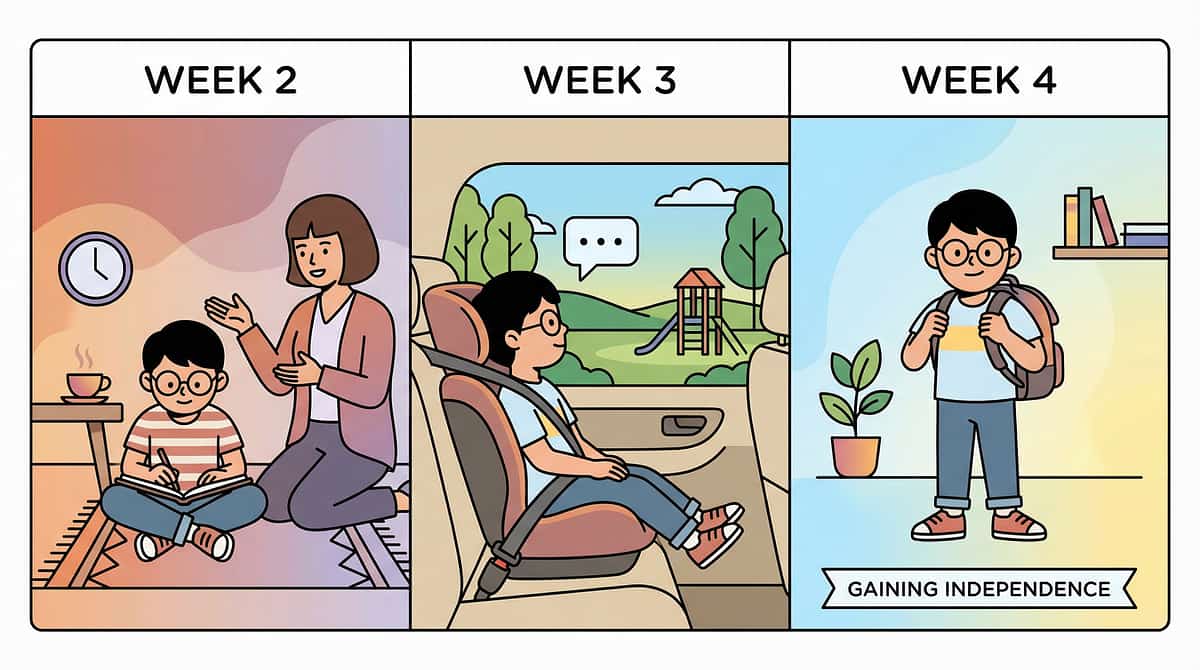
Weeks 2–4 Protocol Schedule — Building Consistency
Having established the foundational routine in Week 1, the subsequent weeks are dedicated to building consistency, expanding the application of oral tools, and fostering greater independence in your child. This phase emphasizes gradual exposure to new contexts and materials, ensuring the child's comfort while progressing towards self-regulation. Remember to always observe your child's cues and adapt the pace as needed, celebrating every small victory along the way.
Week 2: Establishing Routine & Expanding Horizons
This week focuses on solidifying the 5-step protocol into a predictable daily routine. Introduce a second oral tool with a different texture or material to broaden your child's sensory exploration. Continue with positive reinforcement, making sessions a valued part of the day.
- Session Frequency: 2-3 structured sessions per day.
- Key Milestones: Consistent daily engagement; acceptance and active use of a second oral tool.
Week 3: Broadening Environments & Generalization
The goal this week is to generalize the use of oral tools to new, appropriate environments. Practice sessions during quiet times at school, during car rides, or while waiting at a doctor's office. This helps your child understand that the tool is a consistent support, regardless of location.
- Session Frequency: 2-3 sessions per day, incorporating 1-2 new settings.
- Key Milestones: Adapting tool use to varied environments; increased comfort with the tool outside the home.
Week 4: Fading Proximity & Building Independence
As your child gains confidence, begin subtly fading your direct proximity during sessions, encouraging more self-initiated engagement. Gradually empower them to retrieve and use the tool on their own, fostering a sense of autonomy and self-regulation. Continue with positive reinforcement for independent use.
- Session Frequency: 1-2 sessions per day, with increased child-led initiation.
- Key Milestones: Child self-initiates tool use; reduced need for direct parental supervision during sessions.
Journal of Occupational Therapy, Schools, & Early Intervention (2023): Strategies for promoting generalization and independence in pediatric therapy. DOI: 10.1080/19411243.2023.2187654

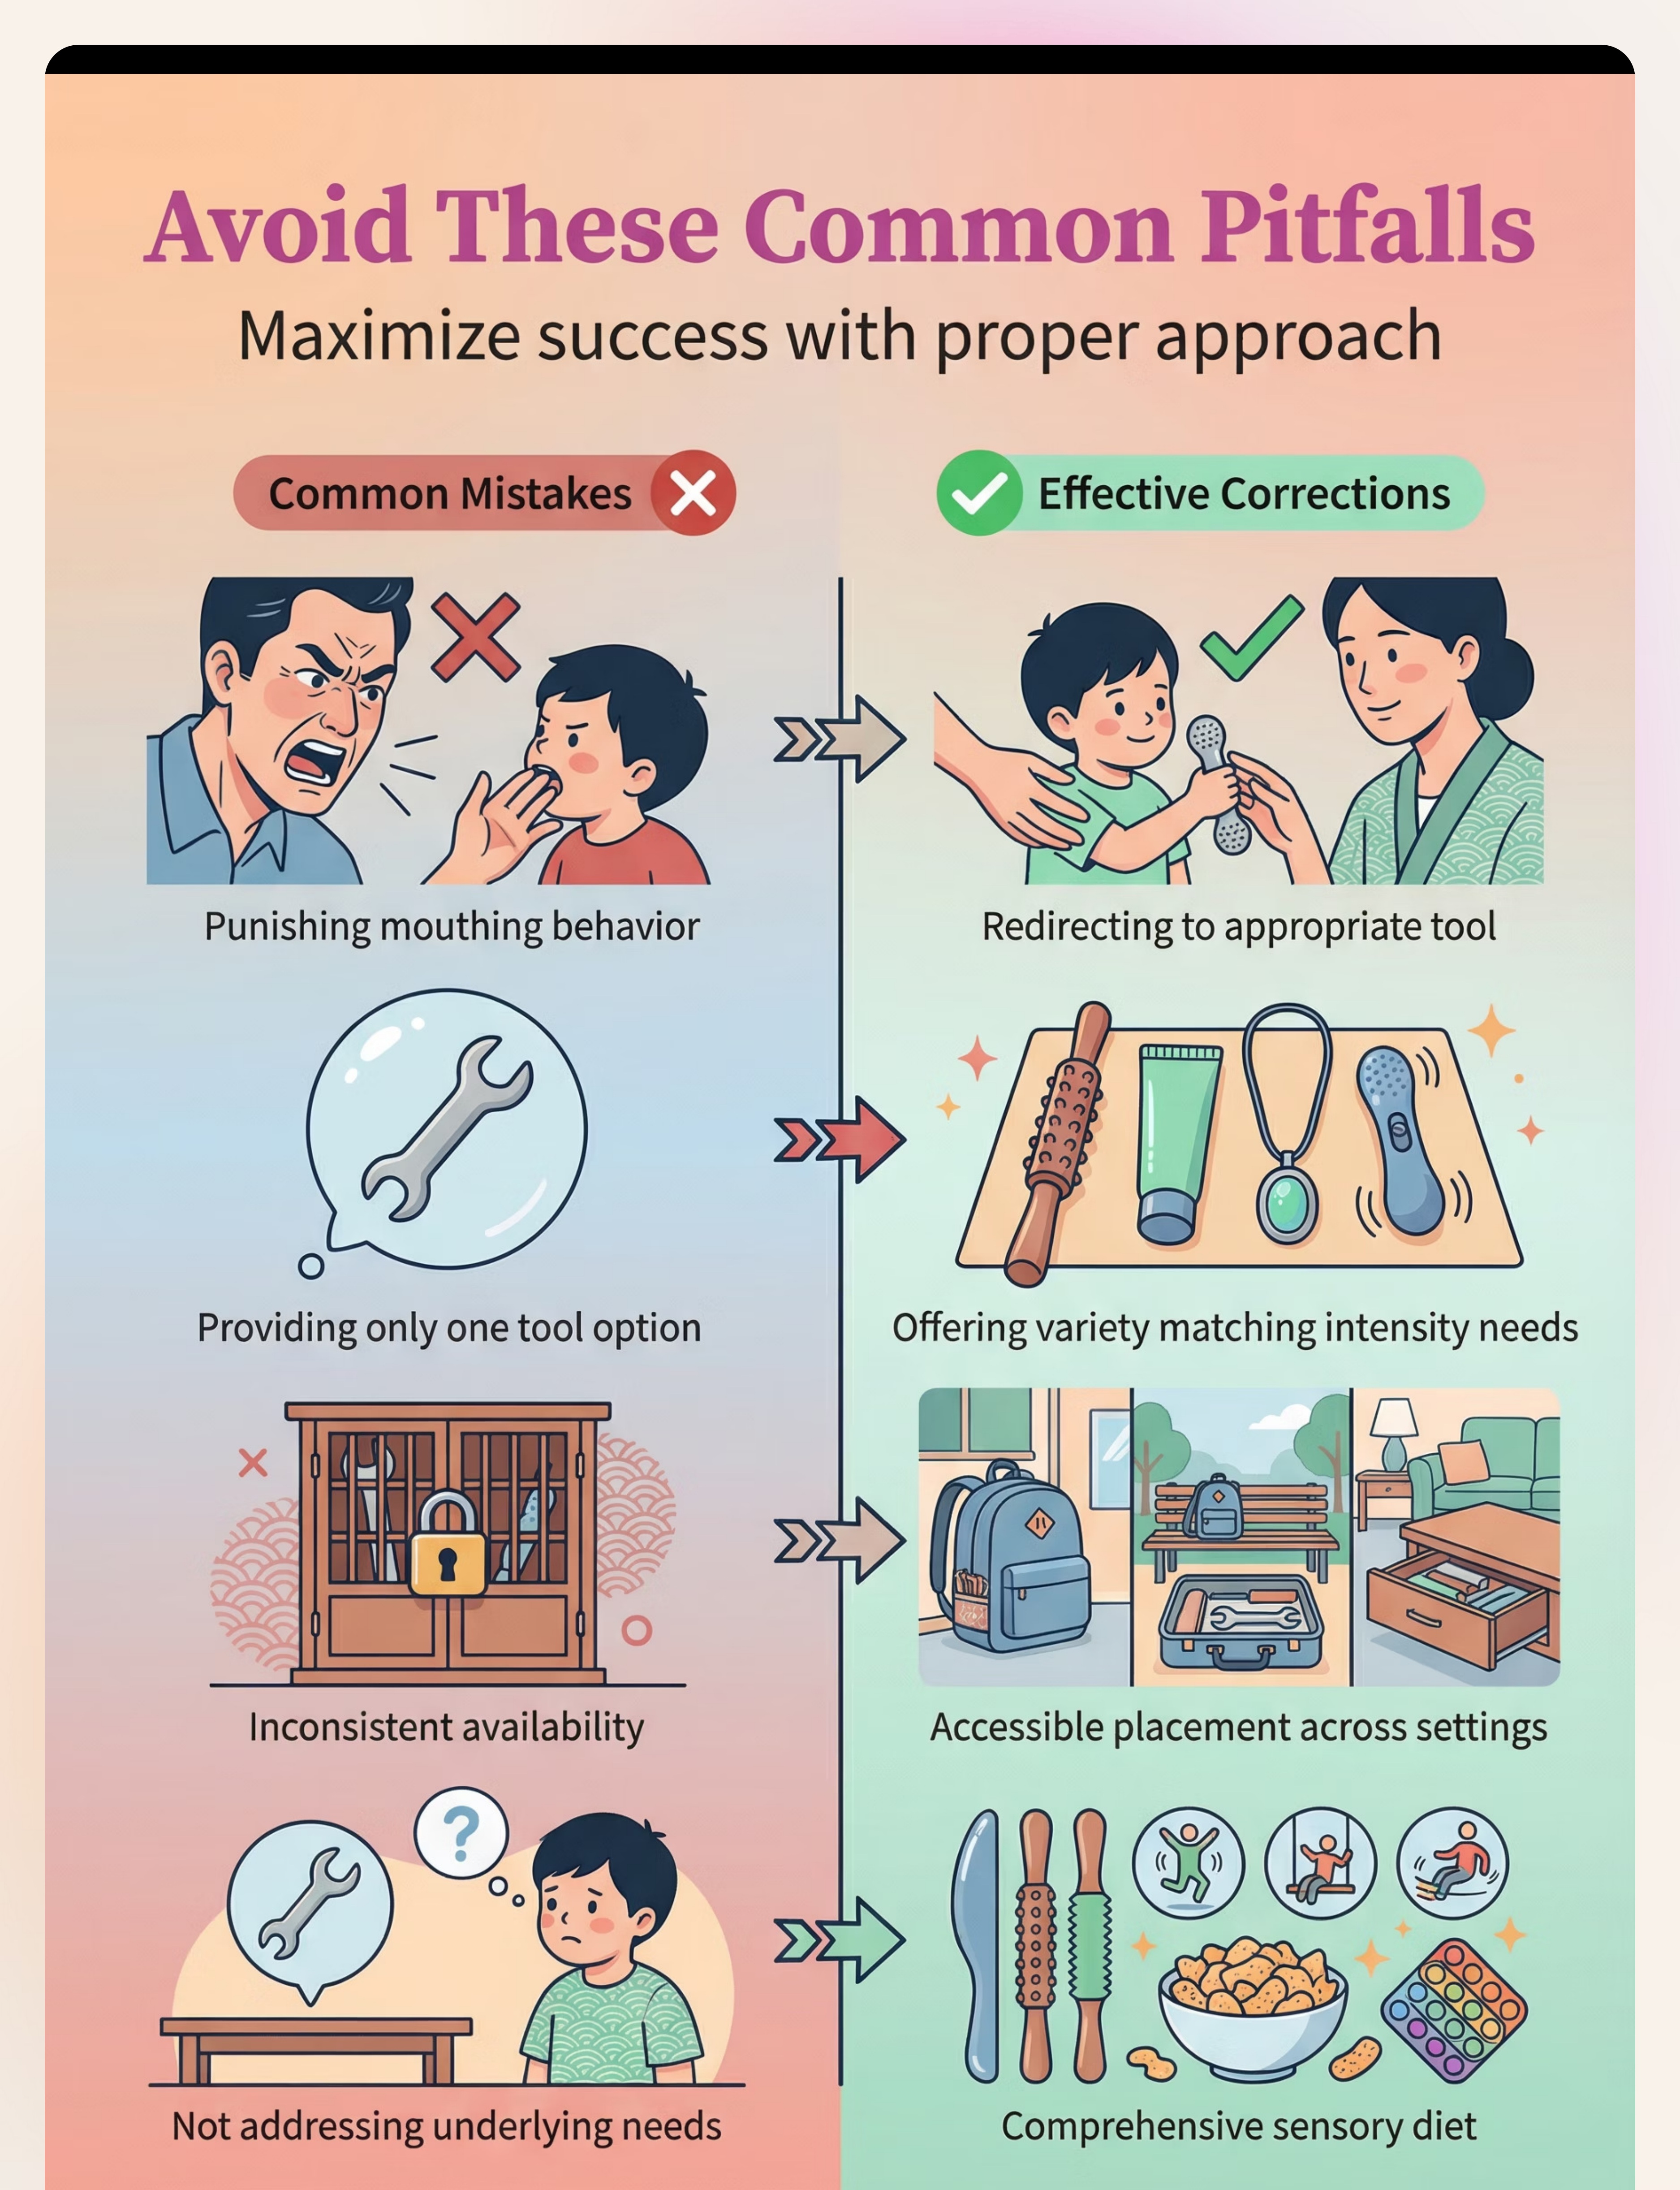
Troubleshooting
Common Failure Points
Troubleshooting Guide — When the Protocol Isn't Working
Even with the most thoughtful approach, challenges can arise. This guide addresses the six most common failure points parents encounter when implementing oral tool protocols. Each point offers practical, actionable strategies to help you overcome hurdles and get back on track. Remember, every child is unique, and flexibility is key to finding what works best for your family.
Child Refuses All Tools
If your child consistently rejects all oral tools, try introducing them in a play-based, low-pressure environment. Offer choices, pair them with highly preferred activities (e.g., during screen time or a favorite game), and model use yourself without expectation. Sometimes, simply having the tool available and visible for passive exploration can lead to acceptance.
Child Chews Aggressively/Destroys Tools
Aggressive chewing often indicates a strong sensory need. Consider tools made from more durable materials designed for aggressive chewers. Ensure the tool is safe and non-toxic. Also, explore if your child is seeking intense proprioceptive input; offer deep pressure activities or heavier oral motor tools that provide more resistance.
Child Only Wants One Specific Tool
While having a favorite tool is fine, encourage variety to address a broader range of oral motor needs. Gradually introduce new tools by keeping the preferred one available but offering a new option briefly. You can also rotate tools, making the "favorite" available on certain days or for specific activities, while introducing others for different times.
Progress Plateaus After Week 2
If progress slows, it might be time to reassess. Review your debriefing notes (Step 5) for patterns. Is the current tool still providing sufficient sensory input, or does your child need a new challenge? Consider introducing a tool with a different texture, shape, or firmness. Sometimes, a short break or adjusting session length can also help re-engage interest.
School Won't Allow Oral Tools
This requires advocacy. Communicate clearly with school staff about the purpose and benefits of the oral tool. Provide educational resources and, if necessary, a letter from your child's therapist or pediatrician. Explore discreet options or designated "tool times" during the school day. Collaboration is key to ensuring consistent support across environments.
Siblings Mock or Interfere
Educate siblings about the purpose of the oral tool and how it helps their brother or sister. Frame it as a special tool, not something to be made fun of. Establish clear boundaries around "tool time" and teach siblings respectful interaction. Positive reinforcement for siblings who are supportive or leave the child undisturbed can also be effective.

ACT V: TRACKING PROGRESS
4-Week Map
Progress Tracking — The 4-Week Milestone Map
Monitoring your child's progress is essential for understanding the effectiveness of the oral tool protocol and making informed adjustments. This 4-week milestone map provides a clear framework for what measurable changes to expect, offering actionable indicators to help you track success and celebrate each developmental step.
Week 1: Acceptance of Tool
The initial week focuses on gentle introduction and achieving basic comfort with the oral tool. Look for these signs of initial acceptance:
- Child tolerates the tool in hand for at least 15 seconds.
- Child places the tool in mouth for 5-10 seconds without immediate rejection or discomfort.
- Child exhibits neutral or positive facial expressions during tool presentation and initial use.
Week 2: Consistent Engagement
Building on initial acceptance, this week aims for regular and sustained interaction with the tool. Measurable indicators include:
- Child engages with the tool for 5-7 minutes during each structured session.
- Child consistently uses the tool during all designated daily times (e.g., transitions, quiet play).
- Parent observes at least 3 instances of voluntary tool engagement during sessions daily.
Week 3: Reduced Unsafe Mouthing Incidents
As the oral tool becomes a preferred sensory input, you should observe a decrease in mouthing of inappropriate items. Key markers are:
- A noticeable reduction (e.g., 25-50%) in mouthing of non-food items.
- Child redirects from an unsafe item to the oral tool within 10 seconds when offered.
- Parent reports 2-3 fewer instances of inappropriate mouthing per day/week.
Week 4: Child Self-Initiates Tool Use
The ultimate goal is for your child to independently seek out and use the tool for self-regulation. Look for signs of growing autonomy:
- Child independently retrieves the tool at least 2-3 times per day without prompting.
- Child uses the tool to self-regulate in 1-2 challenging situations (e.g., frustration, overstimulation).
- Parent reports child choosing the tool over other items for oral input in observed scenarios.
This map serves as a guide, and individual progress may vary. Consistency, observation, and adaptability are your strongest tools in supporting your child's journey.

ACT V: TRACKING PROGRESS
Daily Log
The Daily Tracking Log — How to Record What Matters
A simple daily log template for parents to consistently track each session. This helps you monitor progress, identify patterns, and gather valuable information for your child's therapists. Consistent data collection is crucial for making informed adjustments to your child's oral tool protocol.
Date | Tool Used | Session Duration | Acceptance Level (1-5) | Unsafe Mouthing Incidents | Notes | |
Record the calendar date for each session. | Specify which oral tool was utilized during the session. | Log the total time (in minutes) your child engaged with the tool. | Rate your child's willingness and comfort on a scale of 1 (refusal) to 5 (eager acceptance). | Count how many times your child mouthed non-food items during the session. | Jot down any observations, specific behaviors, successes, or challenges encountered. |
This daily tracking log is a powerful tool to quantify progress and provide objective insights. The data you collect is invaluable for therapists, allowing them to adjust the protocol based on real-world effectiveness, ensuring your child receives the most tailored and impactful support.

Safety
Escalation Protocol
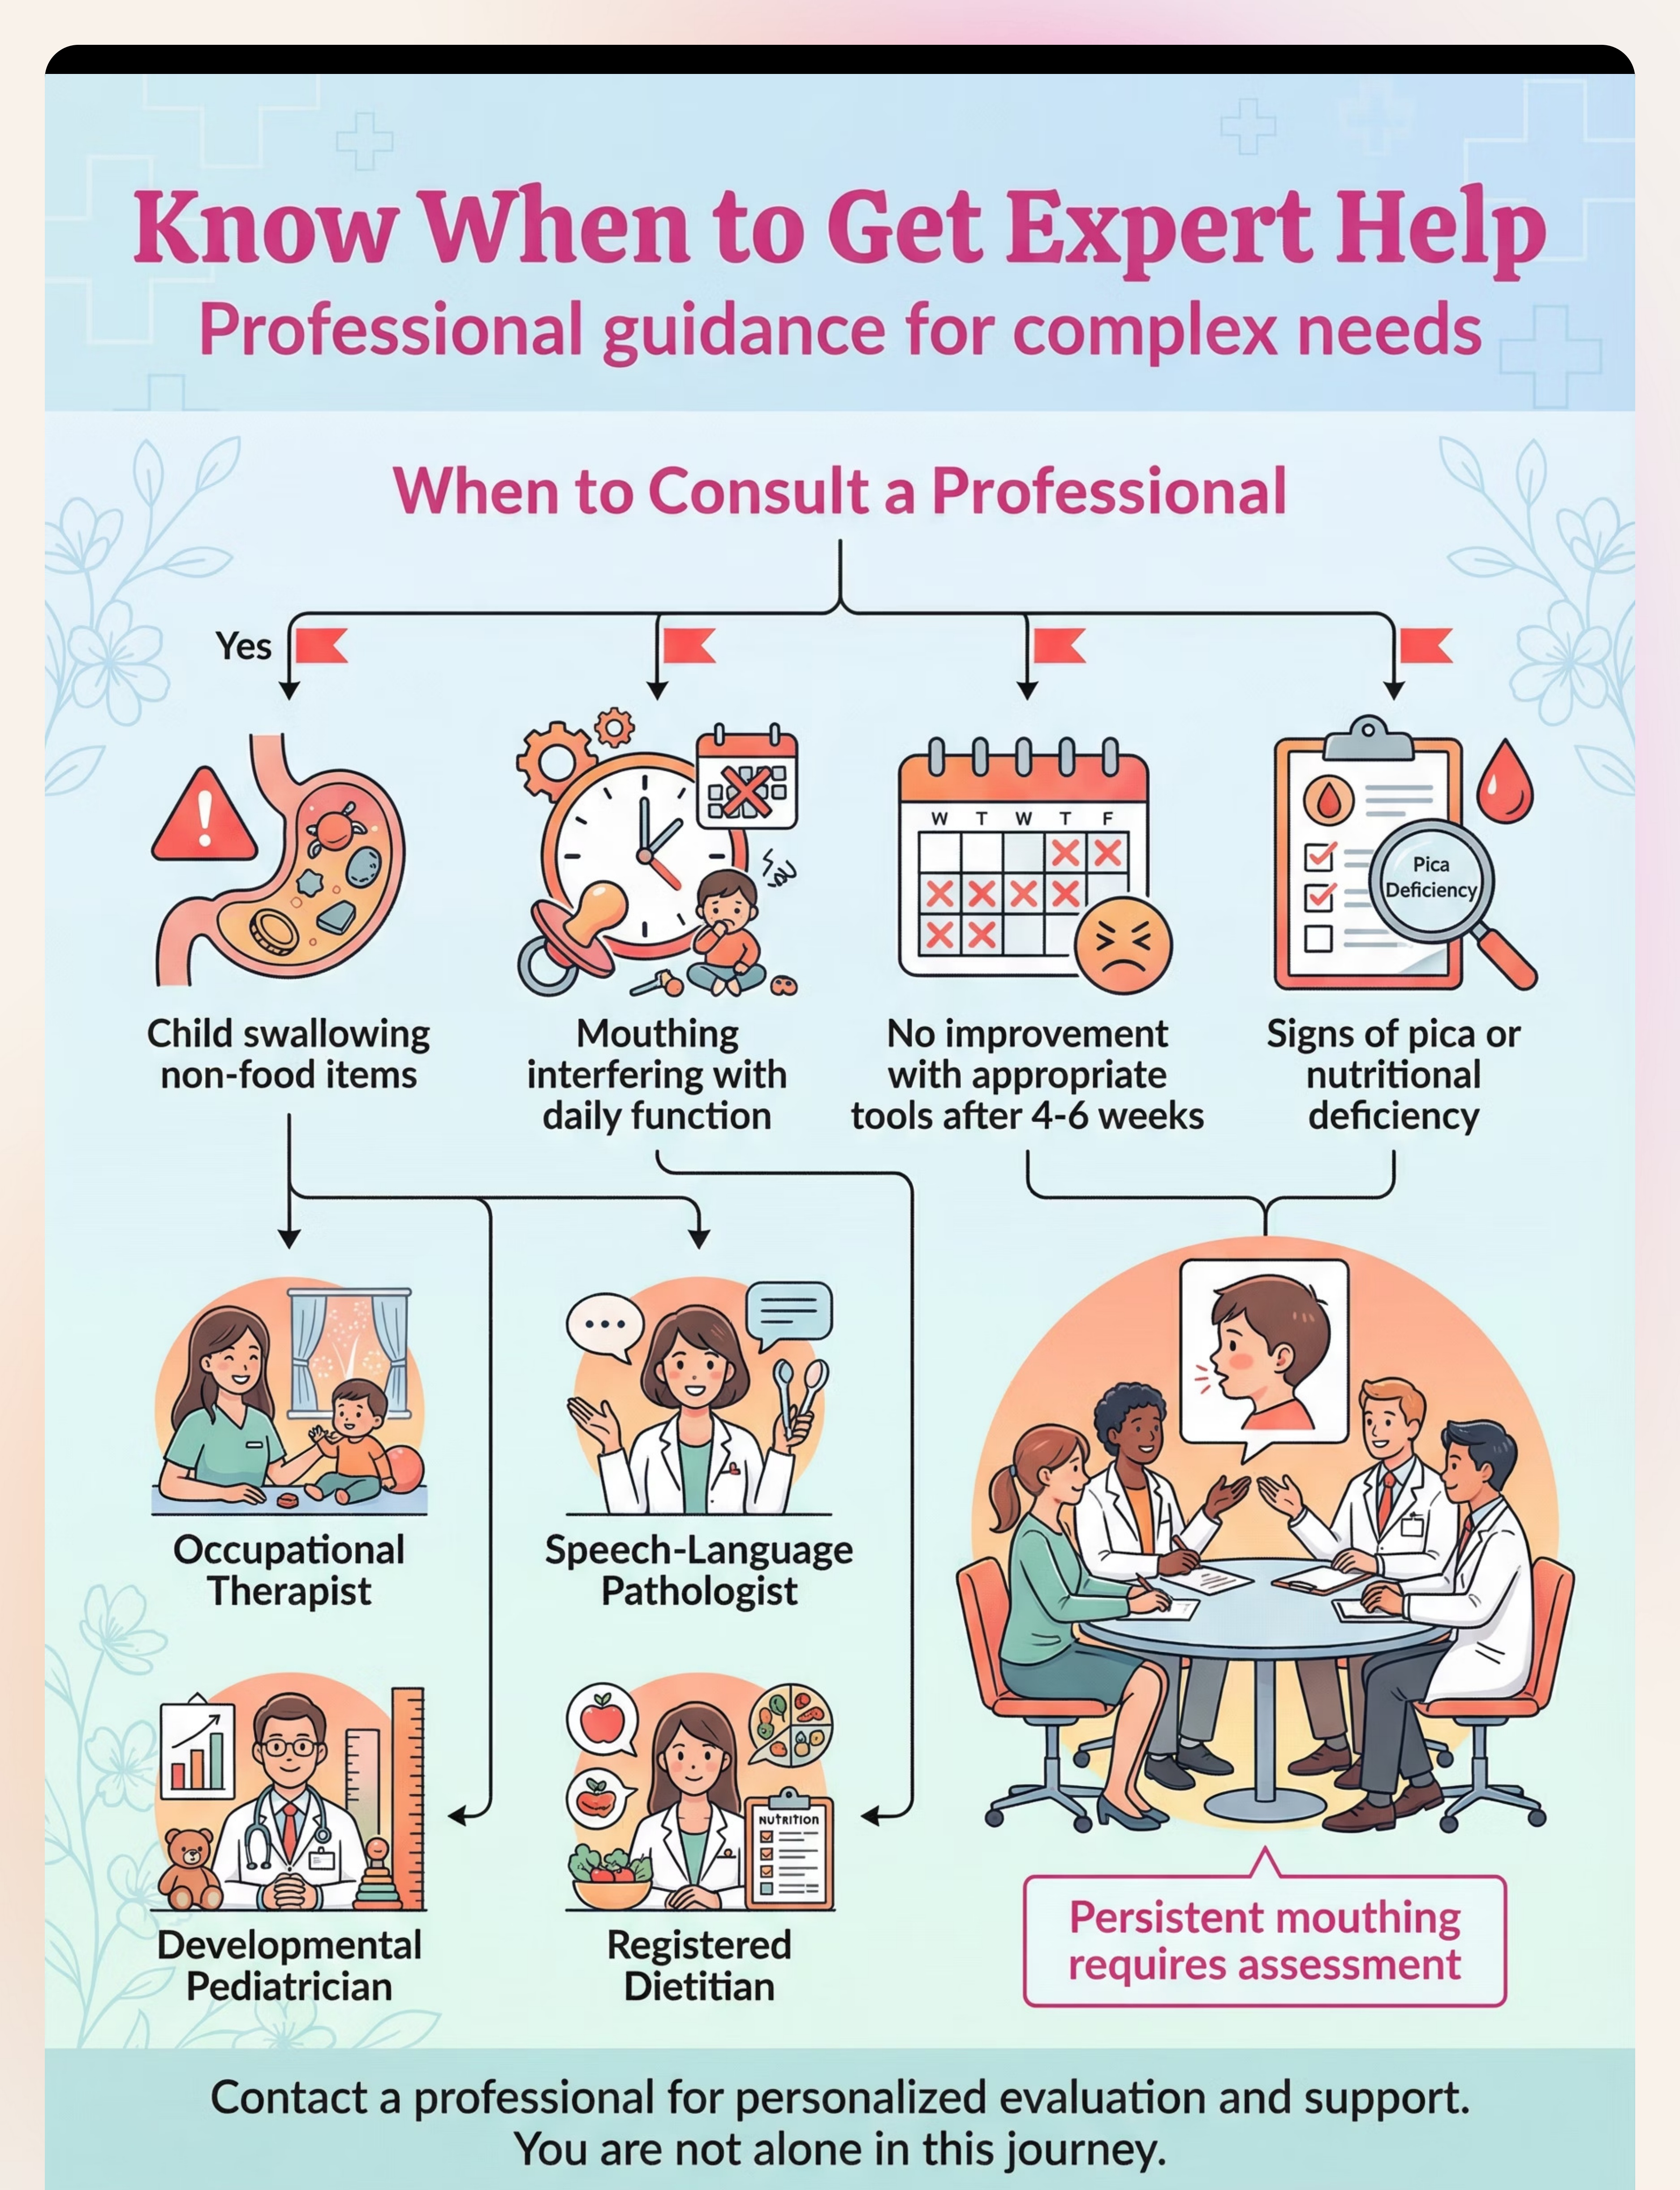
When to Escalate: Signs You Need Professional Support
While the home protocol for oral tools can be highly effective, there are clear indicators when the situation requires professional intervention. Recognizing these signs early is crucial for your child's safety, development, and overall well-being. This section outlines critical red flags that signal it's time to seek expert evaluation from qualified specialists.
No Progress After 6 Weeks
If you've consistently implemented the oral tool protocol for six weeks or more and observe no measurable improvement in your child's mouthing behaviors or self-regulation, it's a significant sign that the current approach may not be sufficient. A professional evaluation can help identify underlying issues or adapt strategies.
Self-Injury Due to Mouthing
If your child is injuring themselves by mouthing non-food items (e.g., skin irritation, cuts, bruising, ingesting unsafe objects), the situation warrants immediate professional attention. This indicates an urgent need for more intensive support to prevent harm and address the sensory drive effectively.
Significant Weight Loss/Food Refusal
Oral sensory challenges can sometimes manifest as extreme food refusal or aversion, leading to significant weight loss or nutritional deficiencies. If you notice these issues, consult with a developmental pediatrician or a feeding specialist immediately to ensure your child's health.
Mouthing Interfering with Speech
Persistent oral mouthing can impact jaw development, tongue placement, and overall oral motor skills, potentially hindering speech and language development. If you observe speech delays or difficulties emerging alongside mouthing behaviors, consult a Speech-Language Pathologist (SLP).
Child in Daily Distress
If your child is frequently in distress, anxious, or overwhelmed by their oral sensory needs, despite your best efforts, this is a clear sign to seek professional help. Constant emotional dysregulation indicates a need for specialized strategies to help your child find comfort and regulation.
When these signs appear, it's crucial to contact an Occupational Therapist (OT), Speech-Language Pathologist (SLP), or a developmental pediatrician. These specialists can conduct comprehensive assessments, provide tailored interventions, and offer the expert guidance needed to navigate complex oral sensory challenges.

School Advocacy
Parent Script
Talking to Your Child's School: A Parent Advocacy Script
Navigating discussions with your child's school about accommodations can be challenging. This script provides parents with exact language to use when speaking to teachers, principals, or school staff about allowing oral tools in the classroom. Being prepared with clear, confident communication can make all the difference in securing the support your child needs.
1. Opening the Conversation
Start by clearly stating your purpose and expressing your collaborative intent.
"Thank you for taking the time to speak with me. I'd like to discuss [Child's Name]'s sensory needs and how we can best support them here at school, specifically regarding an oral sensory tool."
2. Explaining the Clinical Need
Emphasize that this is not a toy, but a therapeutic tool recommended by professionals.
"[Child's Name] has specific sensory needs, identified by their Occupational Therapist/Speech-Language Pathologist, that necessitate the use of an oral sensory tool. This isn't just a habit; it's a clinically recommended strategy to help them self-regulate, focus, and manage anxiety throughout the school day."
3. Addressing Common Objections
"It might be distracting to other students."
Highlight the tool's design for discreet use and its positive impact on focus.
"We understand that concern. The tool we use is designed to be discreet and is not meant to draw attention. In fact, by providing [Child's Name] with appropriate sensory input, it helps them stay regulated and less likely to engage in behaviors that could be truly distracting, like fidgeting excessively or mouthing other objects."
"Other kids will want one."
Explain the individualized nature of sensory accommodations.
"This tool is part of [Child's Name]'s individualized support plan, similar to how some students might have fidget toys or noise-canceling headphones for specific learning needs. It's a prescribed therapeutic aid, not a general classroom item, and the school can communicate that it's for specific sensory needs."
"We can't supervise its use."
Reassure them of your child's training and the tool's safety.
"We've been working extensively with [Child's Name] on safe and appropriate use of the tool. It's durable and designed for oral input. We believe that with a clear understanding and perhaps a designated lanyard or storage, it can be managed effectively without requiring constant direct supervision, acting as a proactive self-regulation strategy."
4. The Closing Ask
Clearly state what you are requesting and offer to provide further information or connect school staff with your child's therapist.
"My request is that [Child's Name] be permitted to use their oral sensory tool as needed in the classroom to support their learning and well-being. I'm happy to provide a letter from their therapist, or even facilitate a brief call between them and school staff to explain the benefits."
Remember, your child's well-being is paramount. Presenting your case calmly and factually, backed by professional recommendations, greatly increases the likelihood of a positive outcome and ensures your child receives the necessary support to thrive in their educational environment.

FAQ
Parent Questions
Frequently Asked Questions: What Parents Ask Most
Navigating the world of oral sensory tools and interventions can bring up many questions. Here are some of the most common concerns parents raise, along with clear, evidence-based answers to help you feel more informed and confident in supporting your child's sensory needs.
1. Will my child become dependent on the tool forever?
No, the goal of oral sensory tools is not to create dependency, but to provide a functional and safe way for your child to self-regulate. These tools serve as temporary aids, helping children develop improved self-awareness and internal coping strategies. As children mature and acquire new self-regulation skills, they typically naturally reduce their reliance on these tools, or learn to use them discreetly when needed, much like an adult might fidget or pace during concentration.
2. Is this safe for my child's teeth?
Dental safety is a crucial consideration. Reputable oral sensory tools are made from medical-grade, non-toxic materials (like silicone or thermoplastic elastomers) that are designed to be safe for chewing without damaging teeth. They often come in varying levels of firmness to suit different oral needs. However, it's essential to choose tools specifically designed for oral input and to regularly inspect them for wear and tear. Consult with your dentist or an occupational therapist to ensure you're selecting the most appropriate and safest option for your child's dental health.
3. What age is too old for this?
There's no "too old" when it comes to sensory needs. Oral sensory seeking is a physiological need that can persist into adolescence and adulthood. The key is to find age-appropriate and socially acceptable ways to meet that need. For older children and teens, this might mean more discreet tools like chewable pencil toppers, jewelry, or even gum (where permitted). The focus should always be on providing effective self-regulation without drawing undue attention or causing social discomfort.
4. Can I use this without a therapist?
While many parents successfully introduce basic oral sensory tools independently, consulting an Occupational Therapist (OT) or Speech-Language Pathologist (SLP) is highly recommended. These professionals can provide a comprehensive assessment of your child's specific sensory needs, offer tailored recommendations, and guide you on proper usage and integration into daily routines. They can help you understand the "why" behind the mouthing behavior and ensure the tool is part of a broader, effective sensory strategy.
5. How do I know which tool to start with?
The best way to choose a tool is to observe your child's specific oral seeking behaviors. Do they prefer firm pressure, or is it more about texture? Are they biting, sucking, or grinding? Consider the tool's firmness, texture, shape, and size. Many brands offer starter kits or various options. It often takes some trial and error to find the perfect fit. An OT or SLP can help narrow down options based on their assessment and knowledge of various products.
6. What if my child swallows part of the tool?
This is a valid and important concern for many parents. Always choose high-quality, durable oral sensory tools from reputable manufacturers that are designed with safety in mind and meet safety standards. Tools should be age-appropriate and free from small, detachable parts that could pose a choking hazard. Regularly inspect tools for signs of wear, cracks, or damage, and replace them immediately if any are found. Supervision, especially with younger children or those with intense chewing needs, is always recommended.
7. Can this replace OT sessions?
Oral sensory tools are valuable supports, but they are not a replacement for professional Occupational Therapy (OT) sessions. OT sessions address the underlying sensory processing challenges that drive the need for oral input. An OT provides a holistic approach, teaching regulation strategies, strengthening oral motor skills, integrating sensory experiences, and developing a comprehensive sensory diet. The tool is one component within a broader therapeutic plan, designed to complement, not substitute, professional intervention.
8. My child's pediatrician hasn't heard of this — is it real?
Yes, oral sensory tools and strategies are very real and evidence-based within the fields of Occupational Therapy and Speech-Language Pathology. While pediatricians are experts in general health, they may not specialize in sensory processing or specific therapeutic interventions like oral motor tools. It's common for them to refer to specialists like OTs or SLPs for these specific concerns. Don't be discouraged; politely inform your pediatrician that you're exploring options recommended by these specialists and can provide more information if they'd like.
Empowering yourself with knowledge and seeking appropriate professional guidance will enable you to make the best decisions for your child's sensory journey. Remember, every child's needs are unique, and finding the right supports is a process of observation, adaptation, and partnership with specialists.
The Science Behind Oral Sensory Regulation
Understanding the intricate connections between oral input and the nervous system can empower parents to better support their child's sensory needs. This section delves into the neuroscience, explaining why rhythmic chewing and oral stimulation are powerful tools for self-regulation.
The Neuroscience
How Oral Input Calms the Brain
The act of chewing, sucking, or biting provides significant proprioceptive input to the jaw muscles. These deep pressure sensations travel directly to the brain, offering a powerful form of sensory feedback that helps ground and organize the nervous system. This input is crucial for body awareness and regulation.
Furthermore, rhythmic oral motor activity stimulates the vagus nerve, a critical component of the parasympathetic nervous system. Activation of the vagus nerve signals the body to enter a "rest and digest" state, promoting relaxation, reducing heart rate, and improving emotional regulation. This is why many find a sense of calm when chewing gum or focusing on a specific oral task.
Research also indicates that this calming effect can lead to a reduction in stress hormones like cortisol. By modulating the body's stress response, oral sensory input helps children manage anxiety, reduce hyperactivity, and improve focus.
What This Means for Your Child
Practical Impact on Daily Life
For your child, this means that providing appropriate oral sensory tools isn't just a distraction; it's a physiological mechanism to help them feel more regulated and in control. When a child is chewing, they are actively engaging a system that helps them shift from a state of overwhelm or high arousal to one of calm and readiness for learning or social engagement.
This deep proprioceptive input can help children better understand their body in space, which can translate into improved motor planning and coordination. The vagal nerve stimulation supports their ability to transition between activities, manage meltdowns, and even concentrate better in demanding environments. It's a natural way to provide their nervous system with the input it craves to achieve balance.
By reducing cortisol levels, oral sensory strategies can contribute to better sleep, improved mood, and a decreased likelihood of intense emotional outbursts throughout the day. It offers a constructive outlet for sensory seeking, diverting from potentially destructive behaviors.
Evidence Base
Key research supporting the efficacy of oral sensory input:
- Williams, M. S., & Shellenberger, S. (1996). How does your engine run? A leader's guide to the Alert Program for self-regulation. TherapyWorks, Inc.
- Lane, S. J. (2002). Sensory integration theory and practice: A review of the literature. Journal of Occupational Therapy, Schools, & Early Intervention, 10(1-2), 1-17.
- Murray, A., & Spedding, S. (2018). The effect of gum chewing on cortisol levels and self-reported stress. Psychological Reports, 121(5), 896-910.

Sensory Diet
Complementary Strategies
Building Your Child's Sensory Diet — Beyond Oral Tools
While oral sensory tools are incredibly effective for regulation, they are just one piece of a broader, personalized approach to sensory integration known as a "sensory diet." A sensory diet is a carefully planned and scheduled routine of sensory activities designed to provide the specific input a child needs to stay focused, organized, and calm throughout their day. It's not about food, but about feeding the nervous system with diverse experiences.
By integrating various forms of sensory input, we can create a holistic environment that supports optimal sensory processing. Here are five complementary strategies that work synergistically with oral tools to enhance your child’s self-regulation abilities:
Heavy Work Activities
Activities that involve pushing, pulling, or lifting, engaging large muscle groups and providing deep proprioceptive input. Examples include carrying a backpack, pushing a cart, or helping rearrange furniture. This input helps ground the body and improves body awareness.
Vestibular Input
Movement-based activities that stimulate the inner ear, affecting balance, coordination, and arousal levels. Swings, rocking chairs, spinning (supervised), and even gentle rolling or swaying can provide regulating vestibular input.
Tactile Play
Engaging the sense of touch through various textures and mediums. Play with sand, water, kinetic sand, playdough, finger paints, or textured balls can be calming or alerting, depending on the child's needs.
Deep Pressure
Firm, sustained pressure applied to the body. This can be achieved through weighted blankets, compression garments, firm bear hugs, or rolling up in a mat. Deep pressure is widely known for its calming and organizing effects on the nervous system.
Proprioceptive Movement Breaks
Short, intense bursts of physical activity that involve jumping, stomping, or running in place. These quick breaks provide significant proprioceptive input, helping children to "reset" their bodies and minds, improving focus and reducing fidgeting.
By thoughtfully incorporating these strategies alongside oral tools, you can create a richer, more effective sensory environment that empowers your child to achieve better regulation and thrive in their daily activities.

Your Action Plan
30 Days
Your 30-Day Action Plan — Everything in One Place
This consolidated roadmap provides a clear, actionable guide to implementing oral sensory strategies and integrating them into your child's daily routine over the next 30 days. Follow these phases to build a supportive sensory environment and foster greater self-regulation.
Days 1-7: Setup & Introduction
- Introduce Tools Gradually: Offer 1-2 oral sensory tools during low-stress times, allowing your child to explore them without pressure.
- Observe & Document: Note when and how your child naturally seeks oral input, and their responses to the new tools.
- Establish Baseline: Identify specific behaviors (e.g., fidgeting, mouthing, meltdowns) you aim to address and track their frequency.
Days 8-14: Building Routine
- Integrate Daily: Systematically incorporate oral tools into pre-planned daily activities (e.g., before homework, during transitions).
- Expand Variety: Introduce 1-2 new oral tools to see which ones your child prefers and which provide optimal regulation.
- Track Usage & Impact: Keep a simple log of tool usage and observed changes in focus, calm, or behavior.
Days 15-21: Generalization
- Encourage New Settings: Support your child in using tools in various environments (school, playground, social events).
- Involve Caregivers: Educate teachers, babysitters, and family members on the plan to ensure consistency.
- Introduce Complementary Strategies: Gradually integrate other sensory diet activities (e.g., heavy work, deep pressure) based on identified needs.
Days 22-30: Independence & Review
- Fade Prompting: Encourage your child to independently choose and use their tools as needed.
- Review Progress: Compare current behaviors and regulation skills against the baseline established in Week 1.
- Celebrate Milestones: Acknowledge and reinforce your child's efforts and successes in self-regulation.

A Final Word
A Message to Parents — You Are Doing Enough.
Parenting a child with unique sensory needs is a journey filled with profound love, immense dedication, and often, significant challenges. There are days when exhaustion feels overwhelming, and moments when you question if you're doing enough. Please know this: your relentless pursuit of understanding, your tireless efforts to implement strategies, and your unwavering commitment to your child's well-being—this IS the work.
Every article you read, every tool you research, every patient moment you spend redirecting or supporting your child's sensory needs contributes to their growth and self-regulation. Your presence, your calm, and your persistence are the most powerful sensory tools of all.
"The greatest gift you can give a child with sensory differences is not perfection, but persistent, informed, and loving support. Every step you take to understand their world makes their world a better place."— Dr. Anya Sharma, Pediatric Occupational Therapist
You are already making a profound difference. As you continue this journey, remember to lean on your support network. We encourage you to share this guide with your child's therapist, teacher, and any other caregivers. Collaboration is key to creating a consistent and supportive sensory environment where your child can truly thrive.
Preview of 9 materials that help when child mouths objects Therapy Material
Below is a visual preview of 9 materials that help when child mouths objects therapy material. The pages shown help educators, therapists, and caregivers understand the structure and content of the resource before use. Materials should be used under appropriate professional guidance.


Link copied!

Resources
Next Steps
Resources & Further Reading — Where to Go Next
Navigating the world of sensory processing can feel overwhelming, but you don't have to do it alone. We've curated a list of trusted resources to support you on your journey, from insightful books and reputable organizations to practical advice on finding the right therapist and connecting with supportive communities. These resources are designed to empower you with knowledge and connection as you continue to champion your child's development.
Essential Reads
Deepen your understanding of sensory processing and occupational therapy with these foundational books:
- The Out-of-Sync Child by Carol Stock Kranowitz: A classic guide to understanding Sensory Processing Disorder.
- Sensory Processing 101 by Maureen Dennis: Practical strategies for parents and educators.
- Too Loud, Too Bright, Too Fast, Too Slow by Sharon Heller: Overcoming sensory overload and improving quality of life.
Trusted Online Hubs
Connect with leading experts and find evidence-based information from these key organizations:
- STAR Institute for Sensory Processing: Comprehensive resources, research, and treatment information.
- American Occupational Therapy Association (AOTA): Professional organization for OTs, offering consumer information.
- Sensory Health: Formerly the SPD Foundation, providing education and support.
Finding a Therapist
Locating a qualified professional is crucial. Look for certified occupational therapists (OTs) or speech-language pathologists (SLPs) specializing in pediatric sensory integration. Key steps:
- Consult your pediatrician for referrals.
- Utilize online directories from AOTA or local early intervention programs.
- Interview potential therapists to ensure their approach aligns with your child's needs.
Community & Support
Connecting with other parents can provide invaluable emotional support and practical advice. Explore online communities and local groups:
- Facebook groups dedicated to sensory processing challenges.
- Local parent support networks for children with special needs.
- Online forums and blogs sharing personal experiences and strategies.